


The Display List section allows users to view all files uploaded to a record. It includes:
The Display List section allows users to view all files uploaded to a record. It includes:
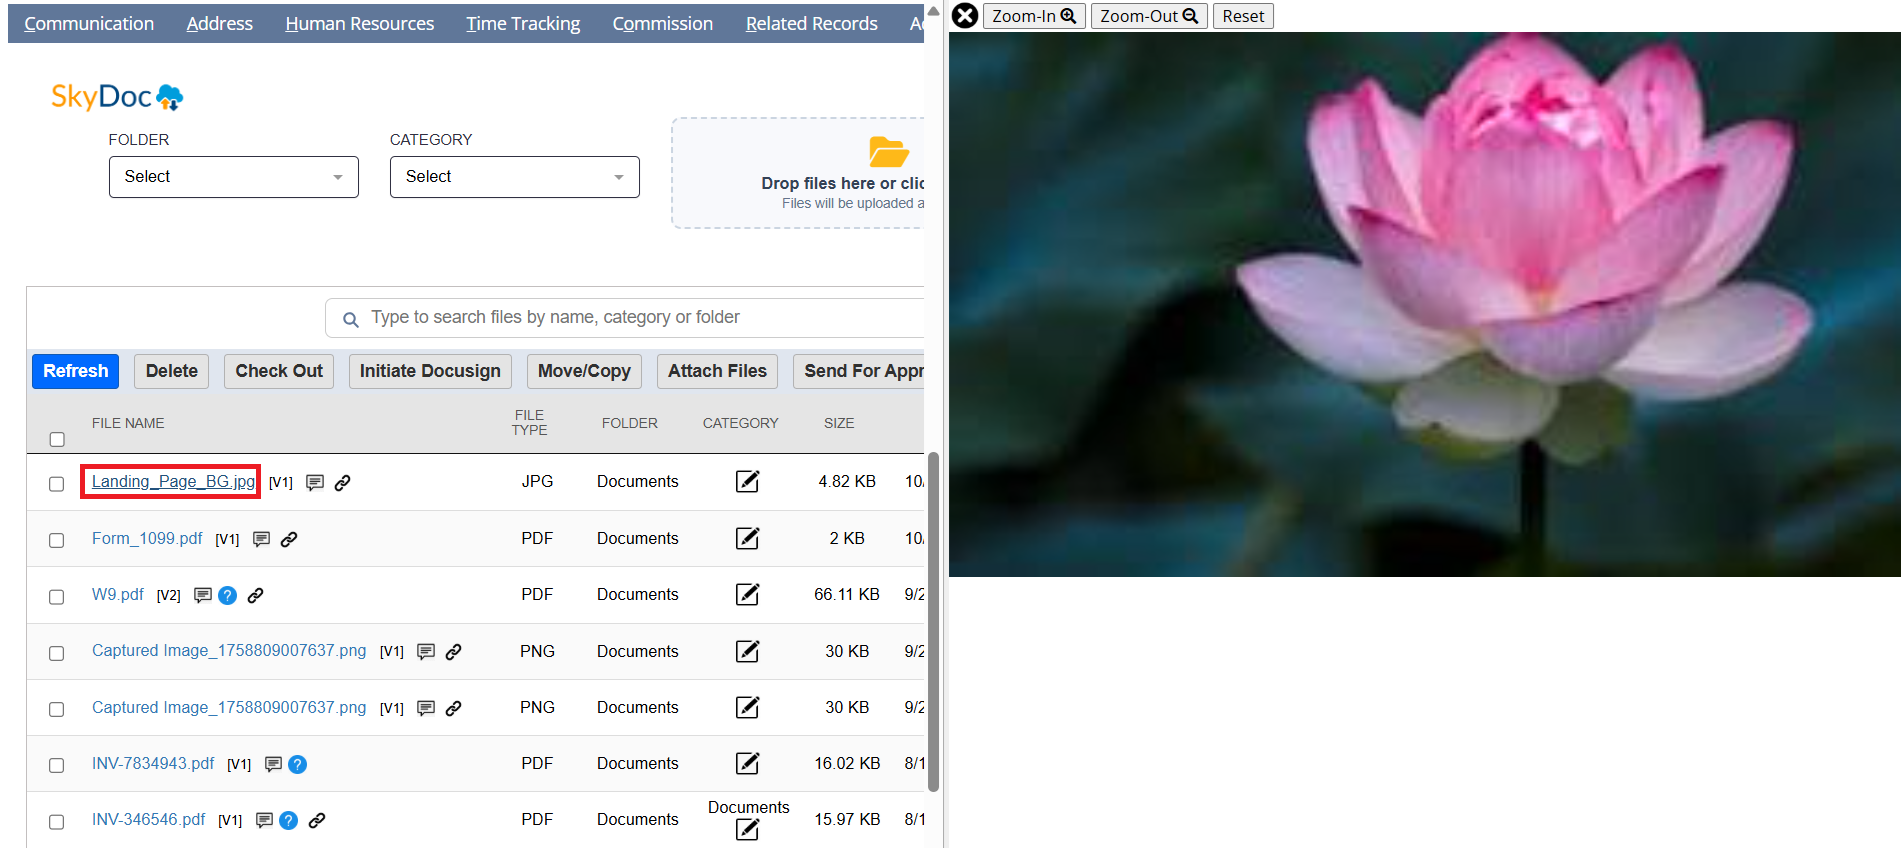
To preview a selected file, simply hover over the file name and click on it. The file will open in a split-screen view, as illustrated below.
The Display List section allows users to view all files uploaded to a record. It includes:
The Zoom In & Zoom Out feature in SkyDoc enables users to adjust the size of images within the split-screen interface. You can enlarge or reduce the image to examine details more closely, with an option to reset the view to its original size for a standard display.
The Display List section allows users to view all files uploaded to a record. It includes:
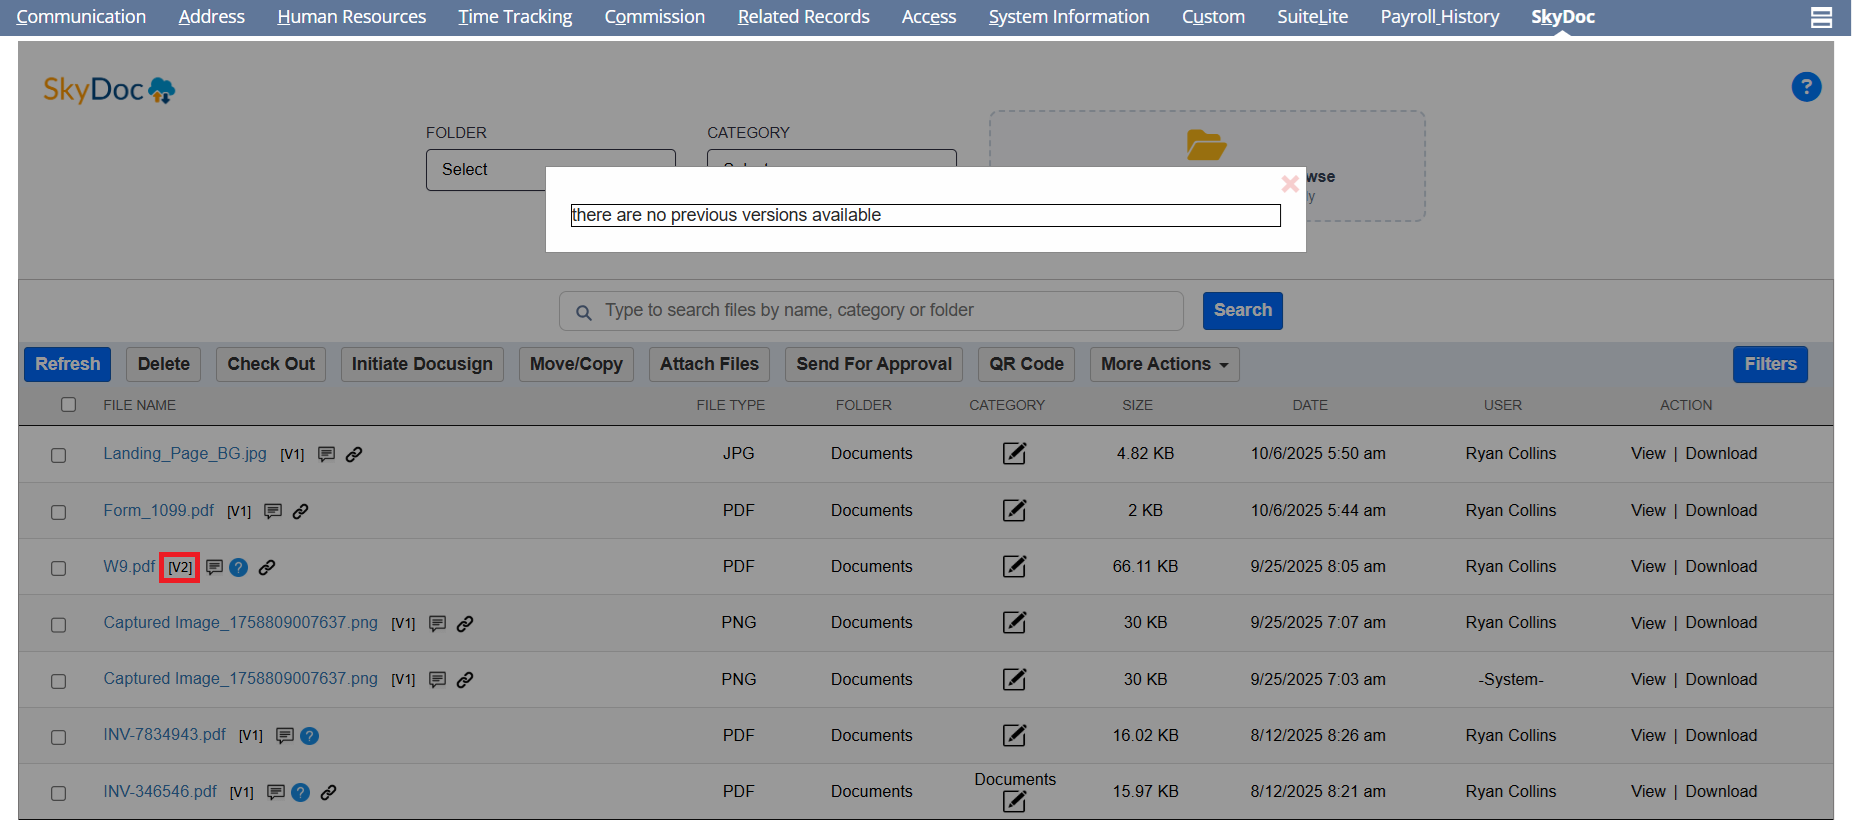
SkyDoc supports file versioning to prevent overwriting. Each time a file is uploaded, a new version is created, allowing users to view and manage previous versions of the file.
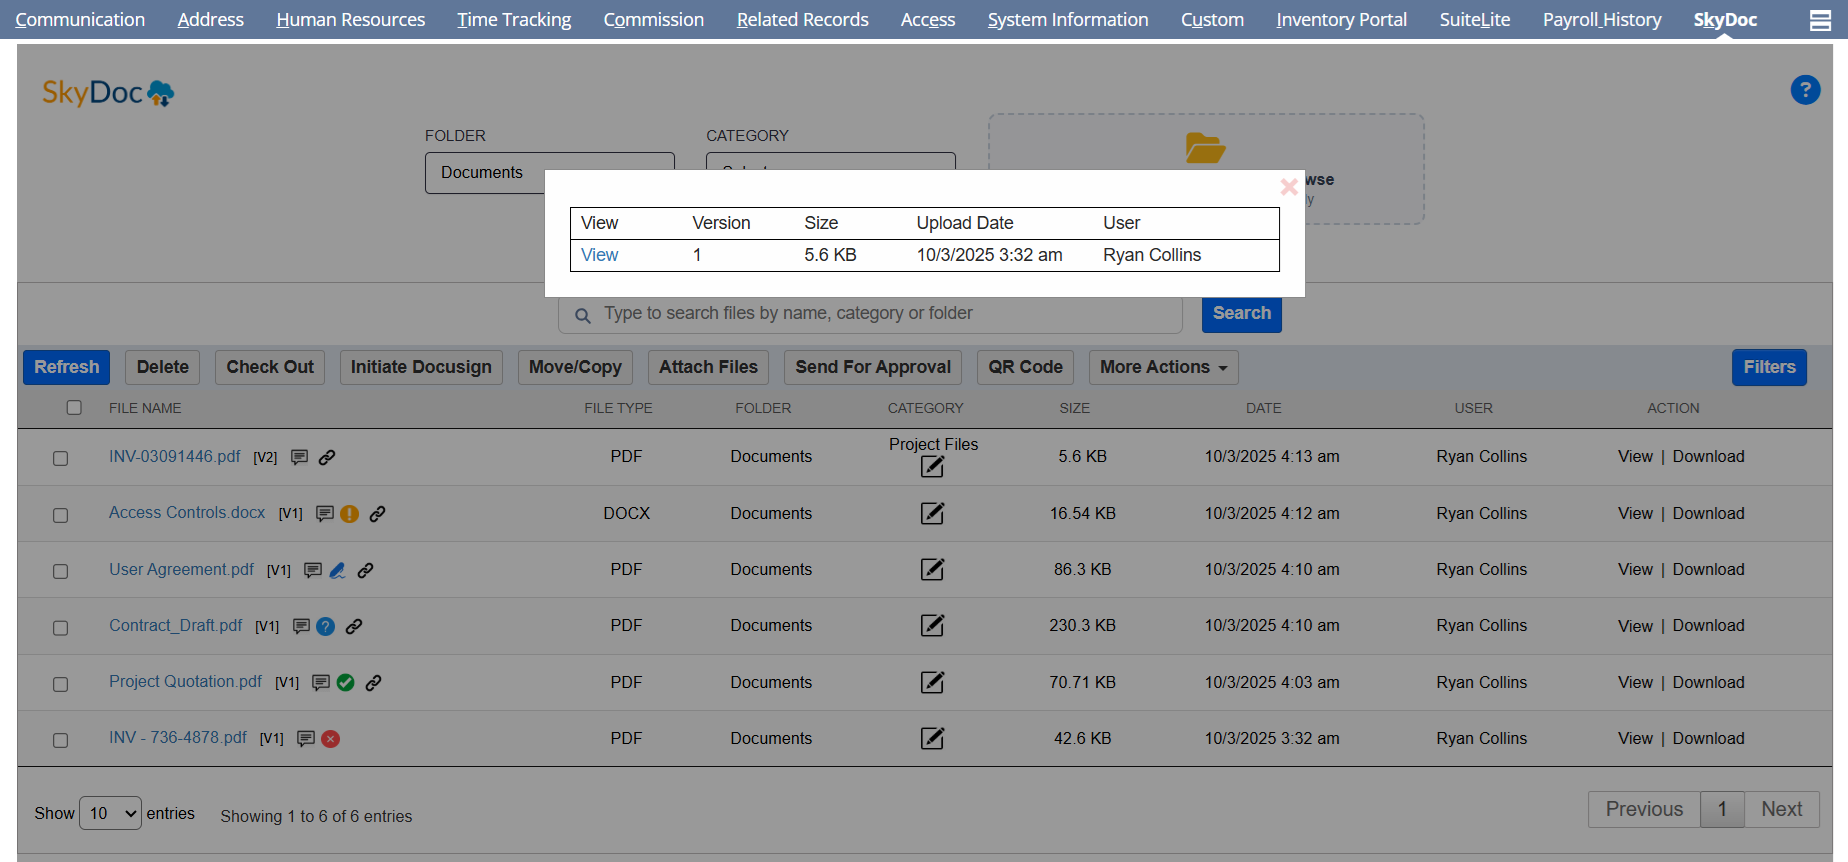
To view the available versions, click the "View" link. If no previous versions exist, a message will appear indicating that there are no versions available.
The Display List section allows users to view all files uploaded to a record. It includes:
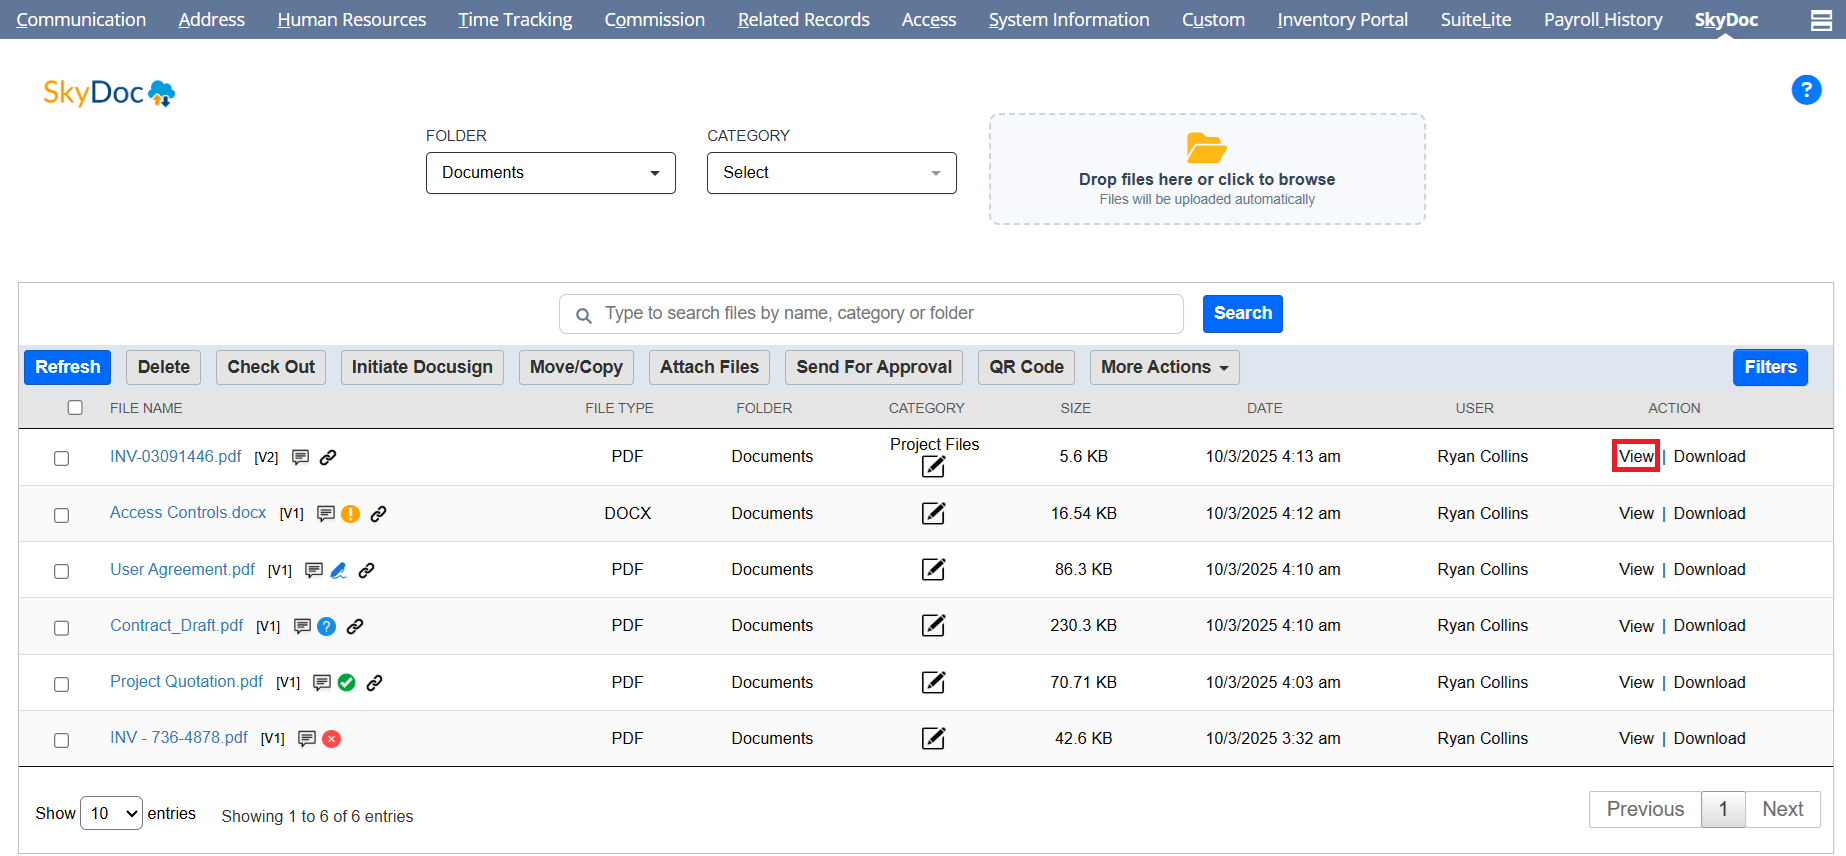
The "View" link in the SkyDoc display list allows users to access and view the content of a file.
The Display List section allows users to view all files uploaded to a record. It includes:
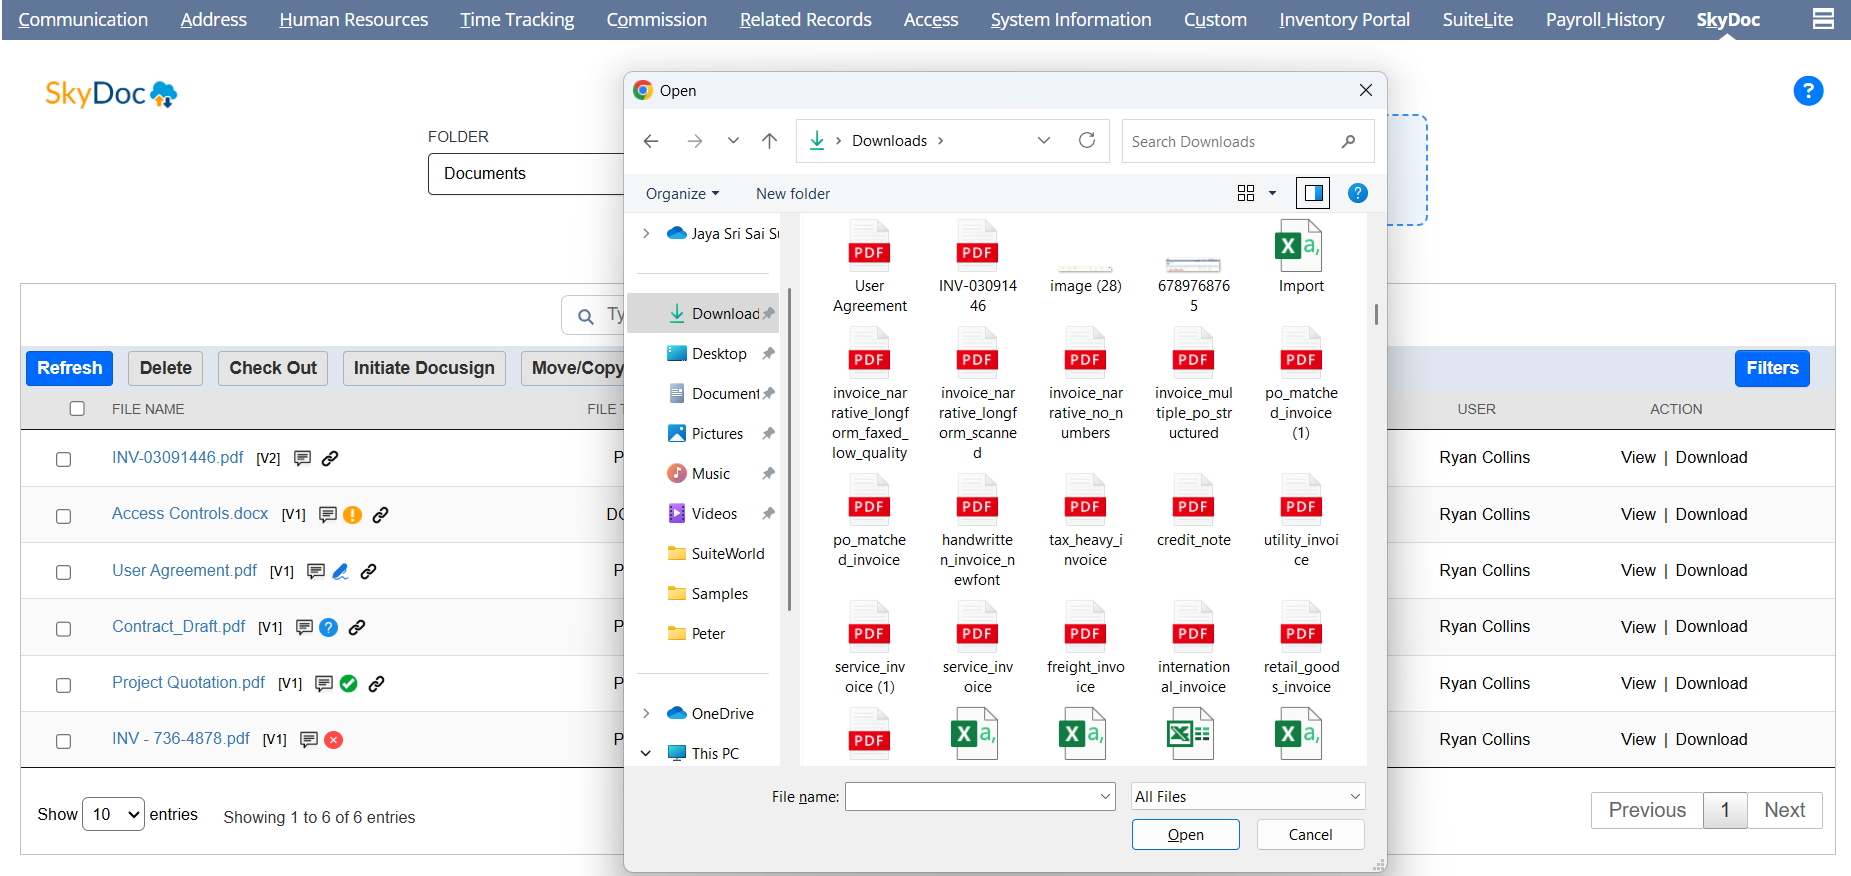
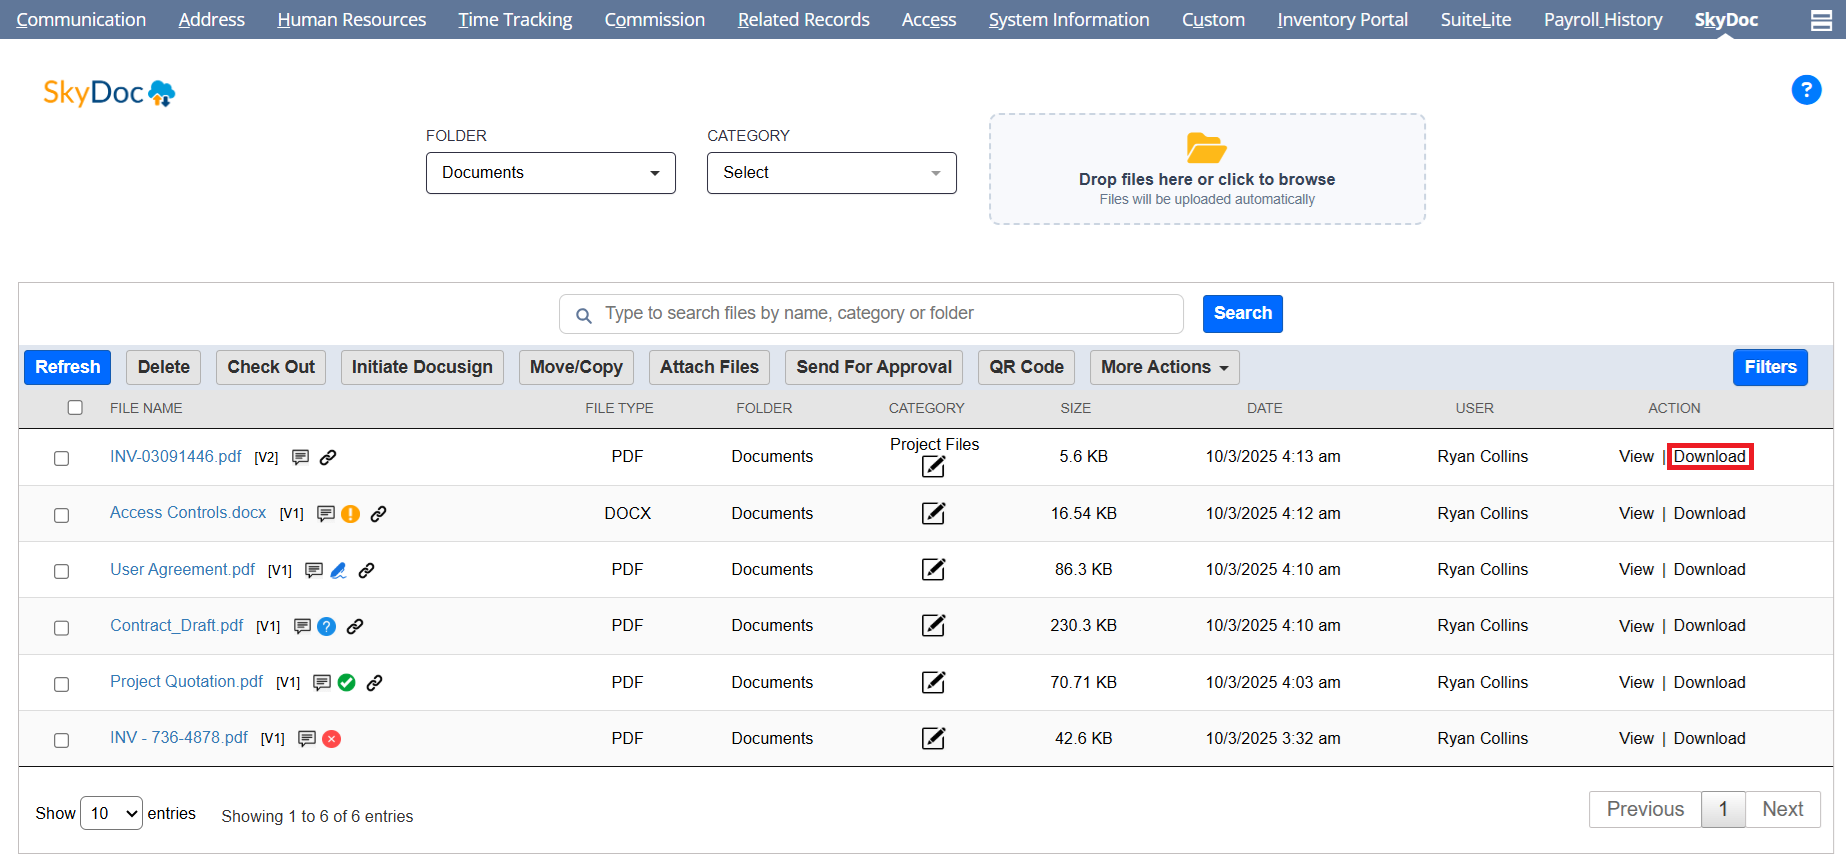
The "Download" link in the SkyDoc display list allows you to download the file
The Display List section allows users to view all files uploaded to a record. It includes:
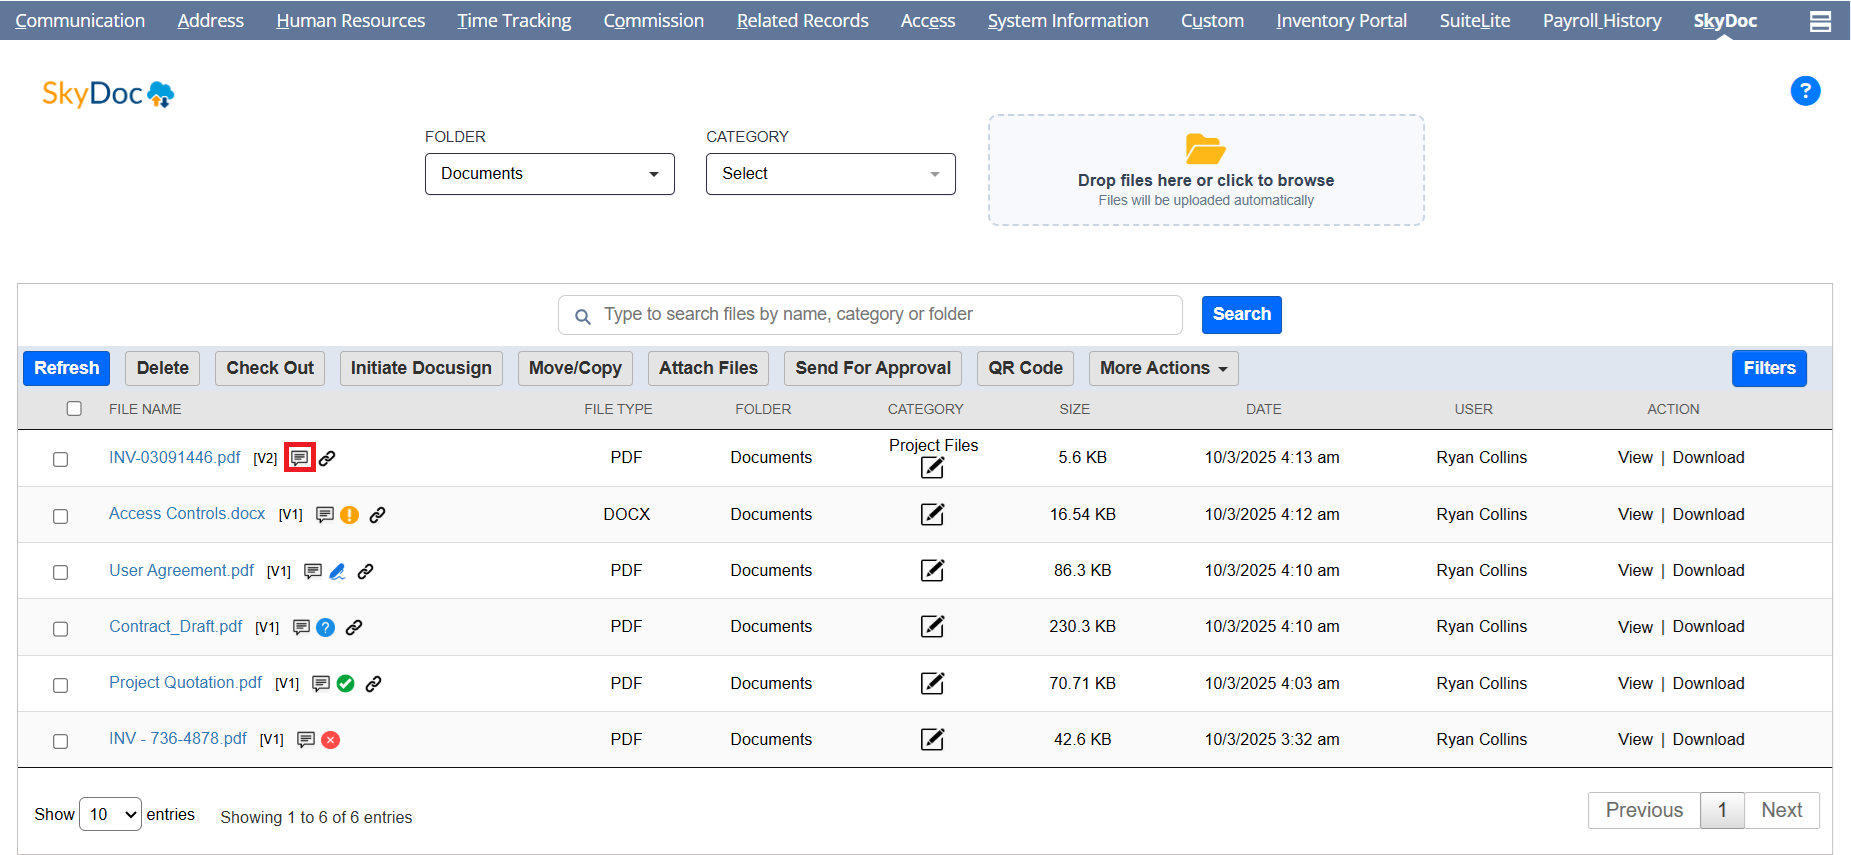
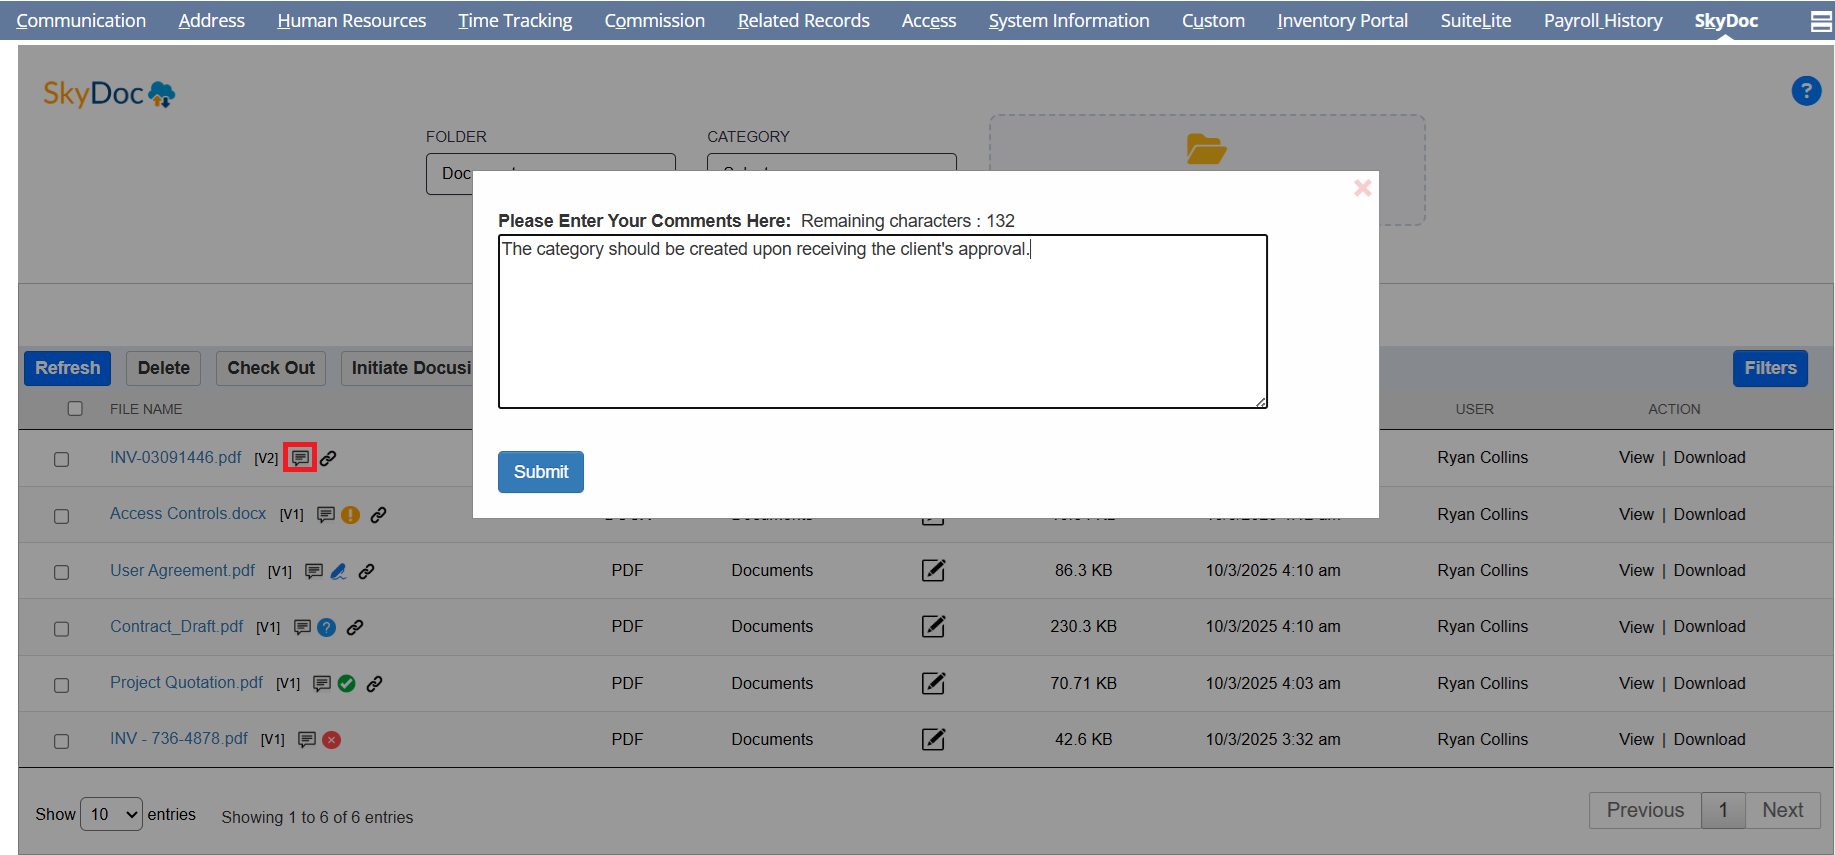
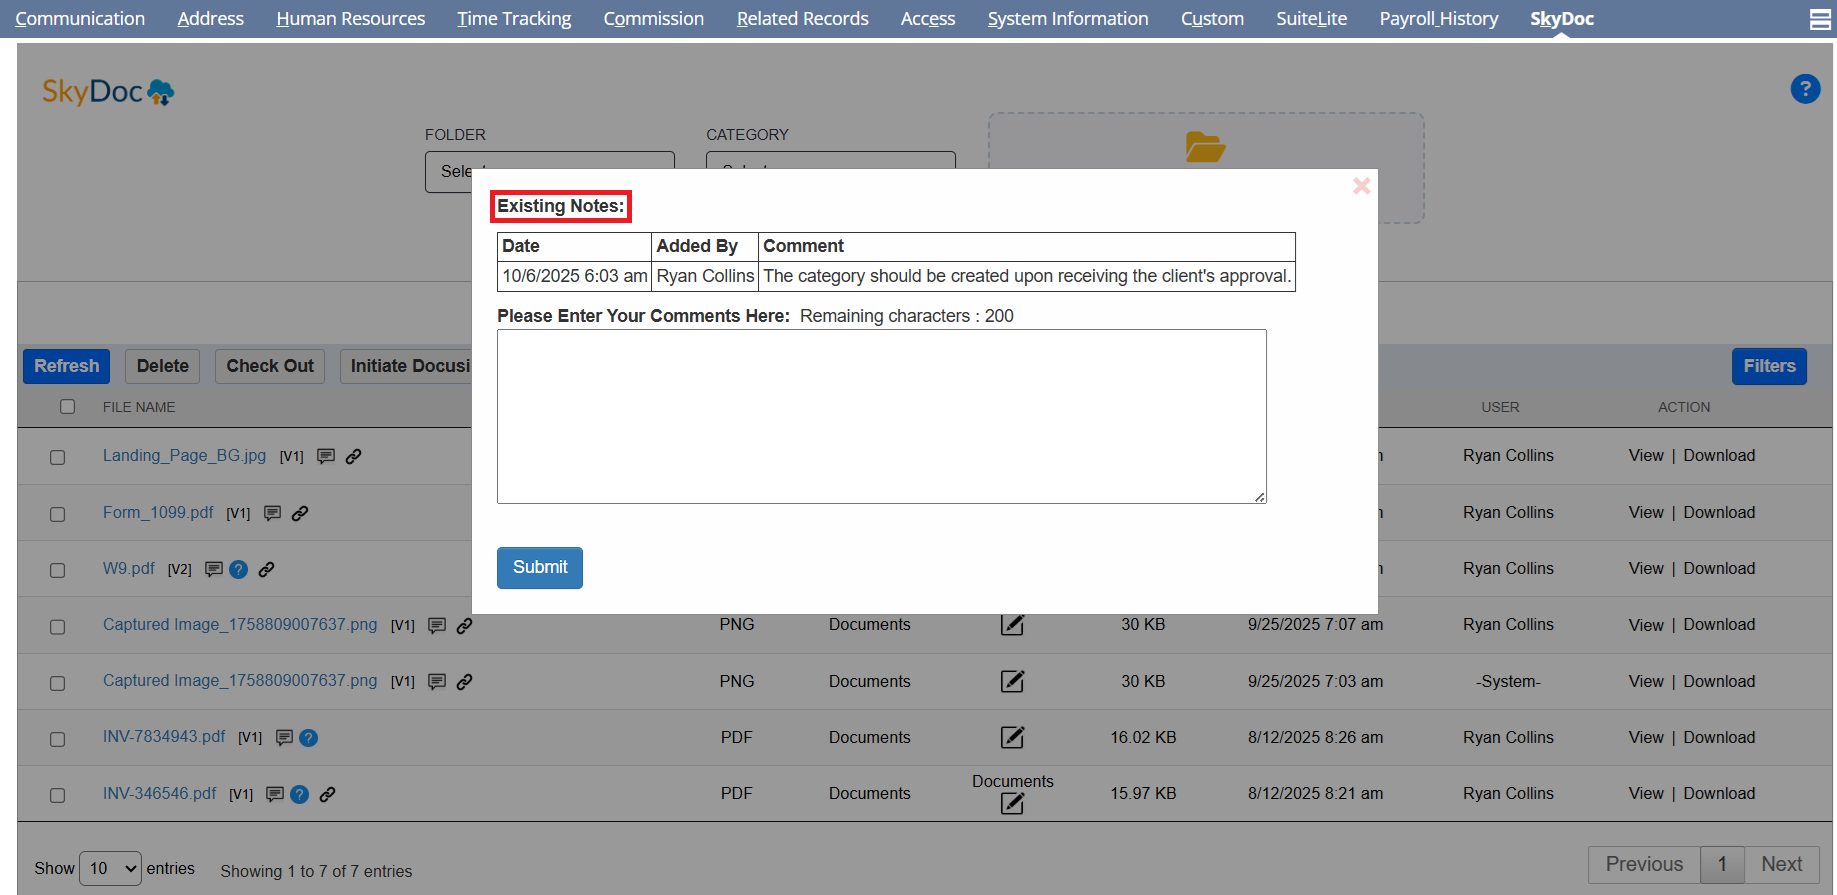
To add a description to a file, click on the ‘Comment’ icon next to the file name to open the comment section.
The Display List section allows users to view all files uploaded to a record. It includes:
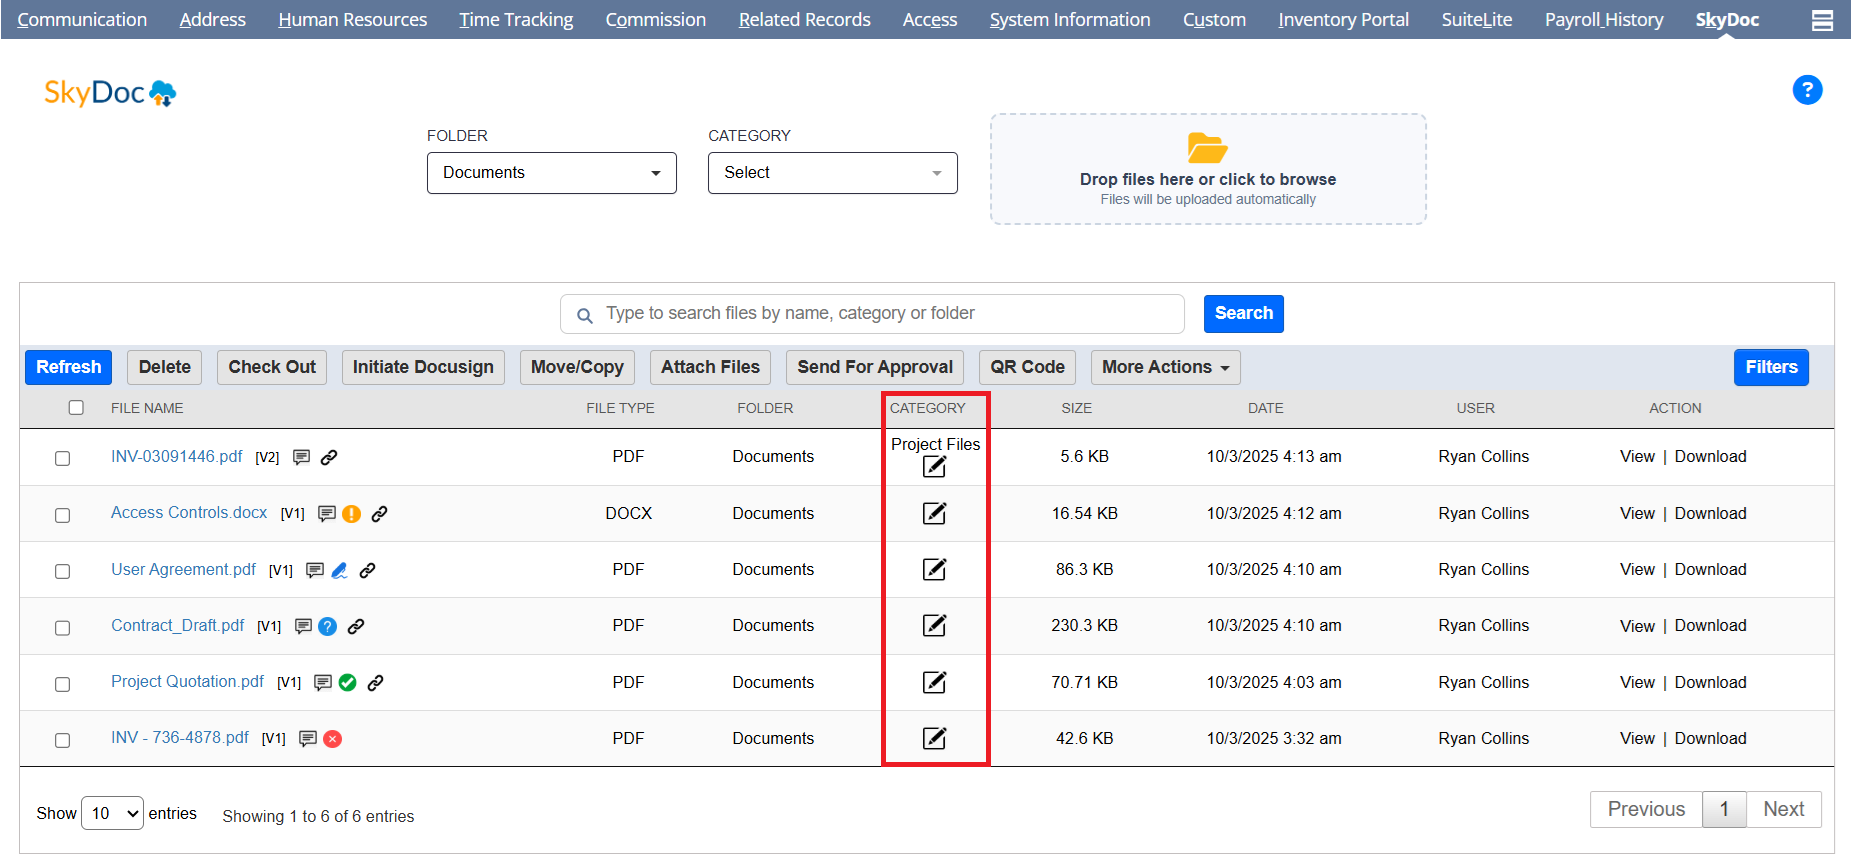
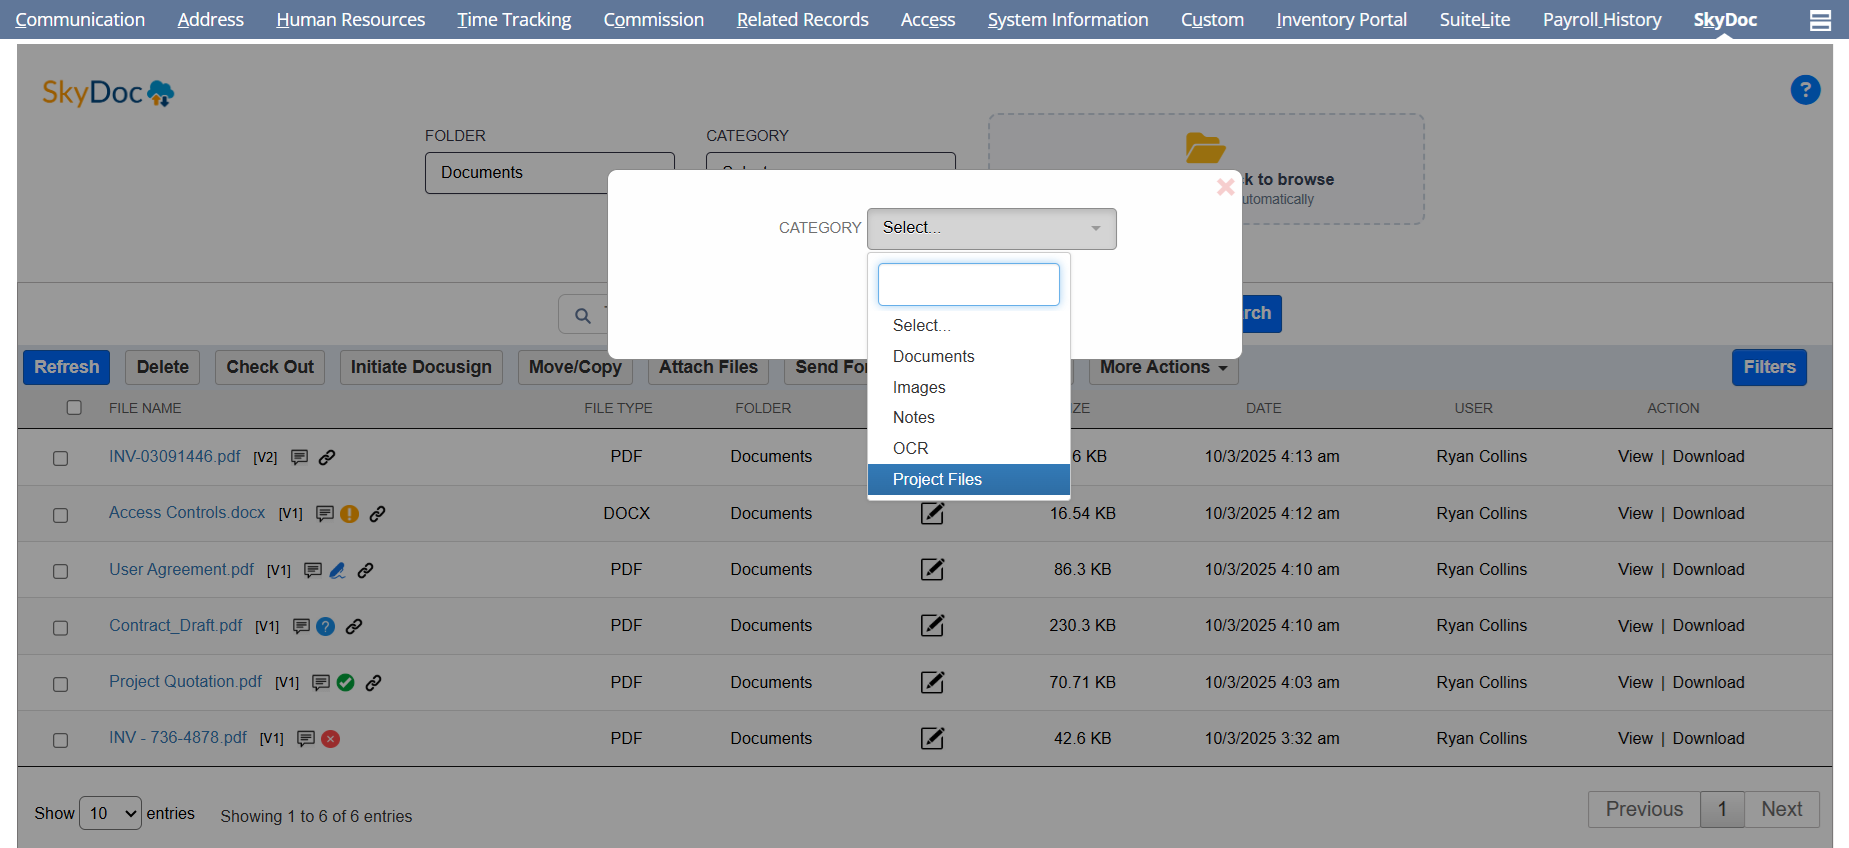
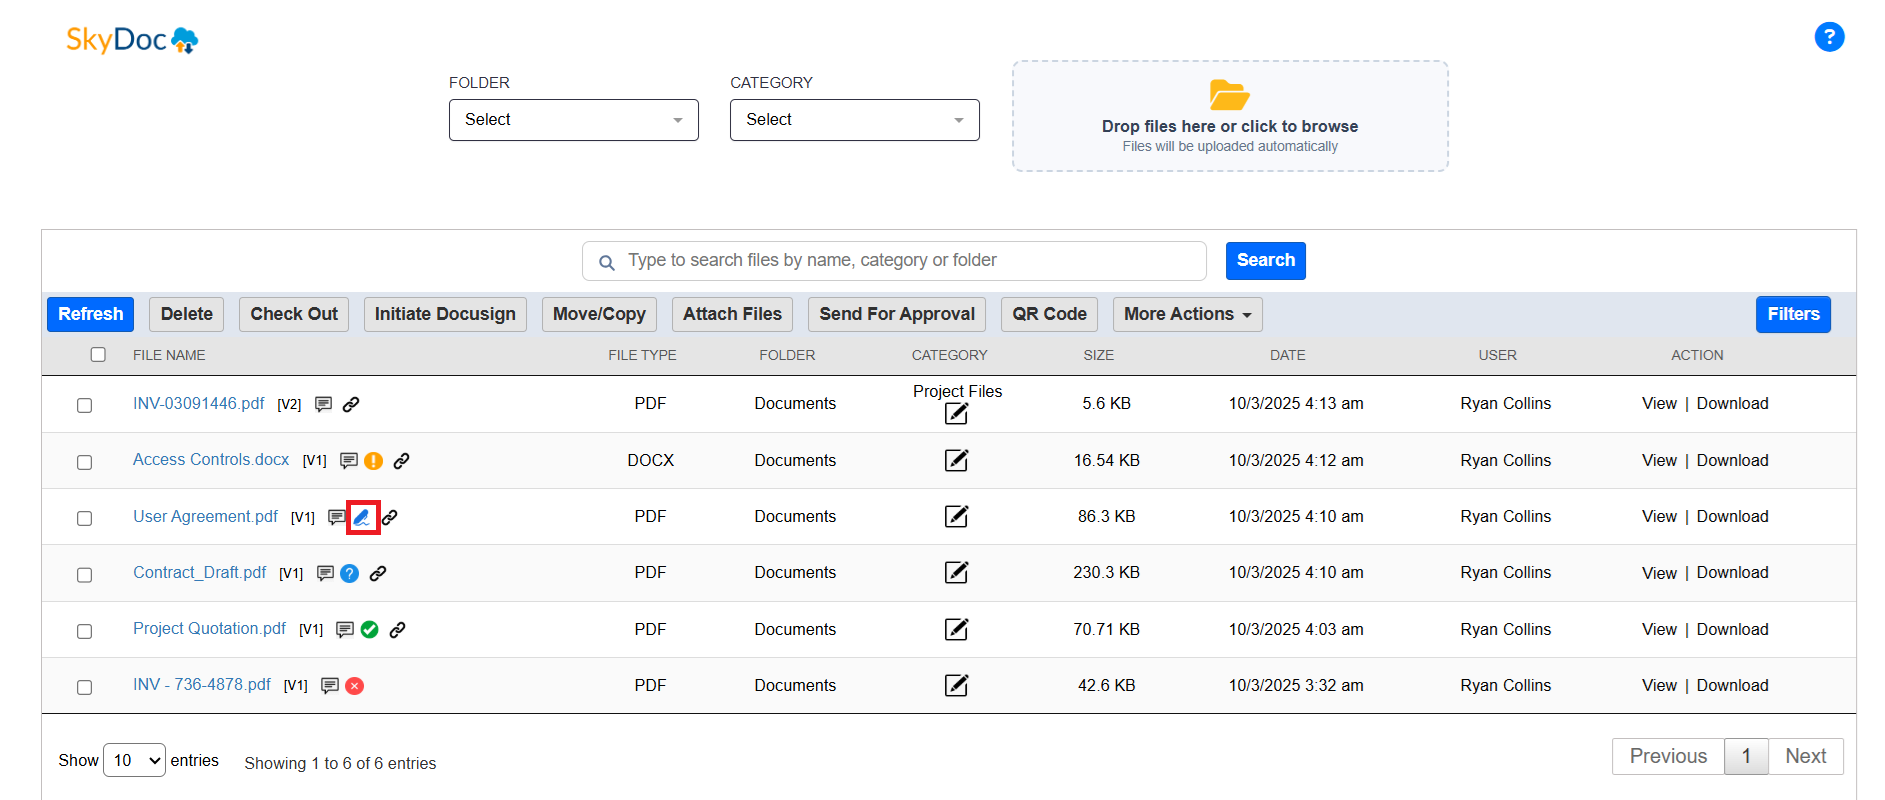
To update the category of existing files that have not been categorized, simply click the pencil icon in the SkyDoc display list. From there, select the desired category to assign to the file.
The Display List section allows users to view all files uploaded to a record. It includes:
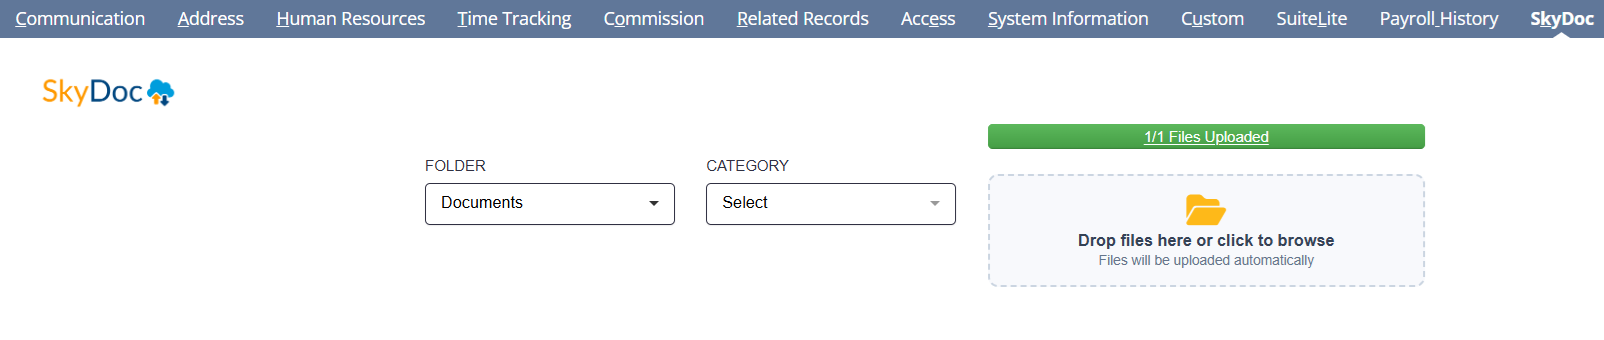
The Status Bar allows you to monitor the progress of file uploads within the "Drag and Drop" box located in the SkyDoc upload section. It displays the current upload status, providing real-time updates during the process.
The Display List section allows users to view all files uploaded to a record. It includes:
When a preferred language is activated in NetSuite, the system will automatically translate the user interface as well as any preconfigured SkyDoc records into the selected language.
The Display List section allows users to view all files uploaded to a record. It includes:
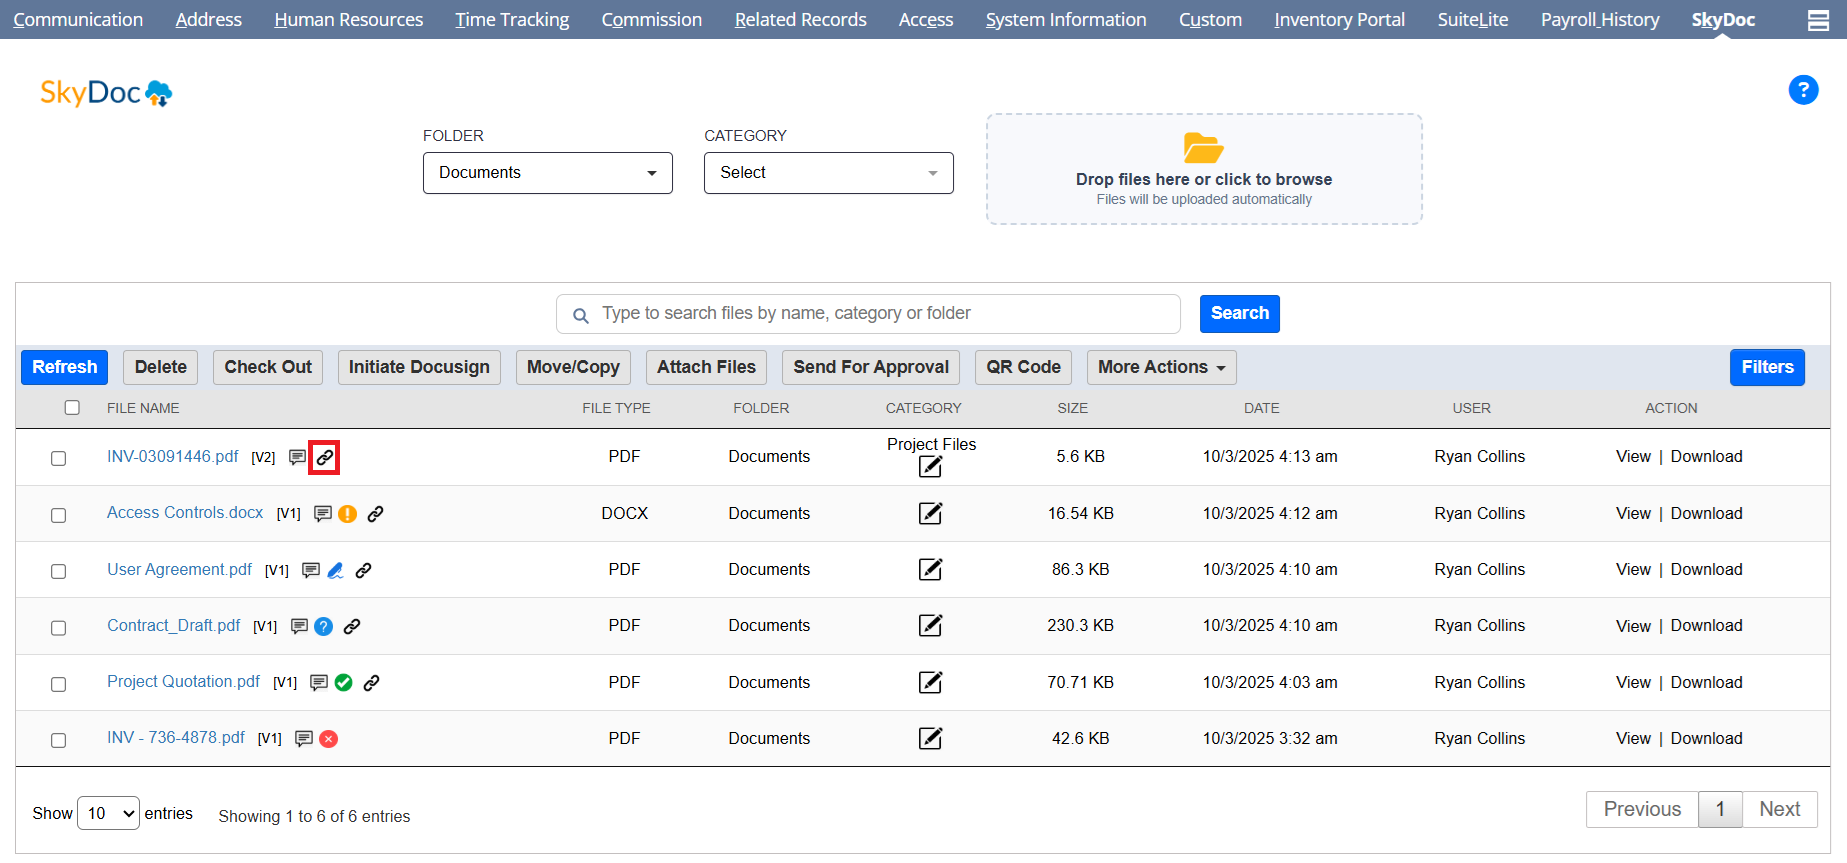
To share files with users outside of NetSuite, you can use the "Copy Link" feature. To enable this, simply click the "Public URL" button on the SkyDoc File record. This will generate a link that can be shared with non-NetSuite users.
The Display List section allows users to view all files uploaded to a record. It includes:
The Refresh button is used to reload the page and display the most current content after performing actions such as deleting, attaching, or uploading files. This ensures the page reflects the latest updates.
The Display List section allows users to view all files uploaded to a record. It includes:
The Delete button allows users to remove files or notes. To delete files, select the desired files under the SkyDoc subtab and click the Delete button to permanently remove them from AWS and SkyDoc.
The Display List section allows users to view all files uploaded to a record. It includes:
The Add Note button enables users to create and add notes to records.
To add a note, click on the Add Note button, select a folder and category, enter any comments, and click on Attach note.
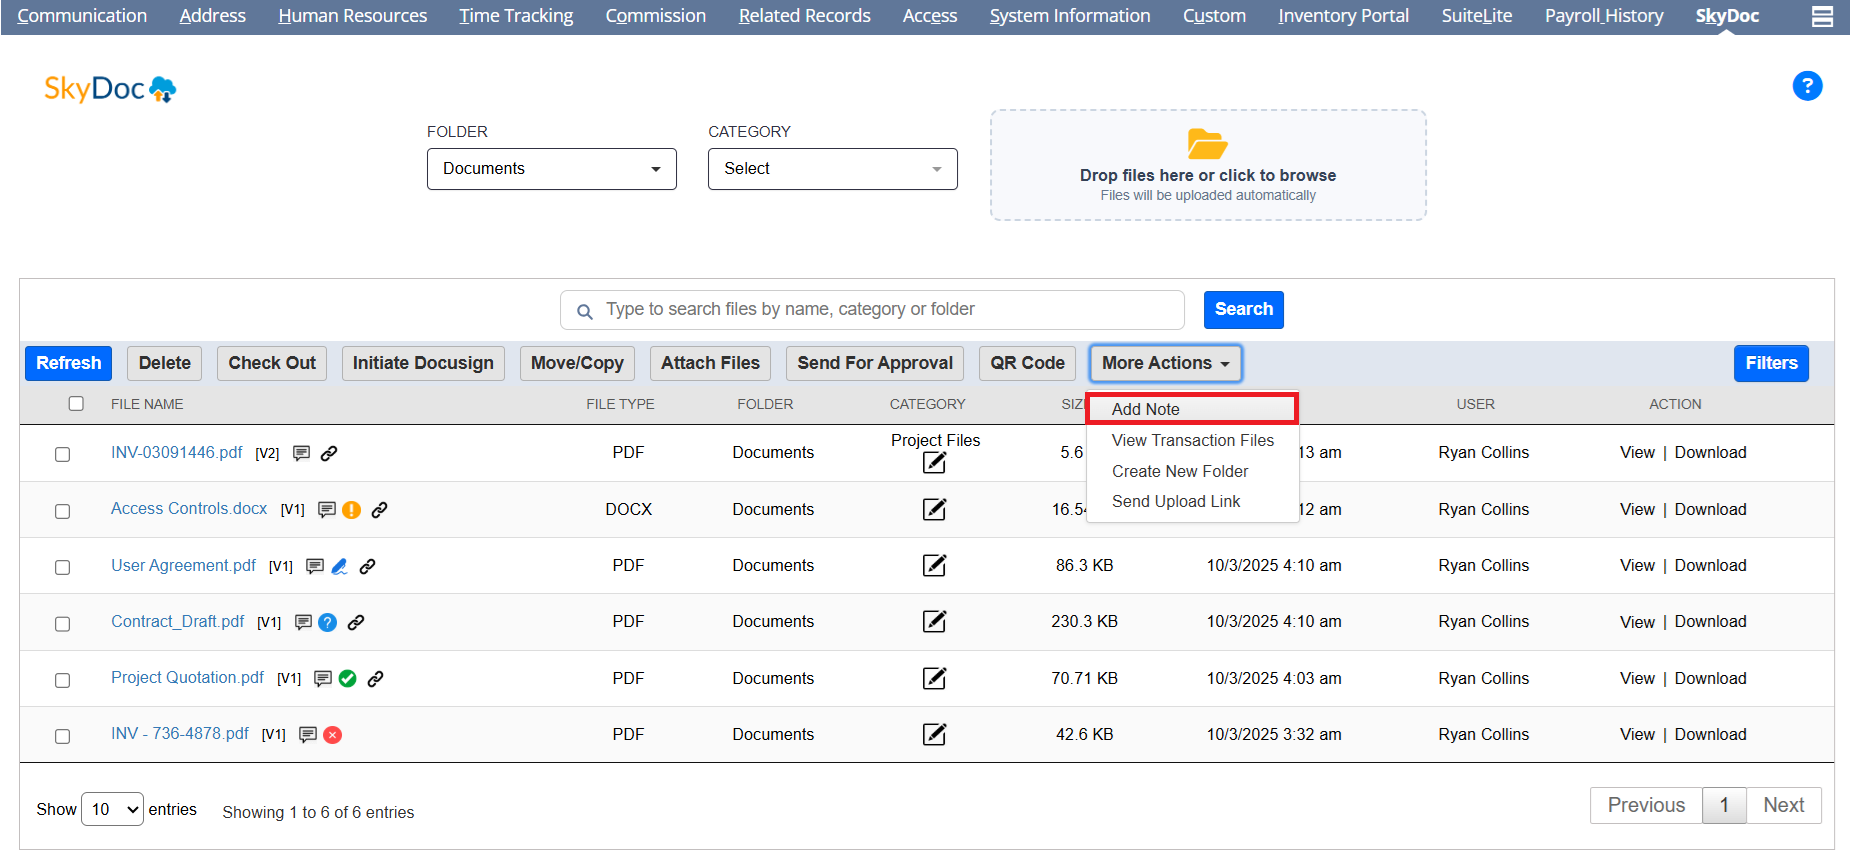
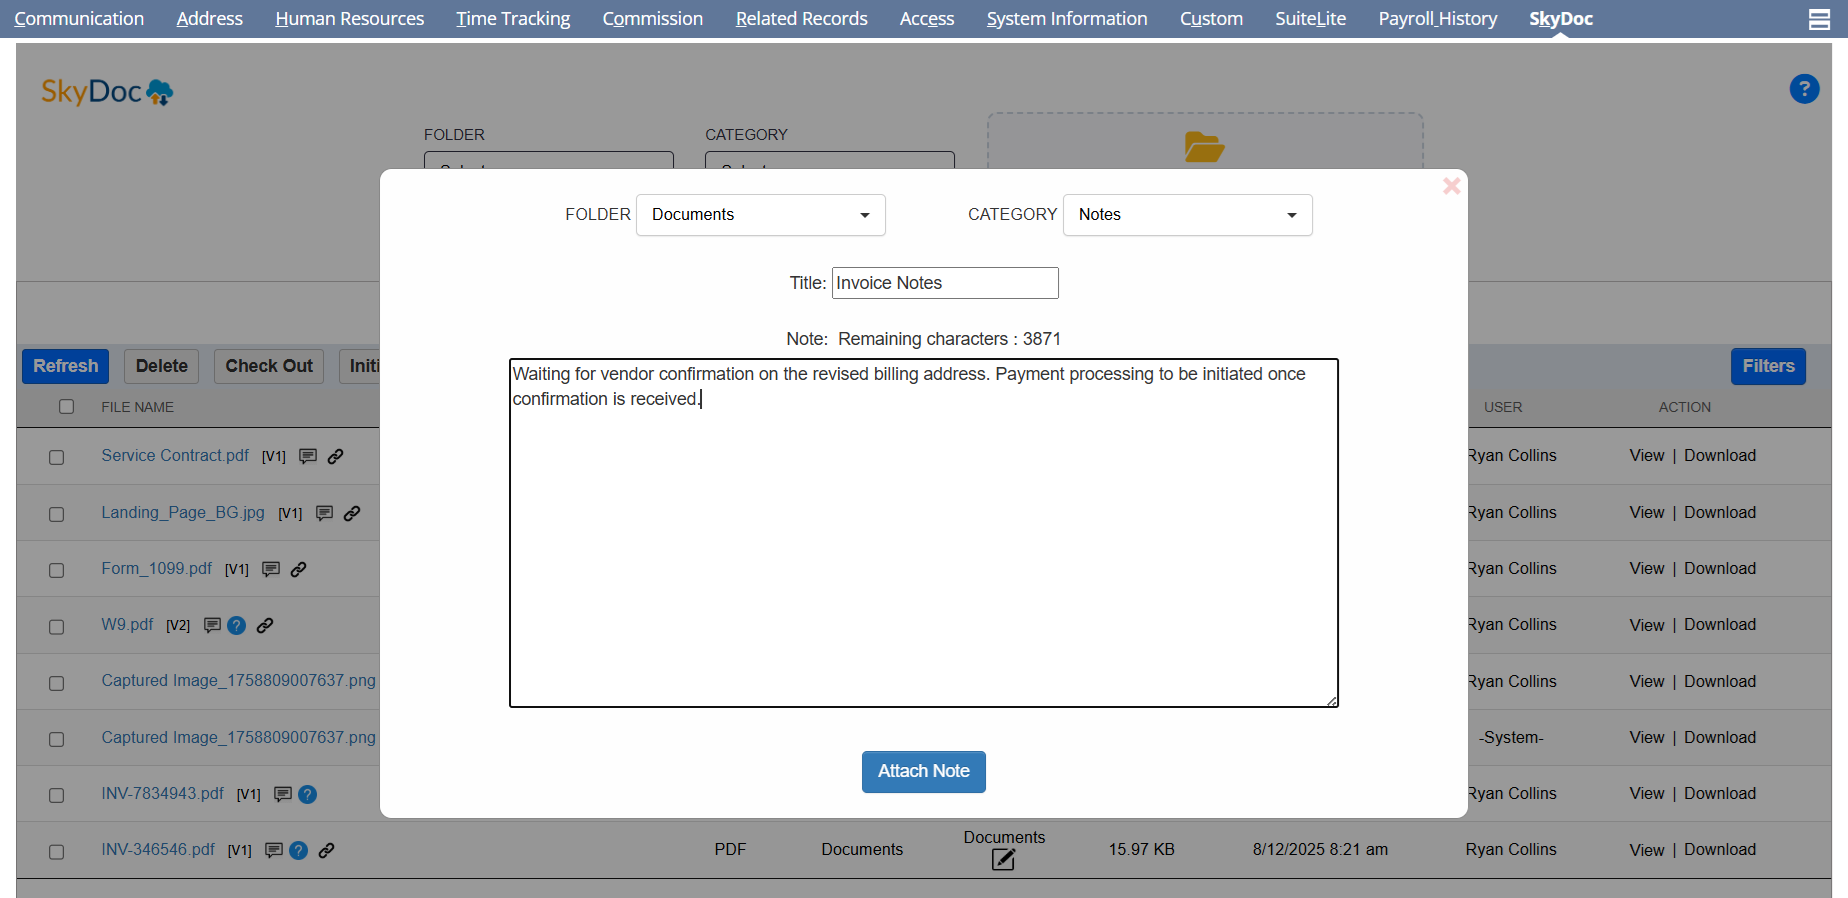
After attaching notes, they can be seen in the display list.
The Display List section allows users to view all files uploaded to a record. It includes:
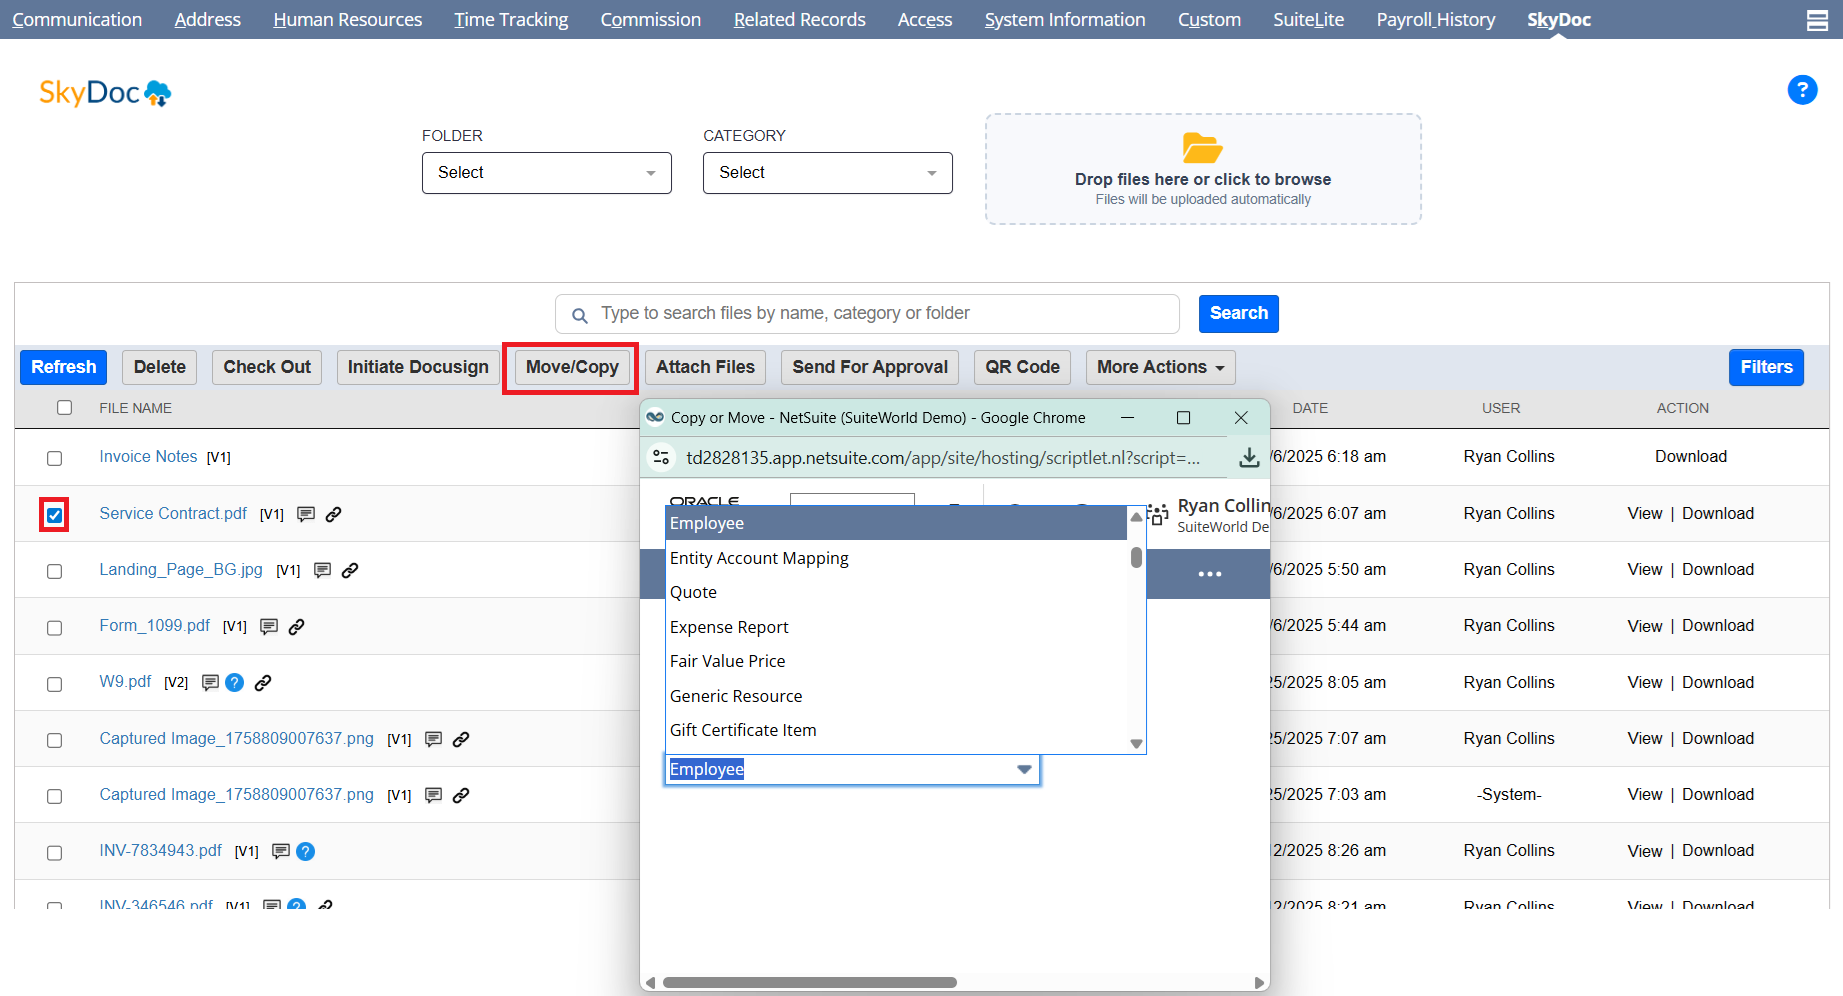
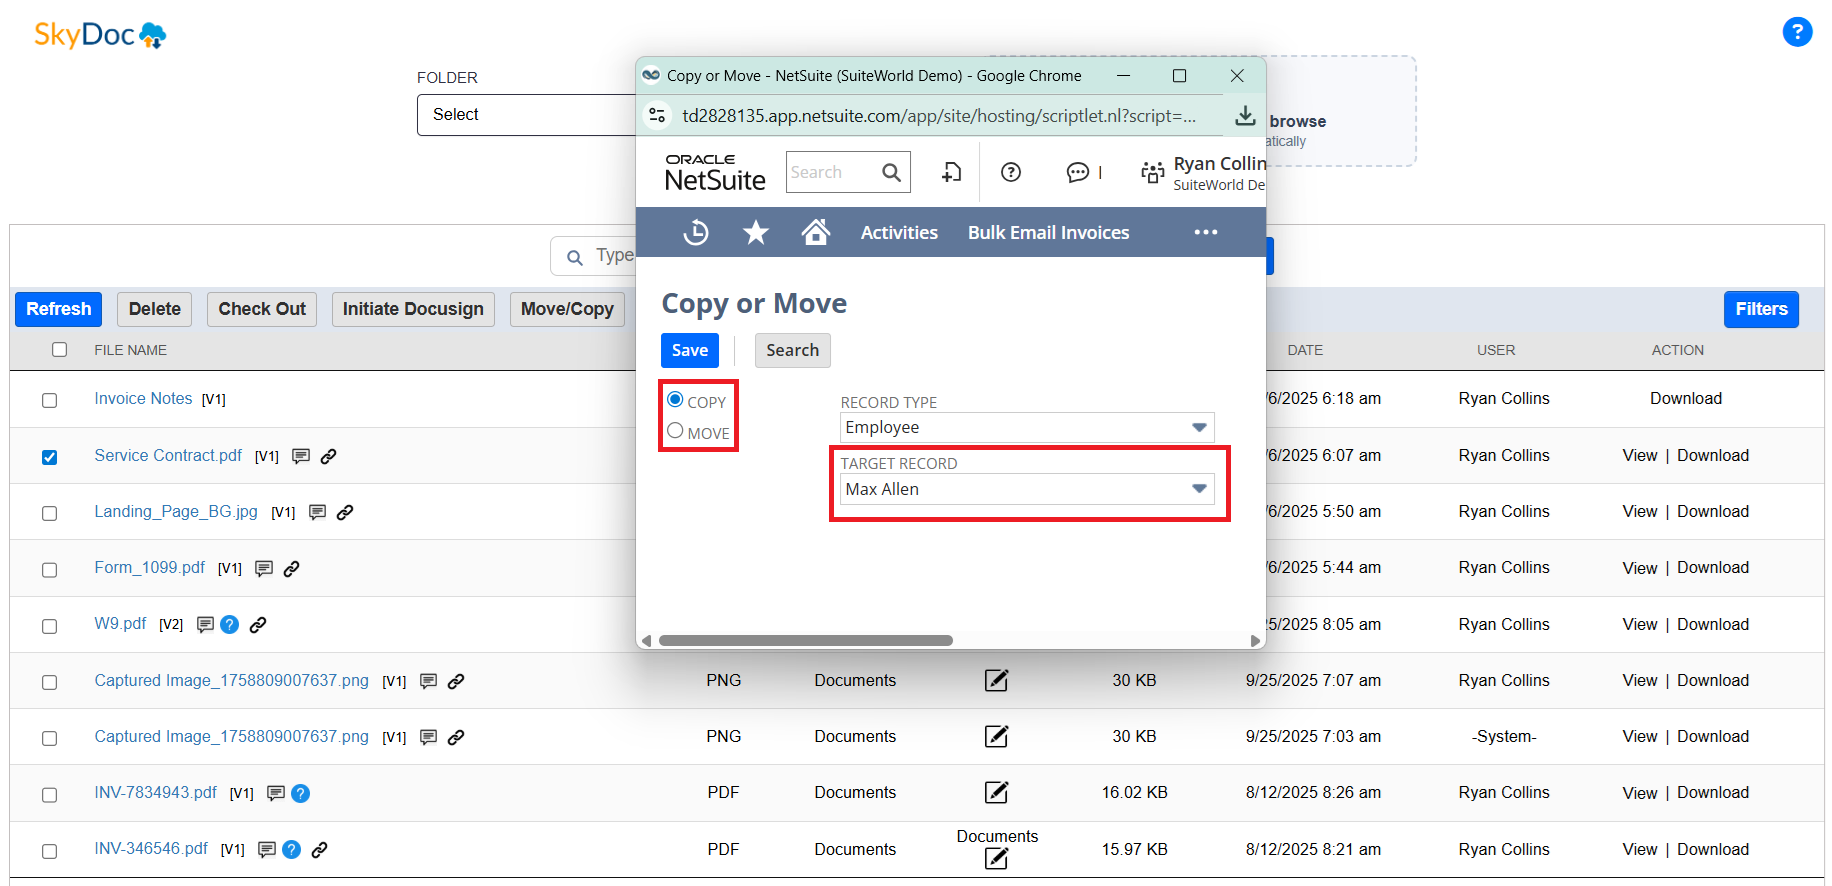
To move or copy a file, please follow the steps outlined below:
For accounts with a large number of records, you can enter the document number of the target transaction directly into the "Target Record" field to avoid time-out issues, rather than selecting it from the list. This option is available only if enabled in your account.
The Display List section allows users to view all files uploaded to a record. It includes:
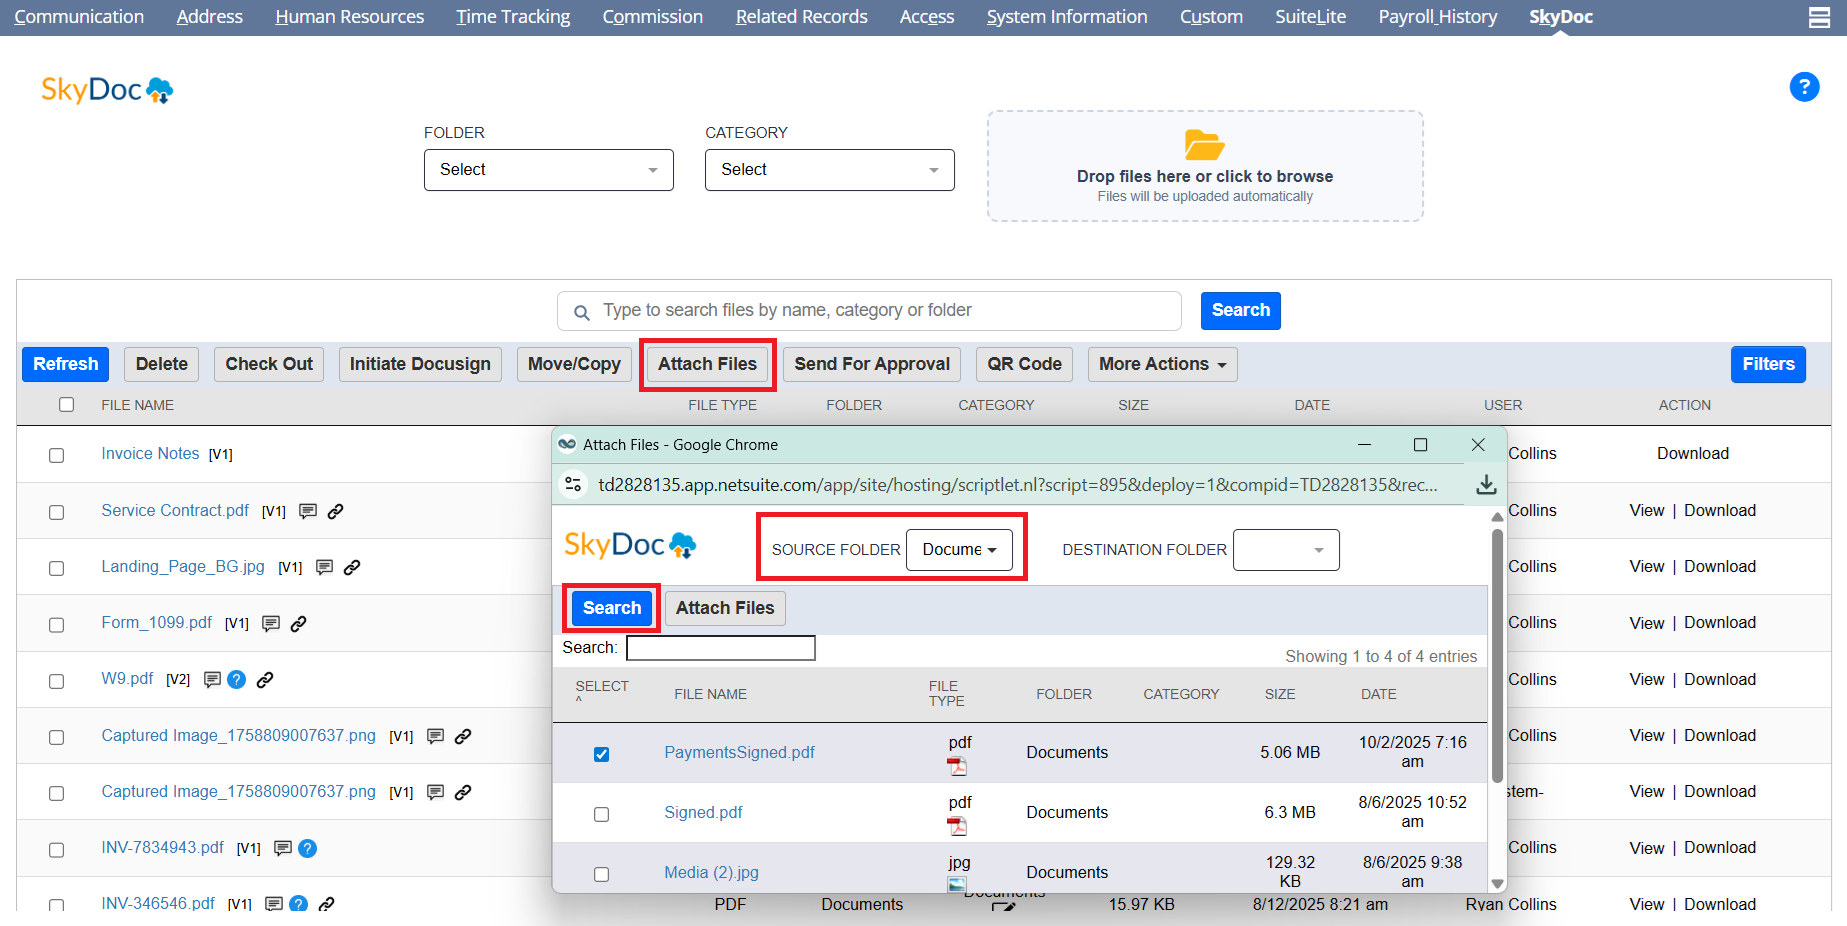
To attach externally uploaded files to any record, follow these steps:
The Display List section allows users to view all files uploaded to a record. It includes:
The Display List section allows users to view all files uploaded to a record. It includes:
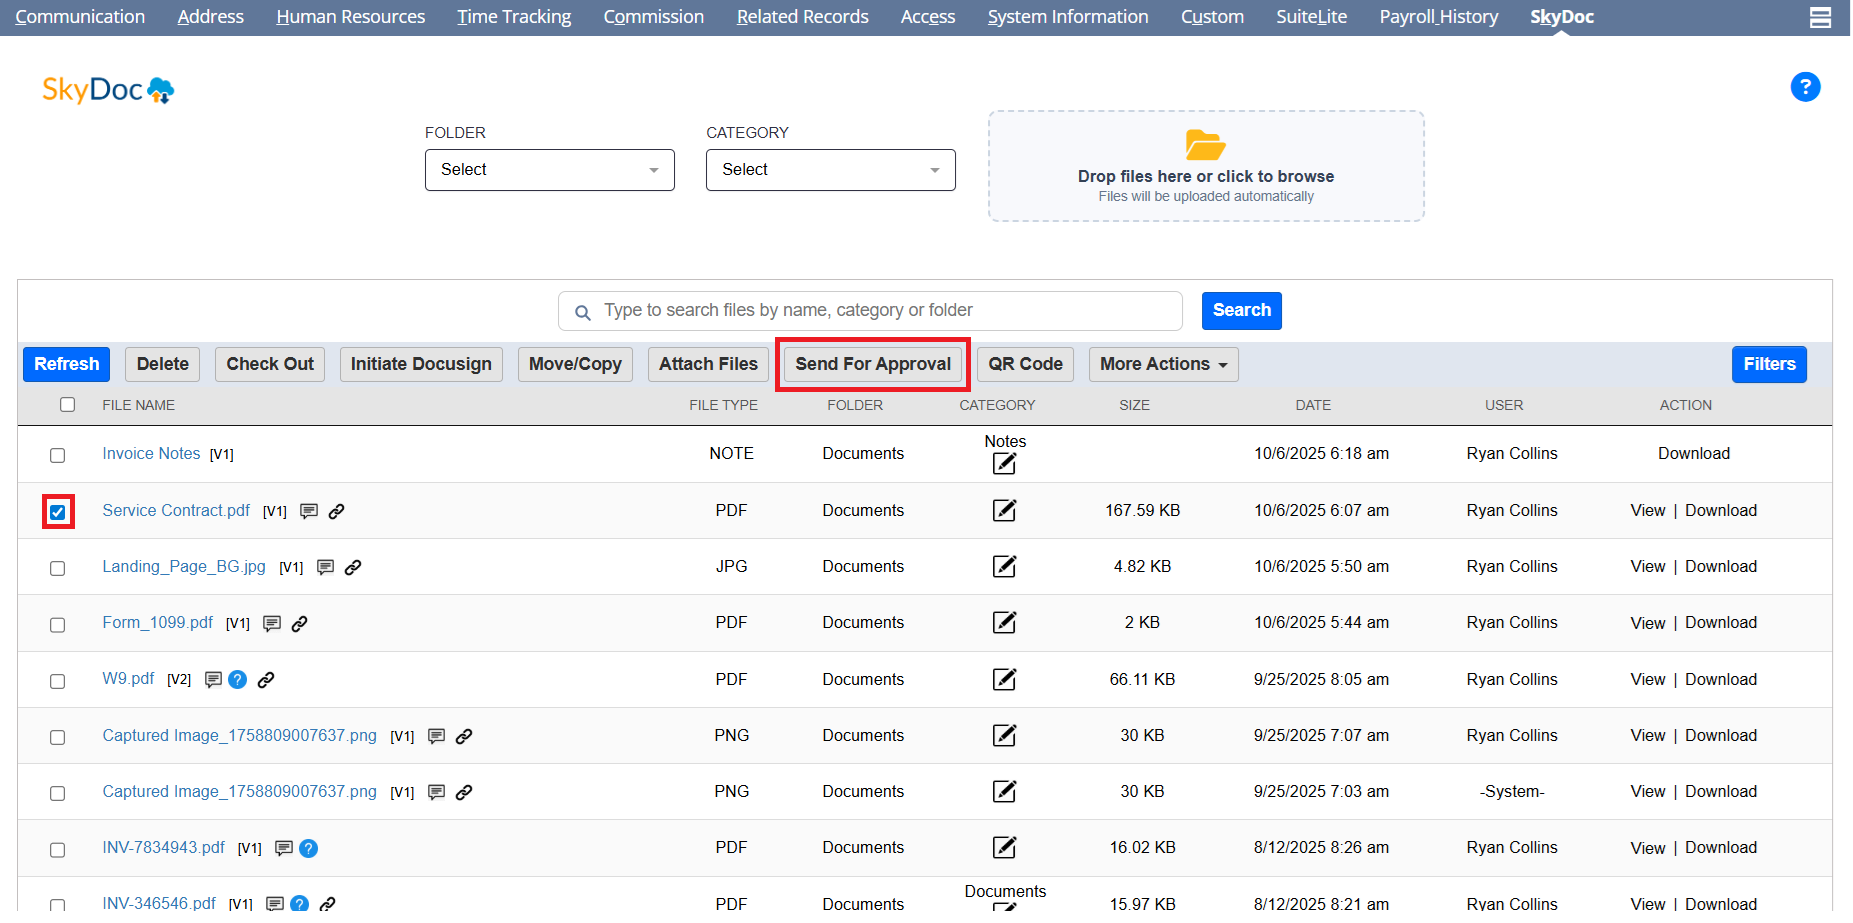
The Send for Approval buttons in the SkyDoc display list facilitate the approval process within SkyDoc. For detailed information, please refer to the Approval Process document
The Display List section allows users to view all files uploaded to a record. It includes:
The "New Folder" button, located in the SkyDoc display list, enables users to create a new folder directly from the list view.
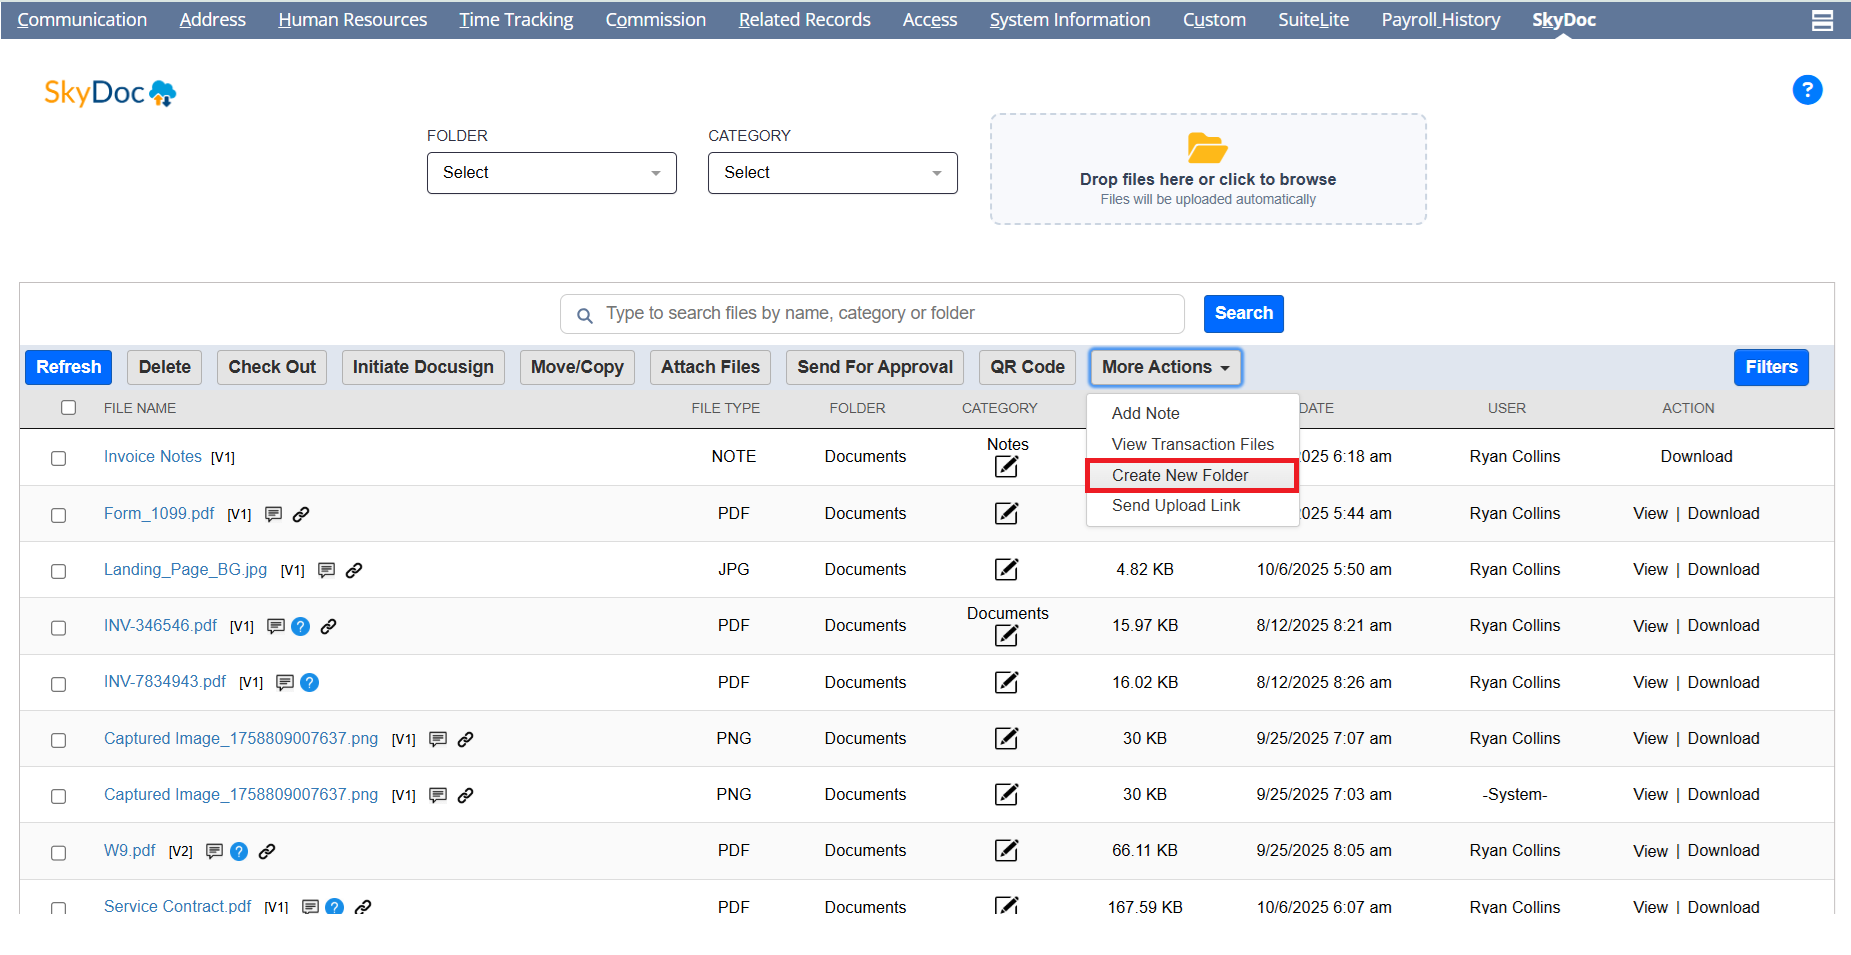
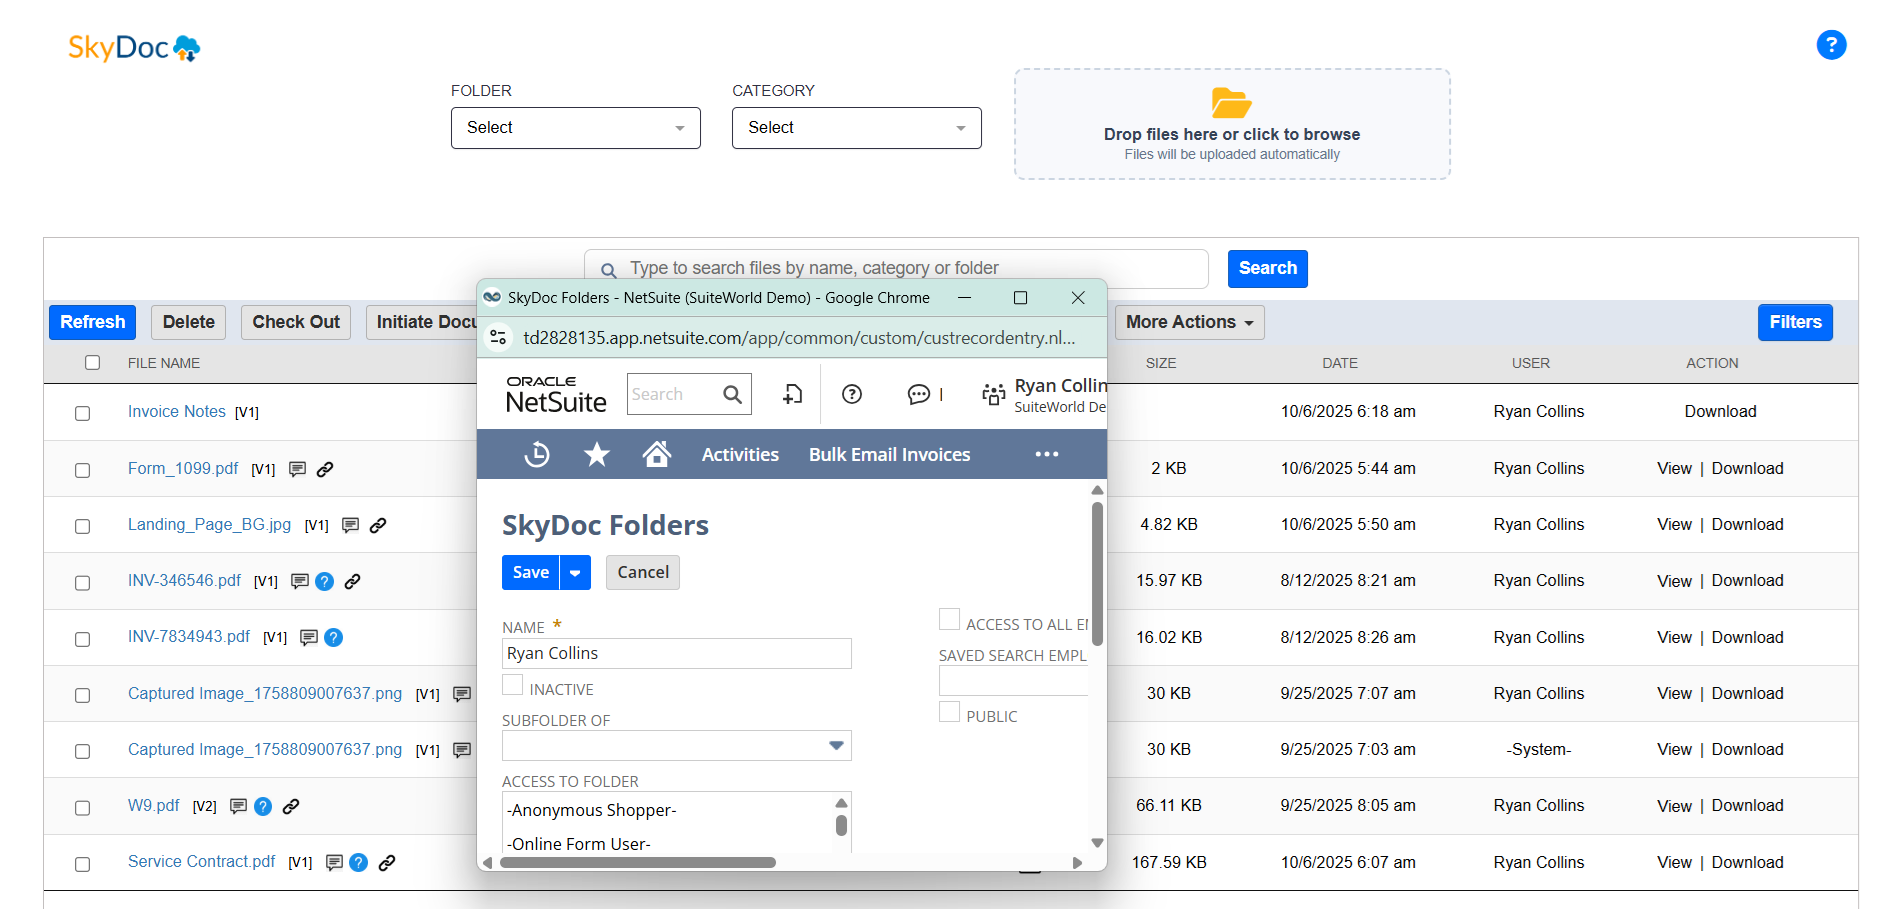
When a new folder is created from the SkyDoc Folder list, it is automatically set as the default folder for the current record. This helps streamline organization and ensures that the folder is immediately linked to the record
Additionally, the folder name is pre-populated in the SkyDoc folder creation page, based on the record type and record ID. This feature enhances user efficiency by eliminating the need for manual data entry
The Display List section allows users to view all files uploaded to a record. It includes:
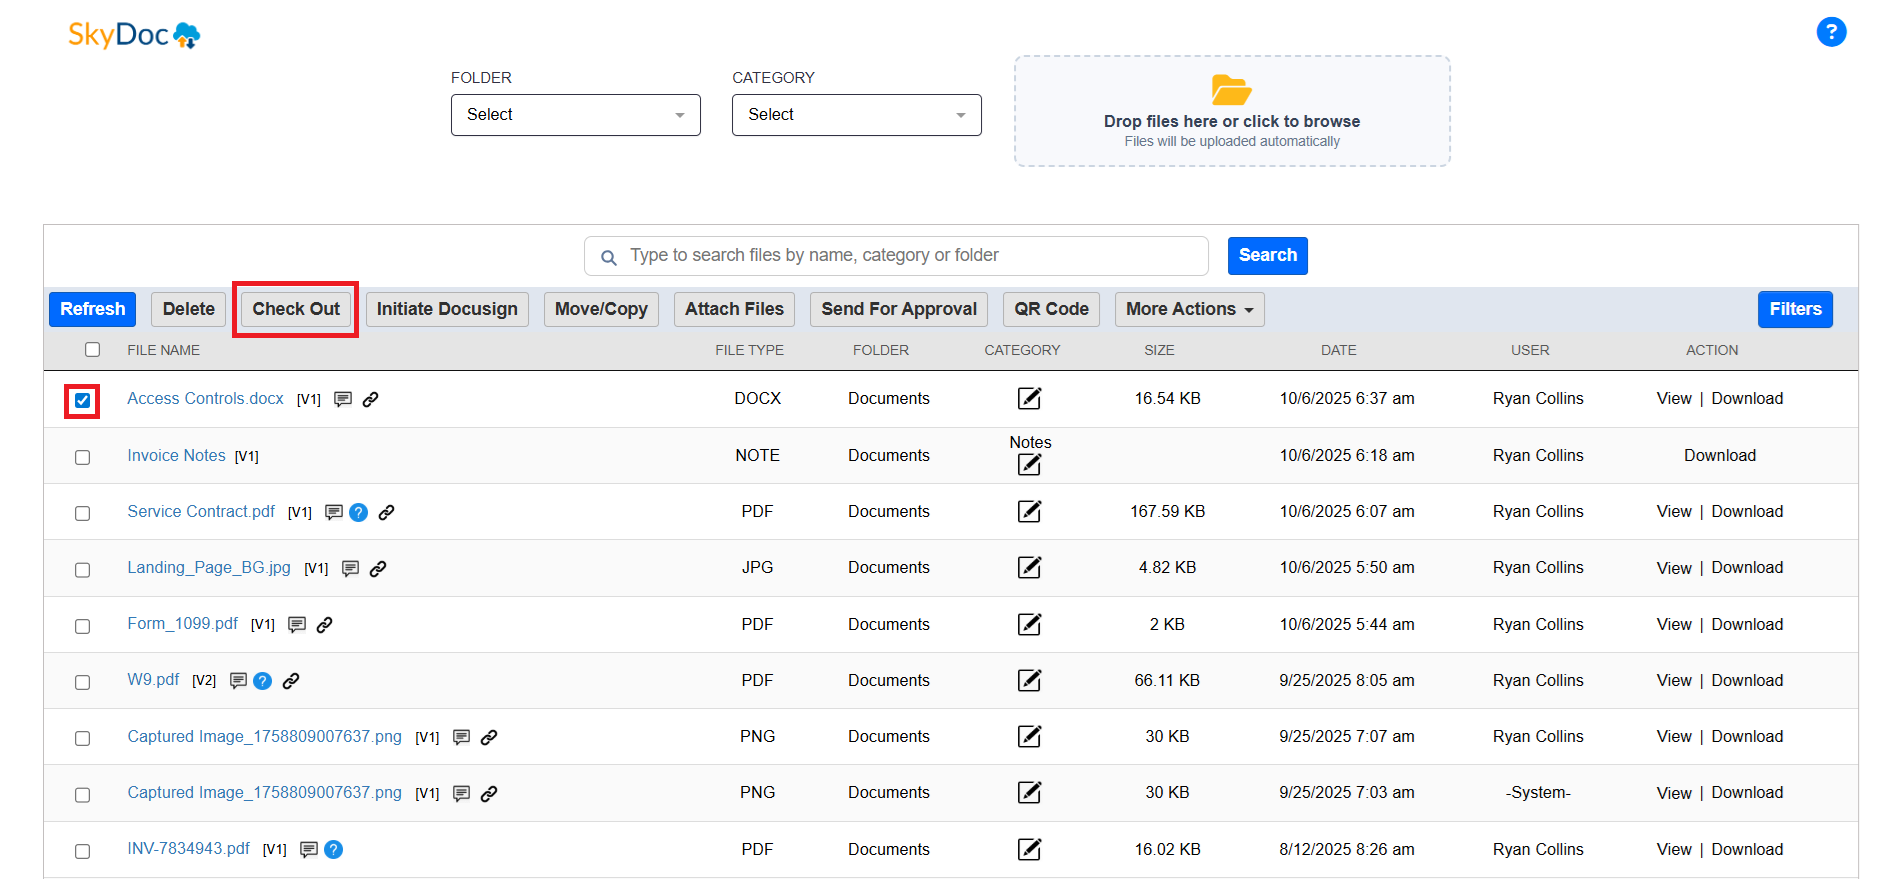
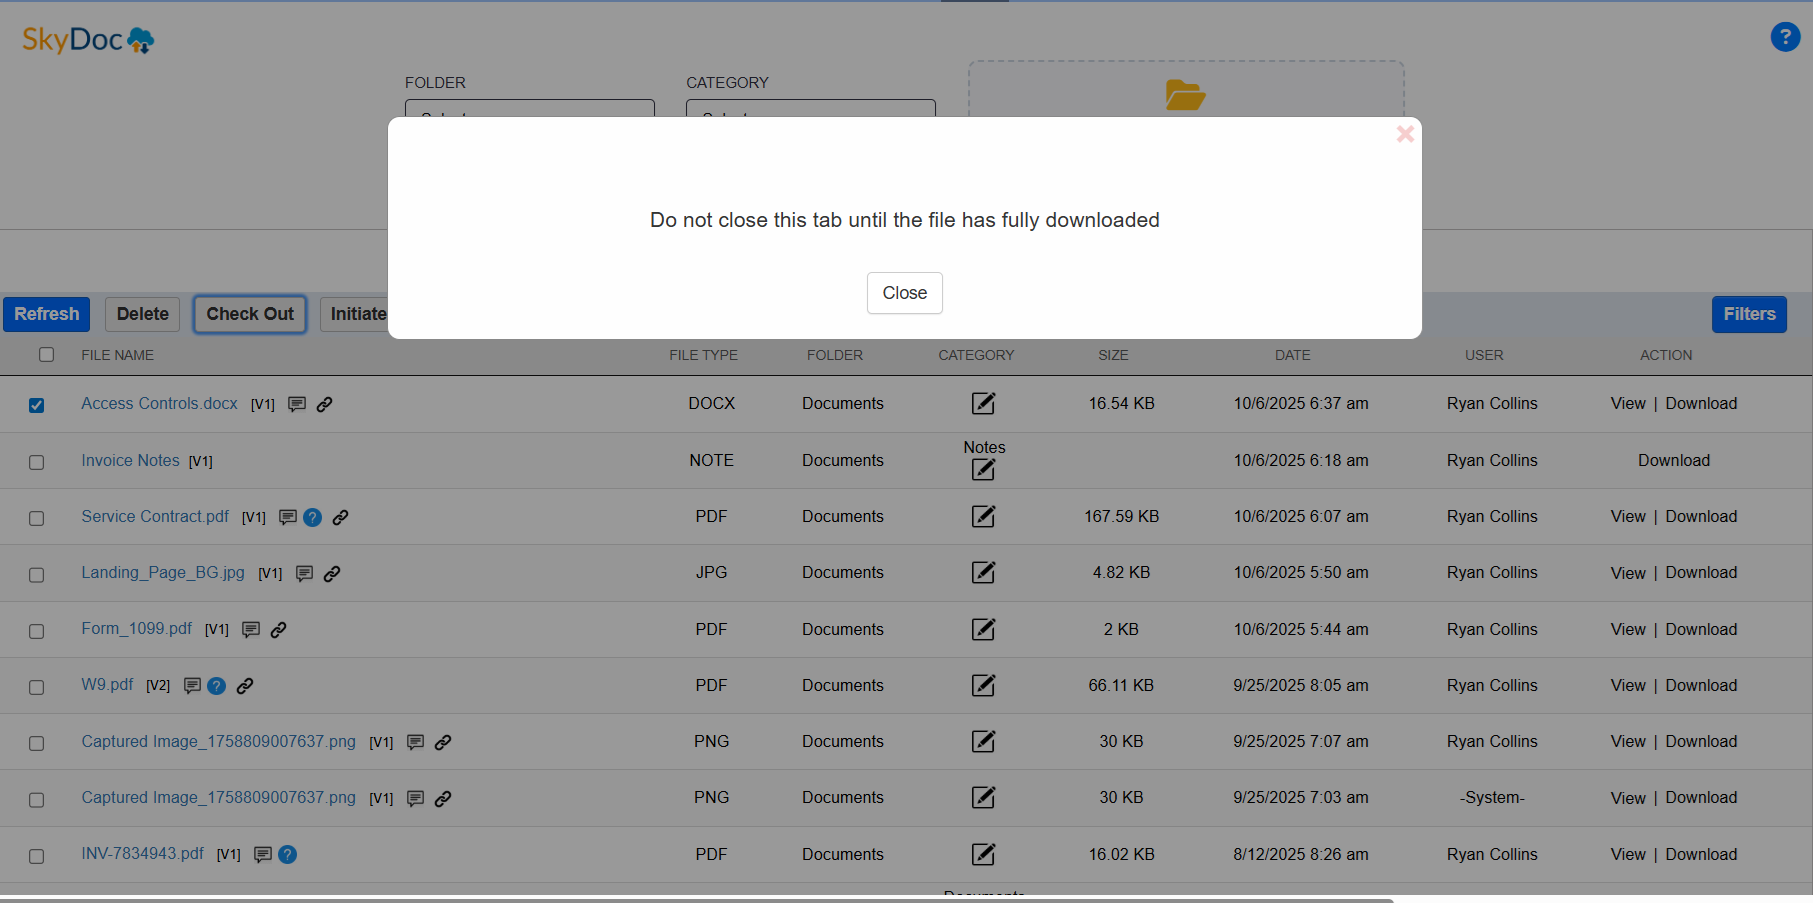
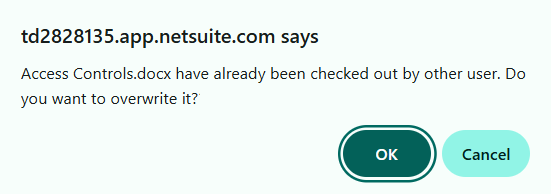
The Check Out feature in the SkyDoc tab is designed to lock a document, signalling to other users that the file is currently in use. This prevents multiple users from uploading the same file simultaneously, reducing the risk of confusion.
Steps to Check Out a File:
Once we click on the Check Out button an alert will appear confirming that the file has been checked out successfully. Click OK to proceed.
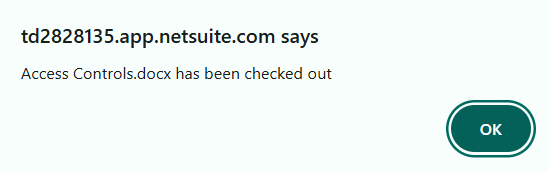
By clicking on the “OK” button we will be able to see an alert in the SkyDoc tab.
The Display List section allows users to view all files uploaded to a record. It includes:
Once the file is checked out, the following changes will occur in the SkyDoc tab:

The Display List section allows users to view all files uploaded to a record. It includes:
Check In Process: To check in the file:
Steps to Check Out a File:
The Display List section allows users to view all files uploaded to a record. It includes:
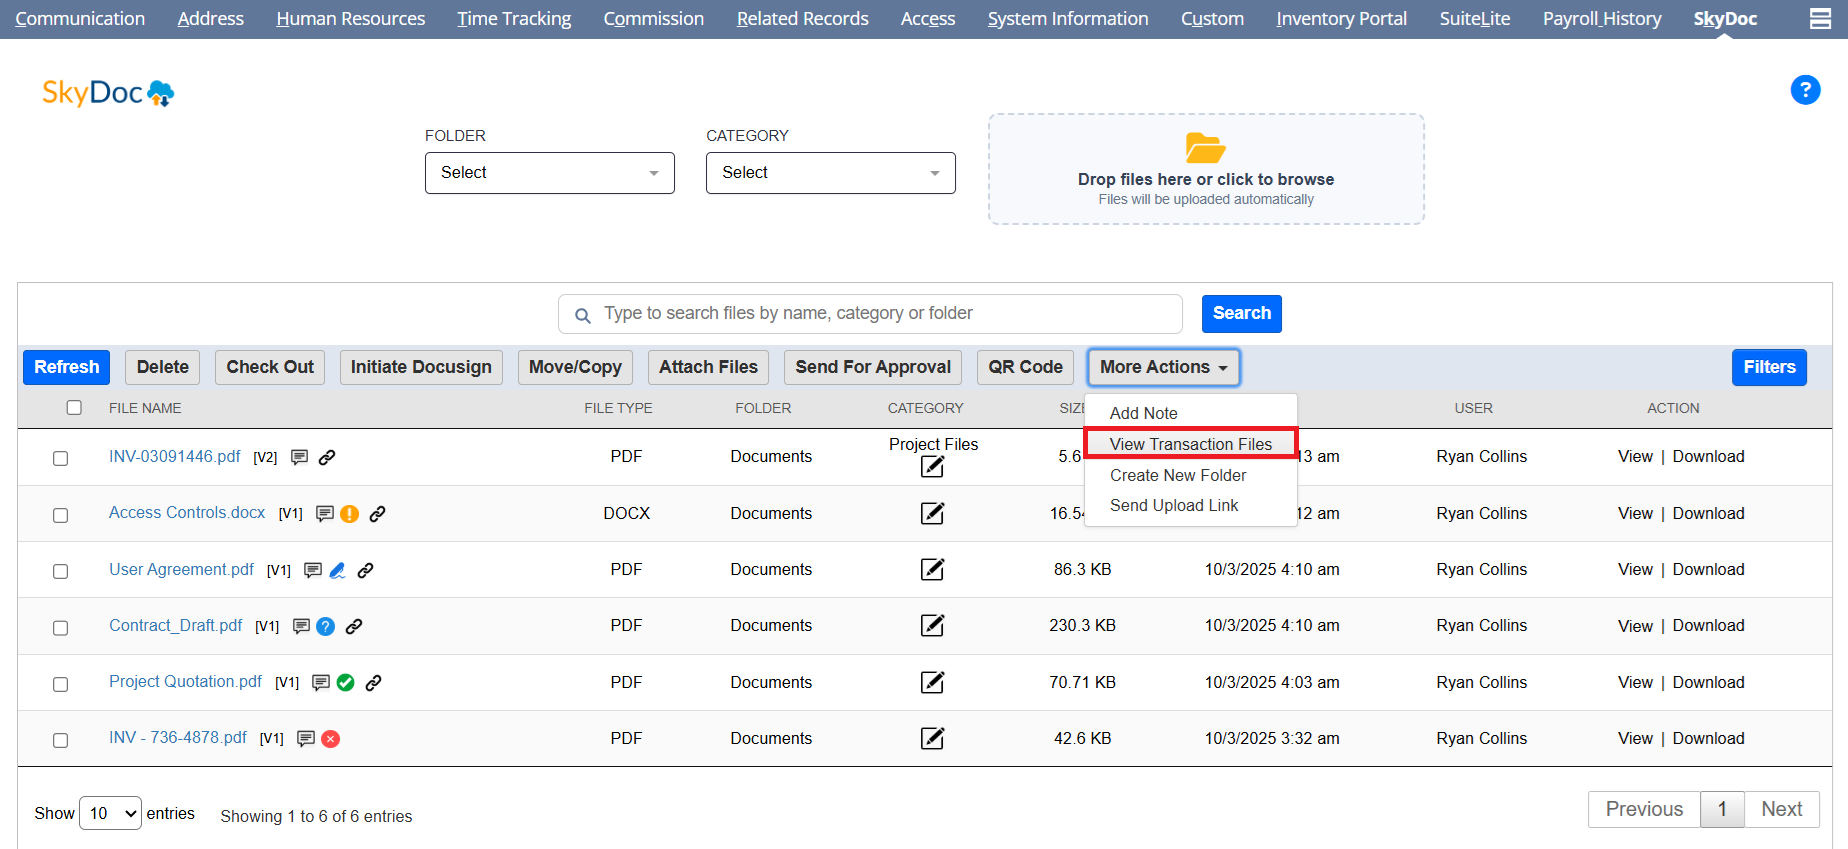
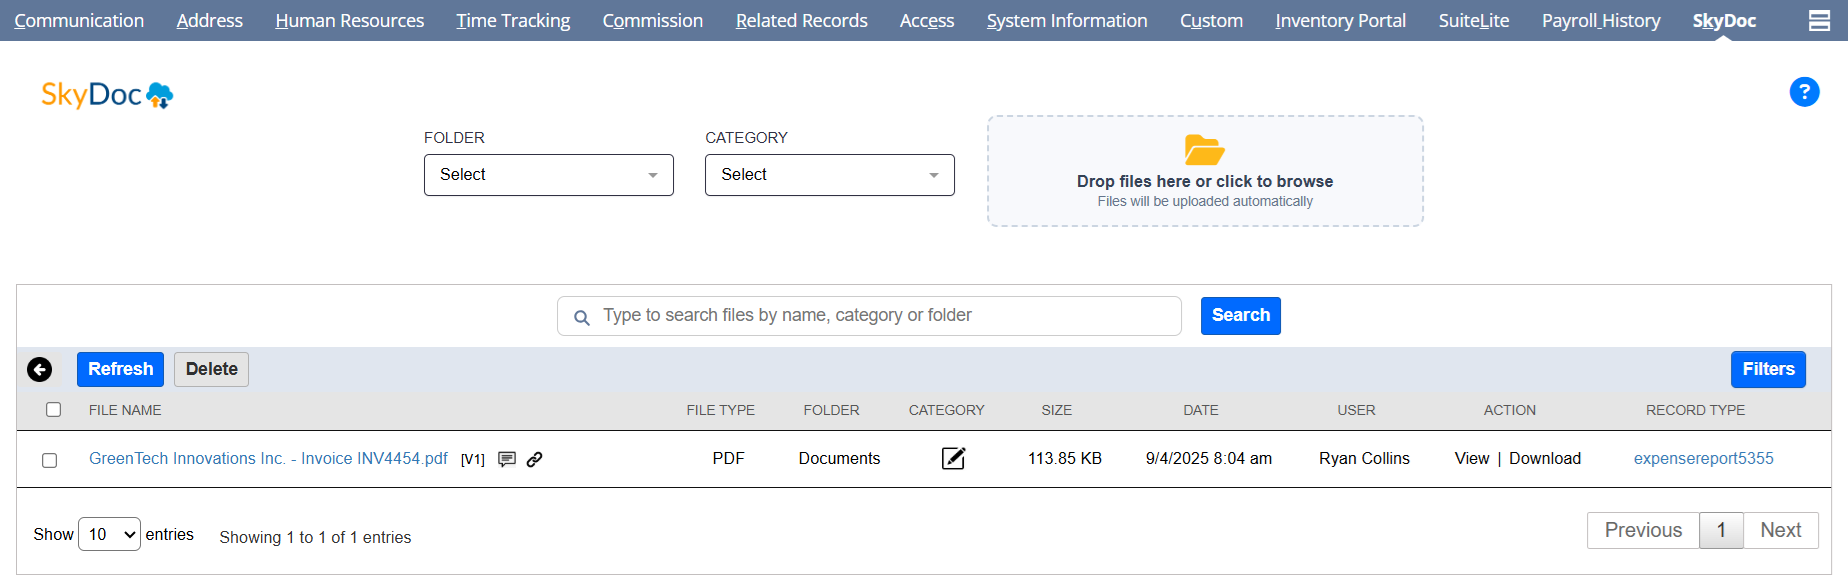
To view the related transactions associated with Transactions and Entity records, simply click the Transaction Files button under the SkyDoc subtab. This will display the relevant transactions linked to the selected records.
The Display List section allows users to view all files uploaded to a record. It includes:
When a file is attached in any Email message sent from any record, then auto upload is performed, and the file is deleted from the NetSuite and transferred to SkyDoc.
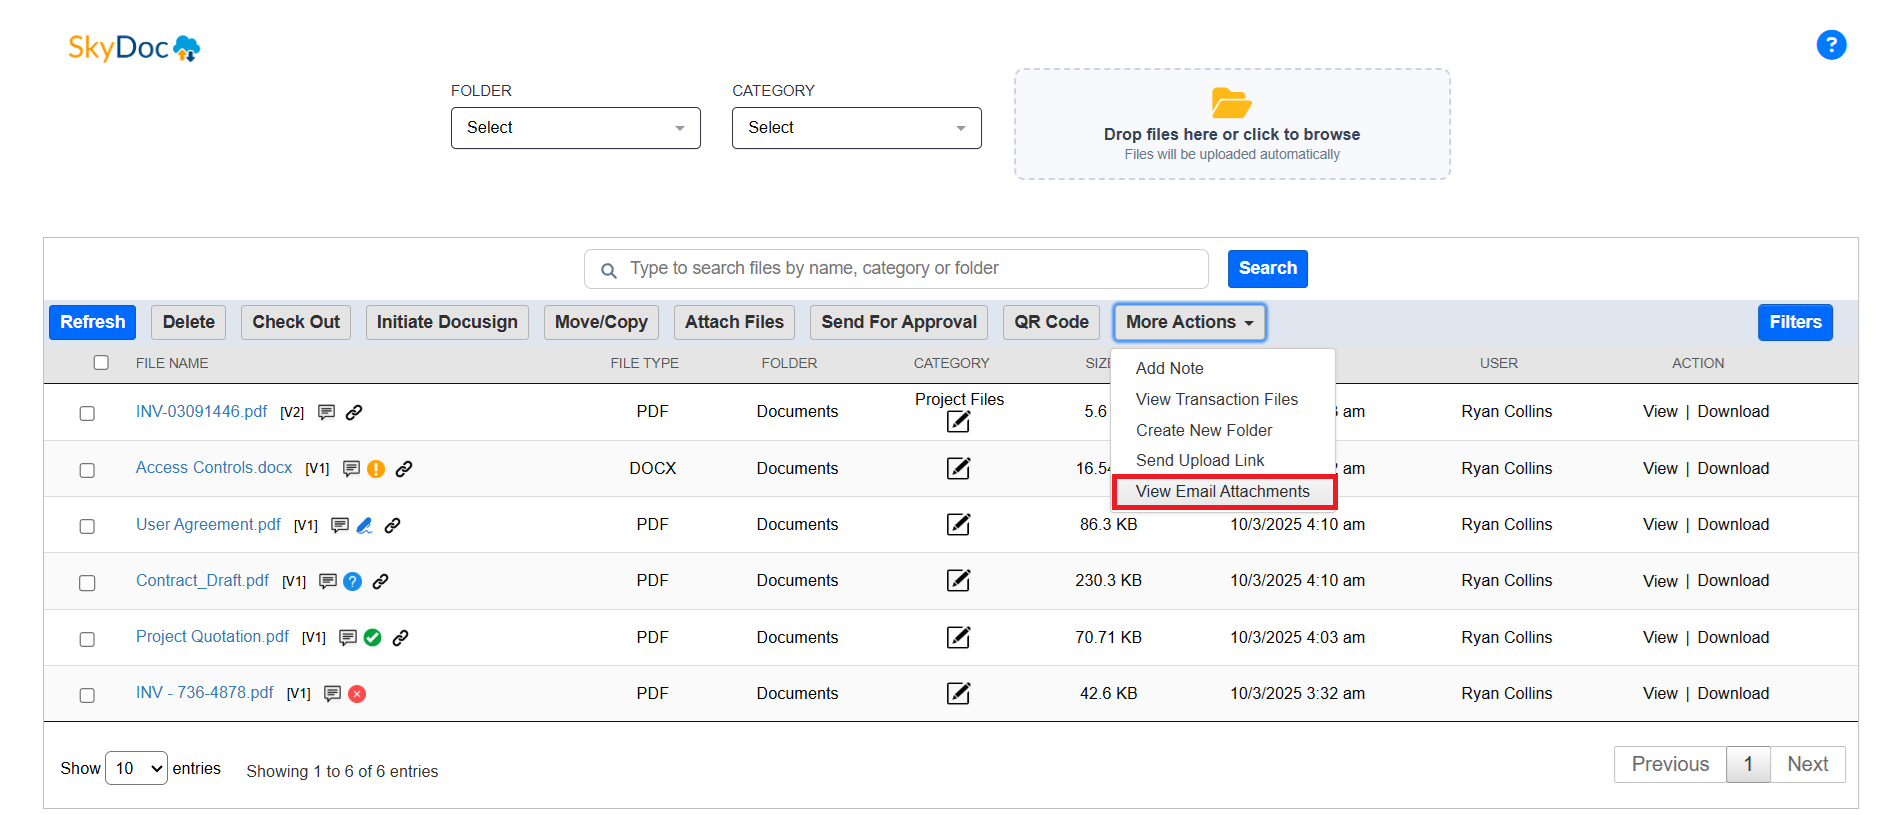
Click on the Message icon in the SkyDoc Display List
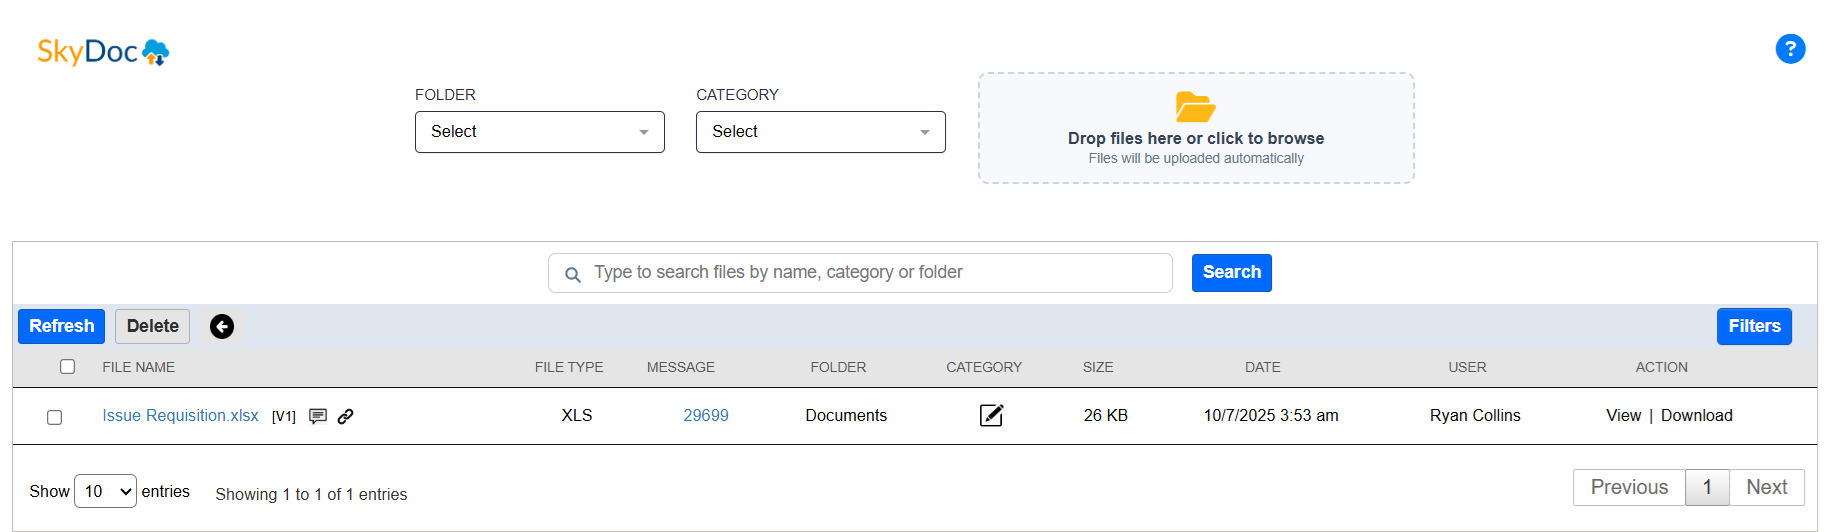
After clicking on the icon, we will be able to see the files attached in the Email messages of that record.
An External user can also upload the files directly to NetSuite using External Email Upload and QR Code.
The Display List section allows users to view all files uploaded to a record. It includes:
The external email upload is the feature that allows users to upload files to SkyDoc.
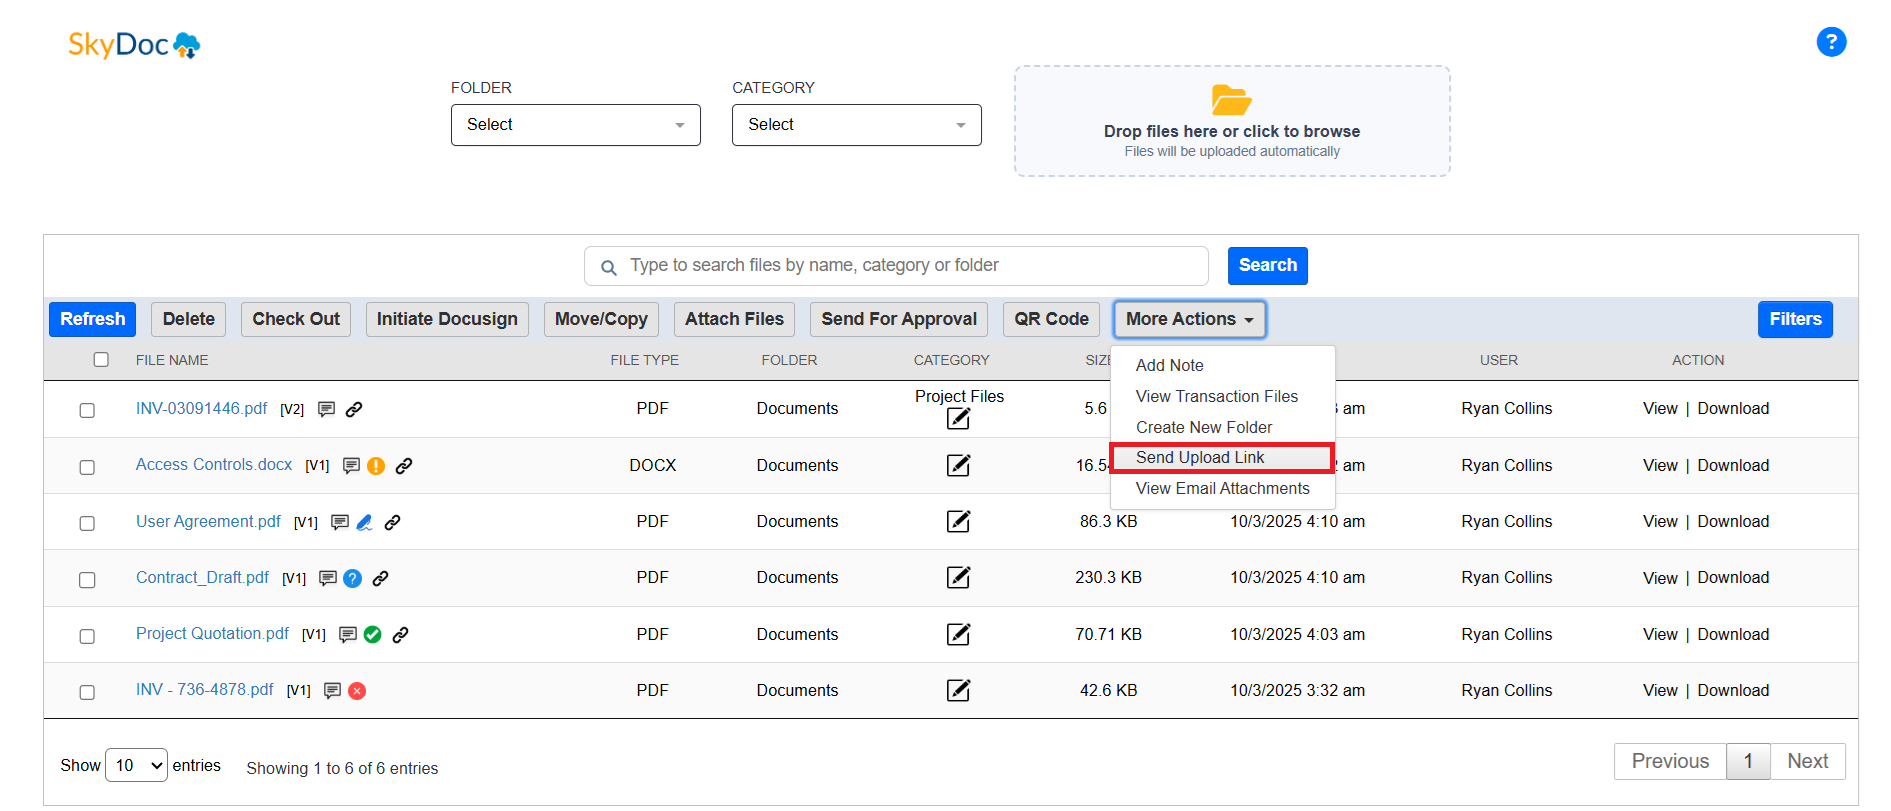
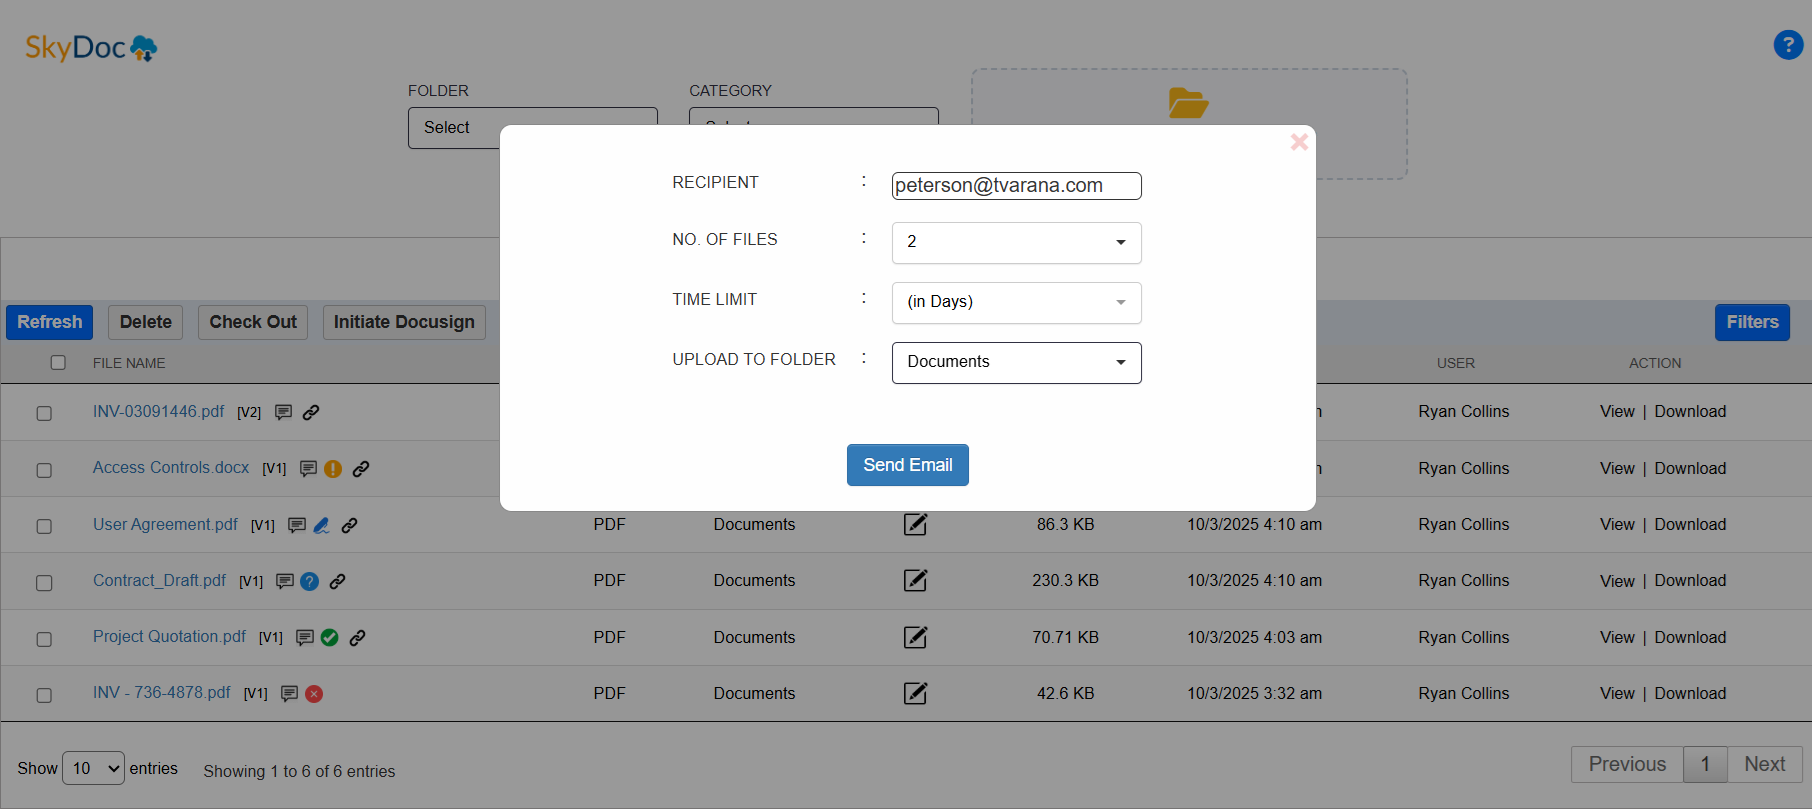
A popup with “email sent successfully” will be displayed after clicking on the send email button.
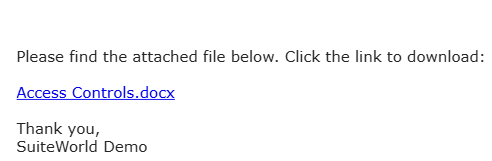
The recipient will receive an email with a Record link and Upload Files link to access to upload the files.
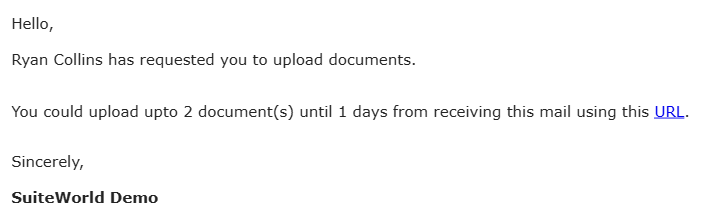
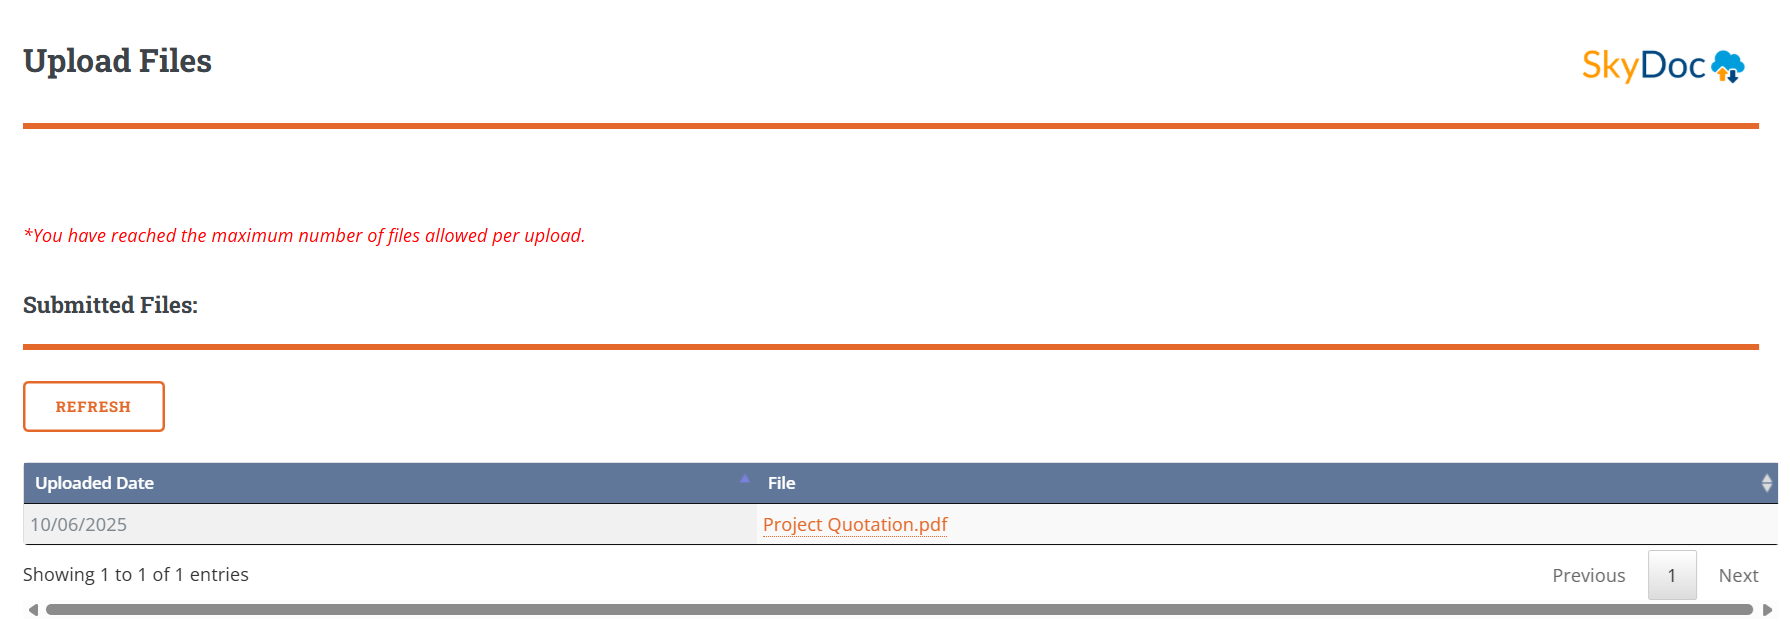
Clicking on the link provided in the email will navigate you to the page as below.

The Display List section allows users to view all files uploaded to a record. It includes:
SkyDoc's QR Code Upload feature allows users to upload files to NetSuite remotely, without needing direct access to the NetSuite. This functionality simplifies file submission from external locations using mobile devices.
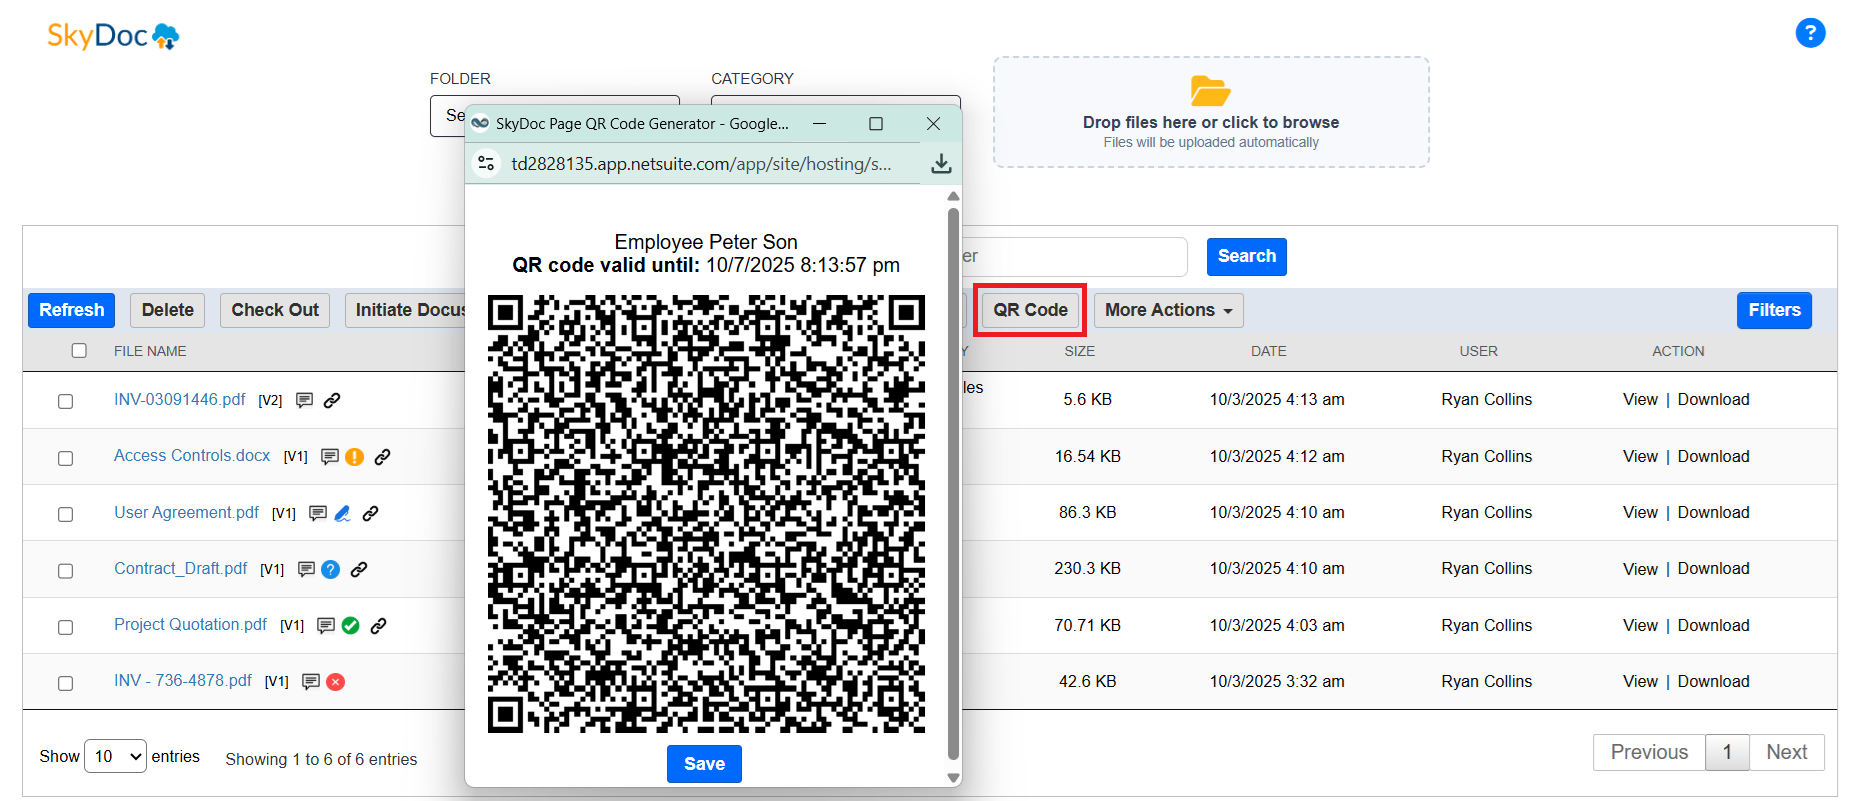

Note: The QR Code and External Email Upload functionalities will work only when Lambda function is configured.
The Display List section allows users to view all files uploaded to a record. It includes:
SkyDoc integrates seamlessly with DocuSign to facilitate electronic signatures within NetSuite. This integration streamlines workflows, making document signing efficient and secure. DocuSign integration allows users to send documents stored in SkyDoc for electronic signature, track the signing process, and automatically save signed documents back into SkyDoc. This eliminates the need for manual uploads and ensures signed documents are stored in the appropriate NetSuite records.
Sending a Document for Signature
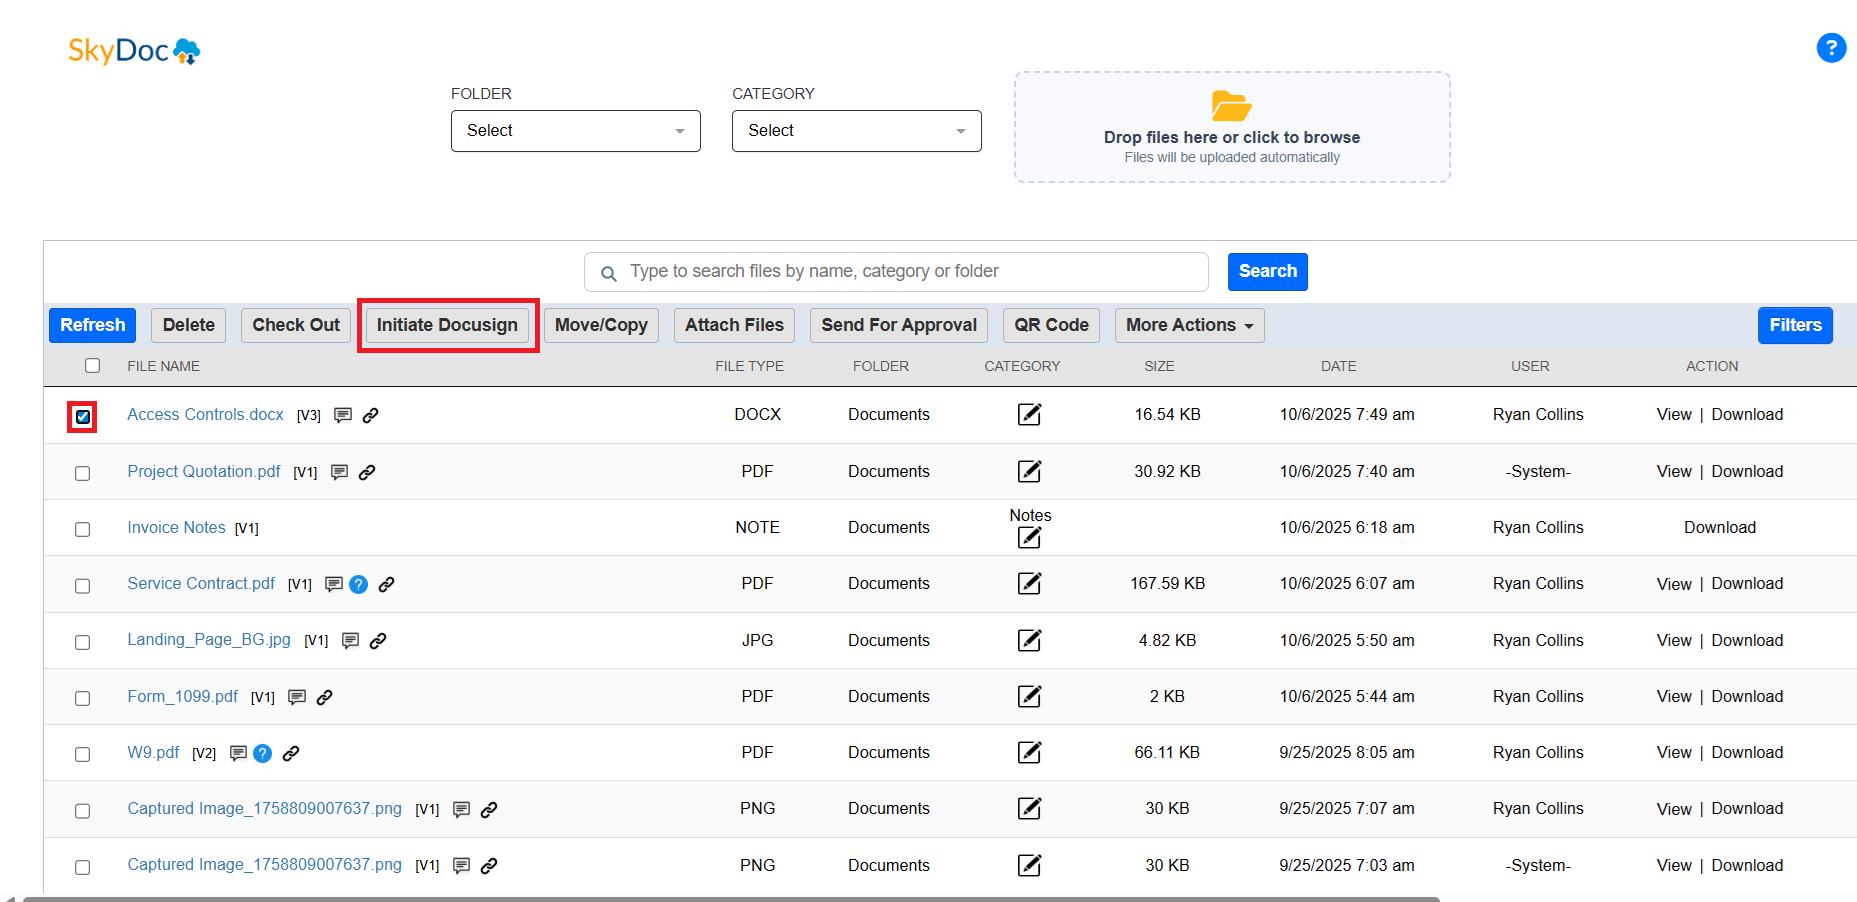
4. Click on the “Initiate DocuSign” button.
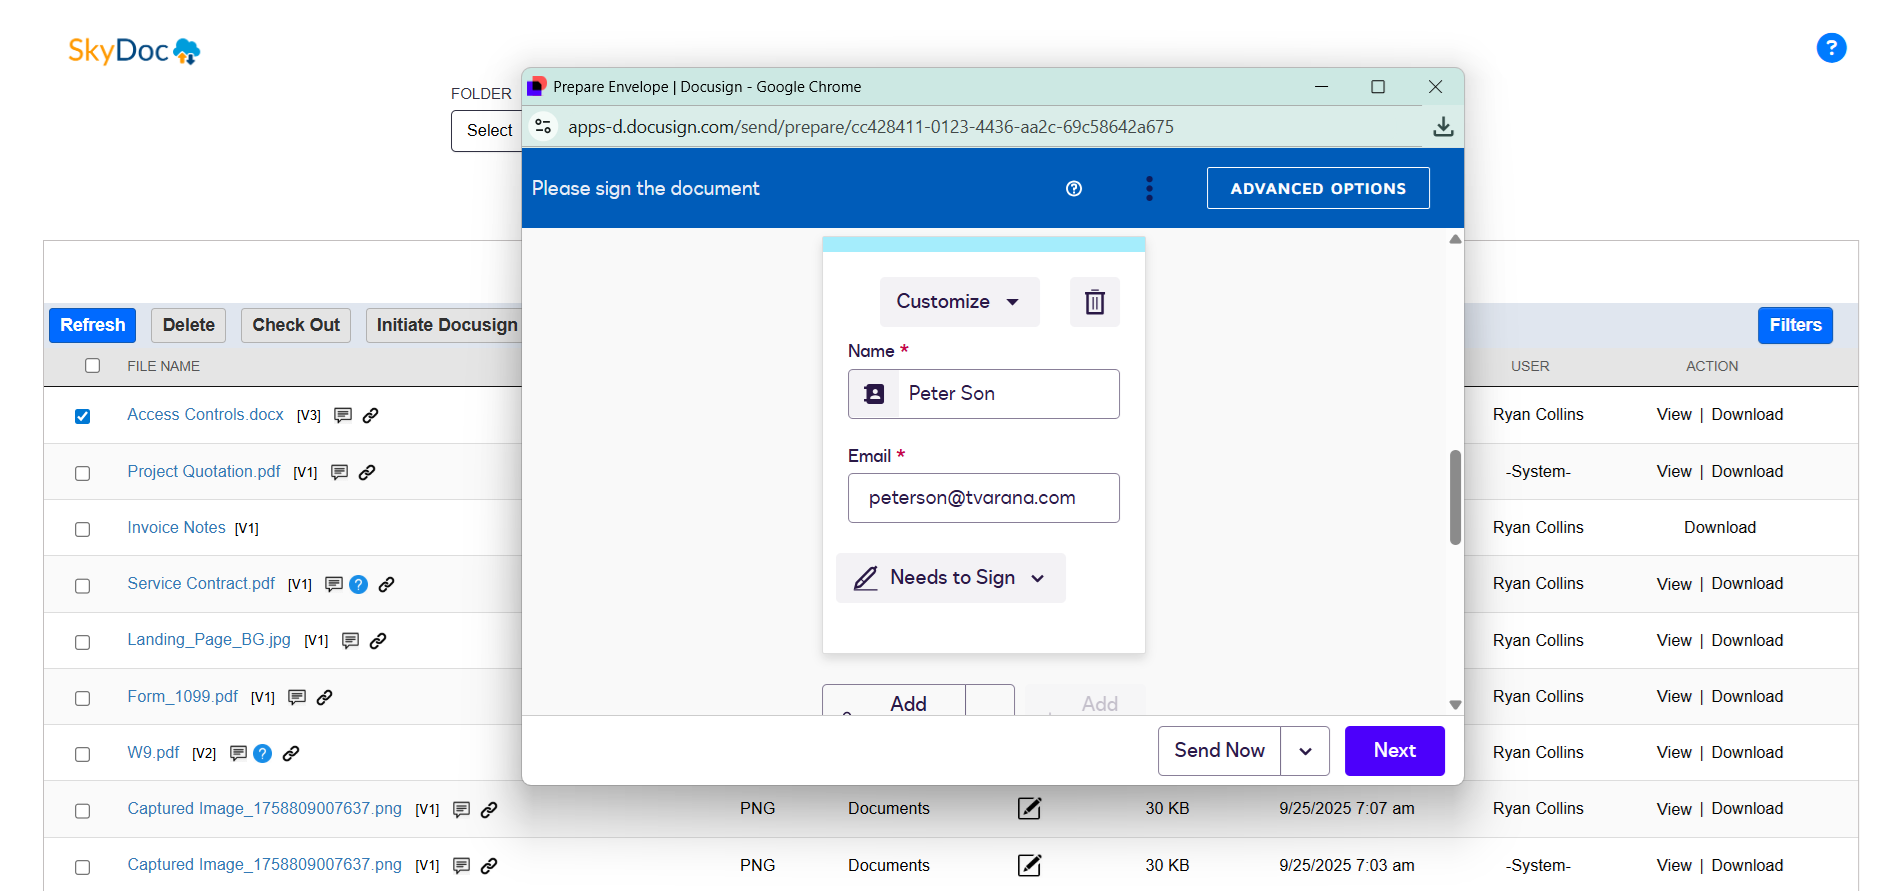
5. In the DocuSign pop-up window, specify:
a. Recipients: Add email addresses of the signers.
b. Message: Customize the email message sent to recipients.
c. Click on the Next button.
d.Add the required fields (signature, initial, date signed etc) to the Document as shown below and click on Send.
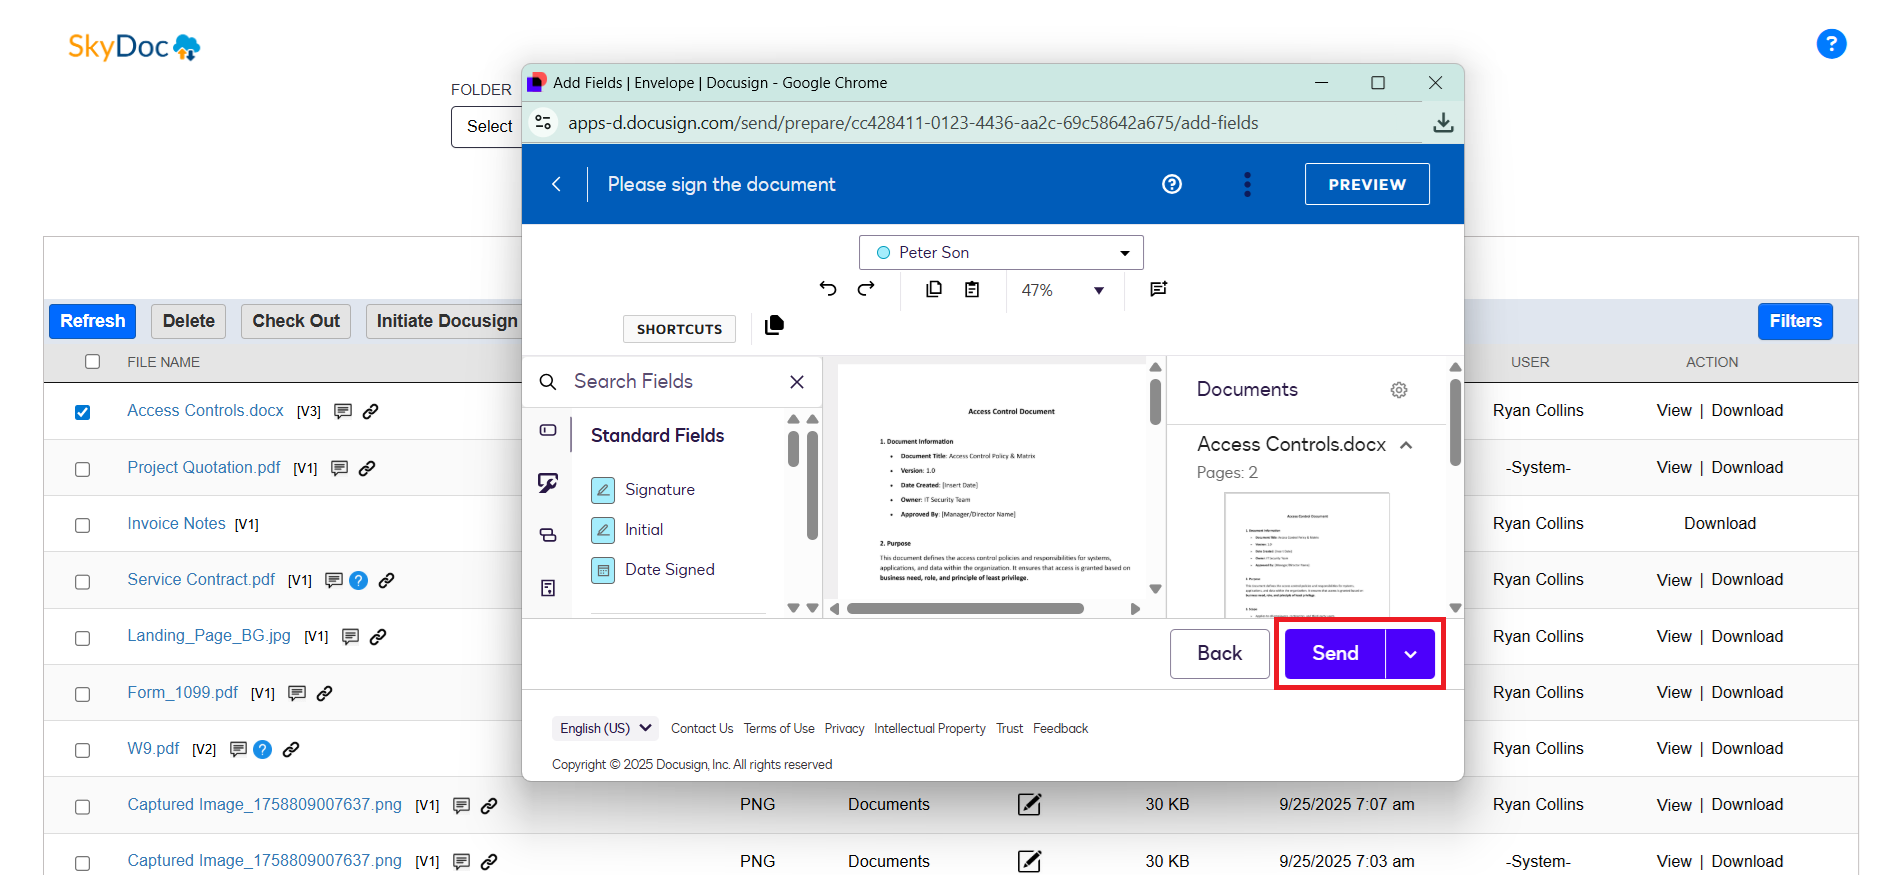
6. Upon clicking Send an email will be sent to all recipients listed in the DocuSign window.
The Display List section allows users to view all files uploaded to a record. It includes:
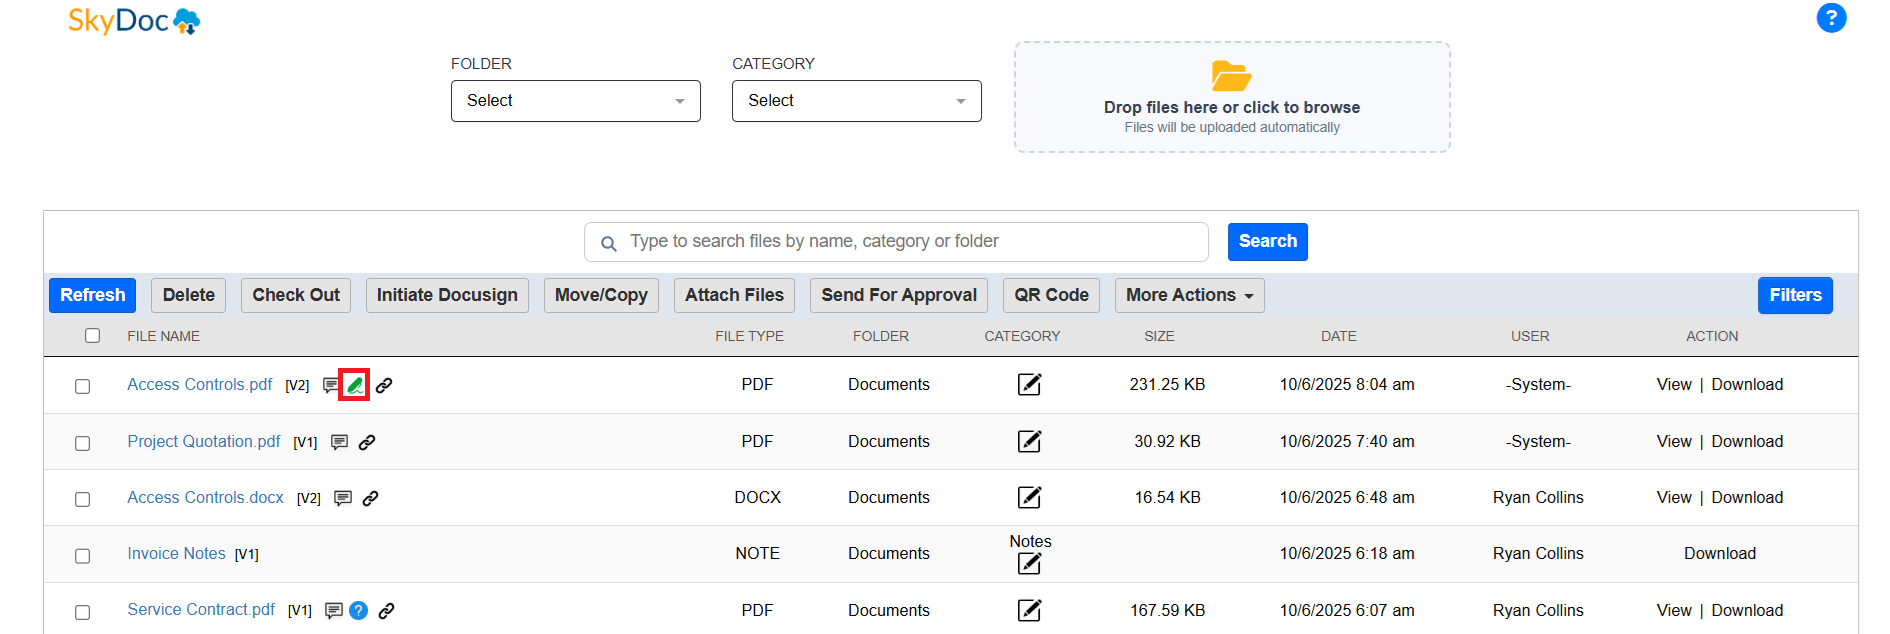
After sending the document, the status can be tracked in the SkyDoc tab under the “DocuSign Status” column.
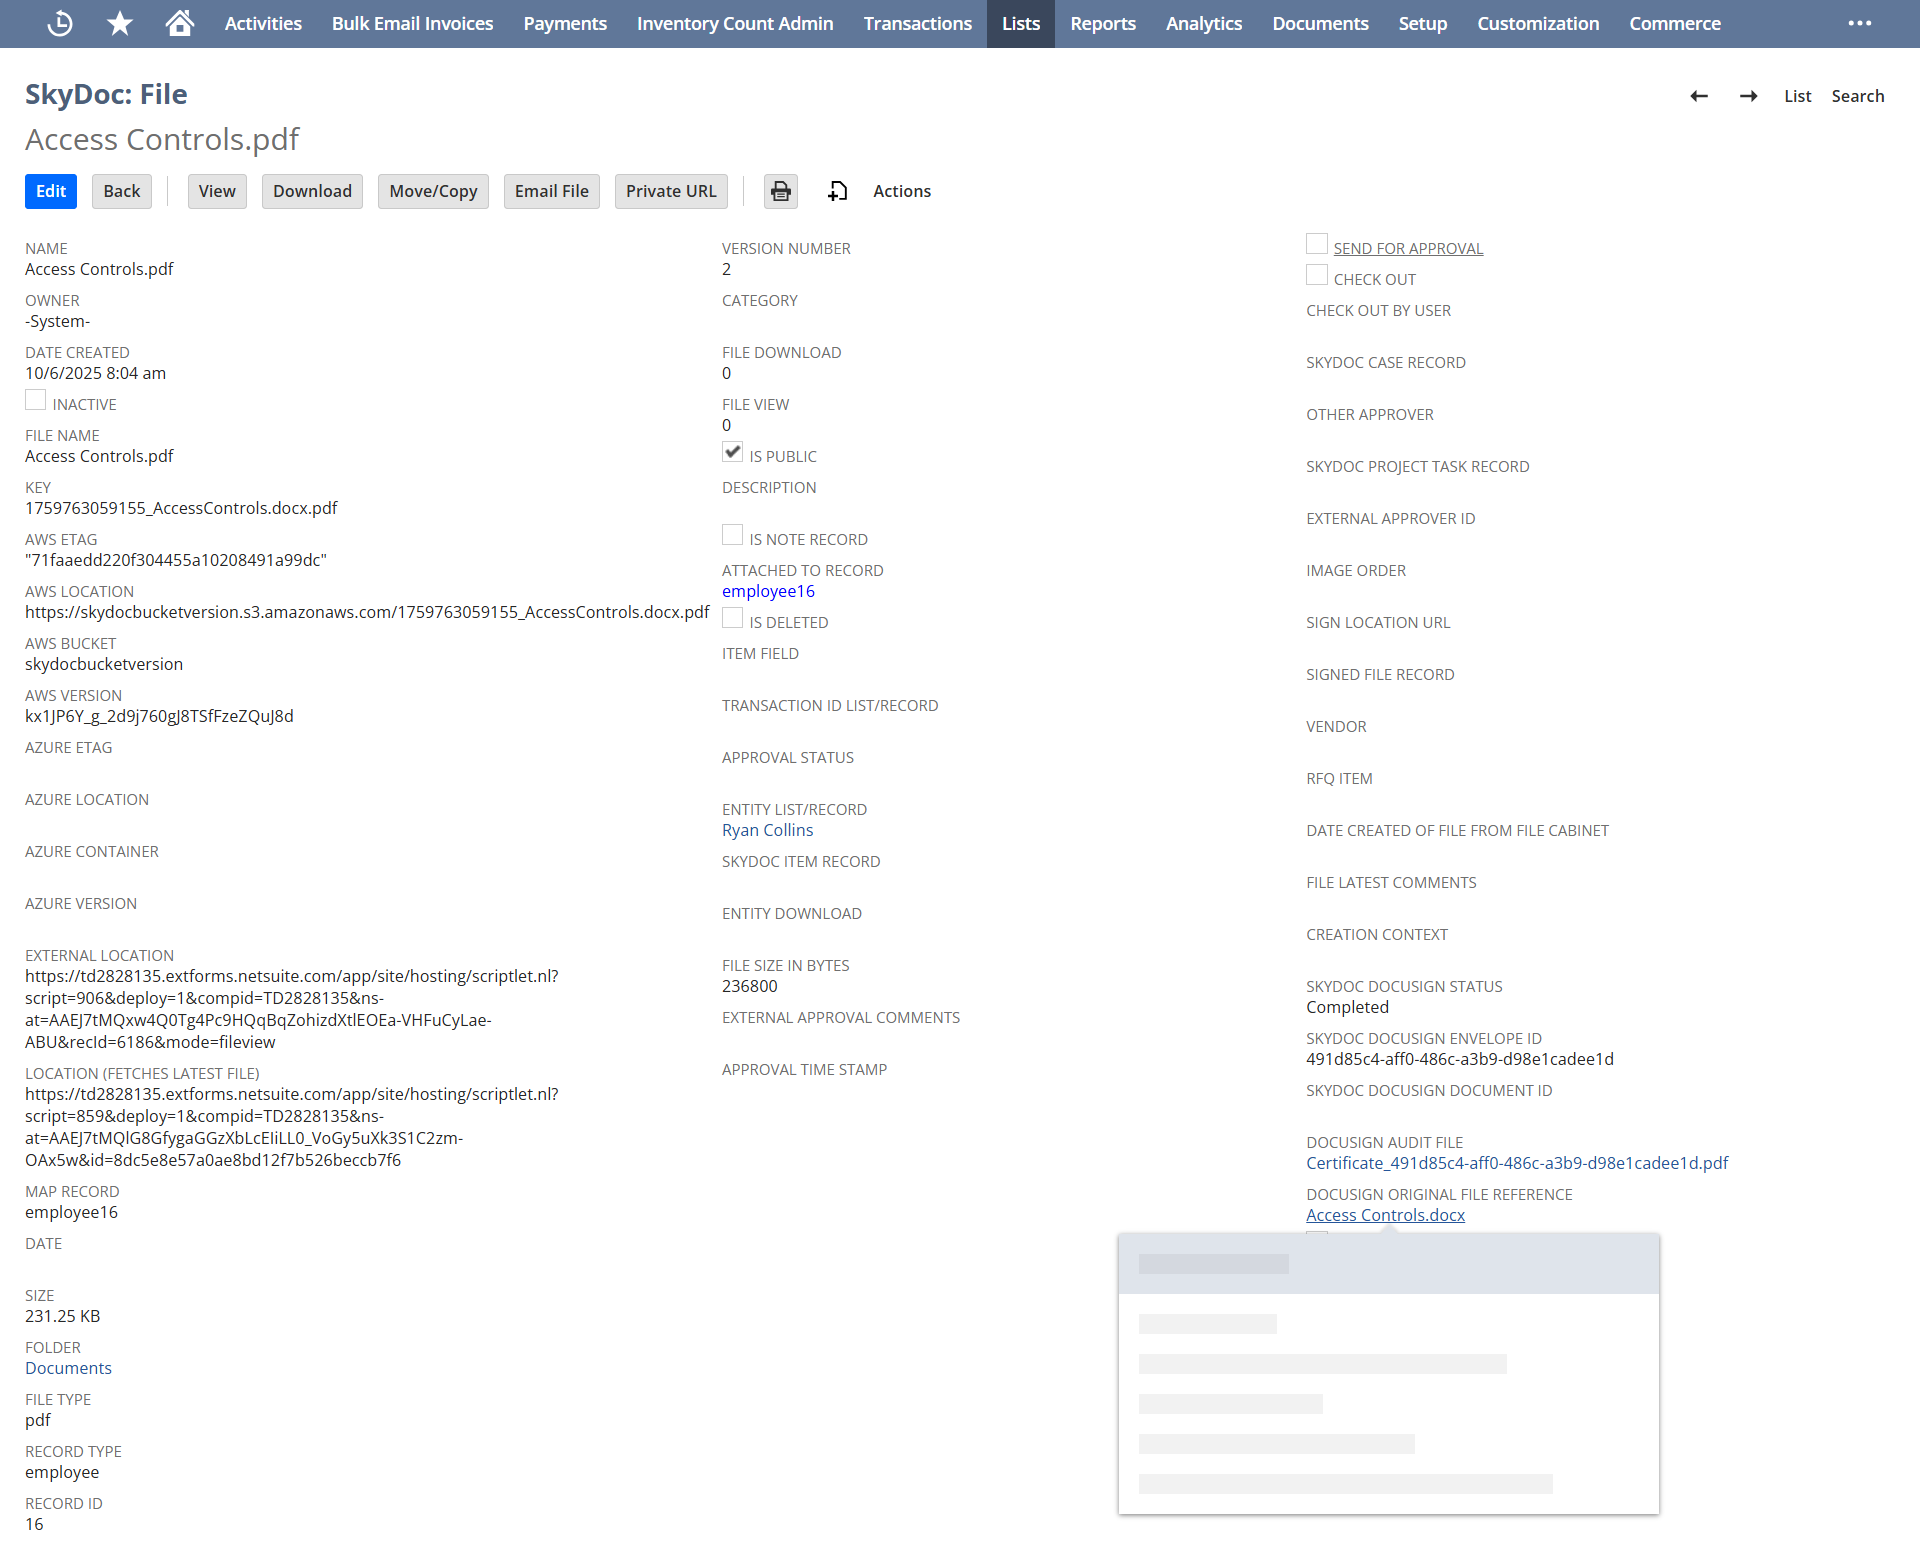
Retrieving Signed Documents
The Display List section allows users to view all files uploaded to a record. It includes:
The Display List section allows users to view all files uploaded to a record. It includes:
Edit
View

Download
Move/Copy
Public URL


Sending Emails with SkyDoc Files
SkyDoc allows you to attach files in emails through two convenient options:
Sending Emails via the “Email File” Button in SkyDoc File Record
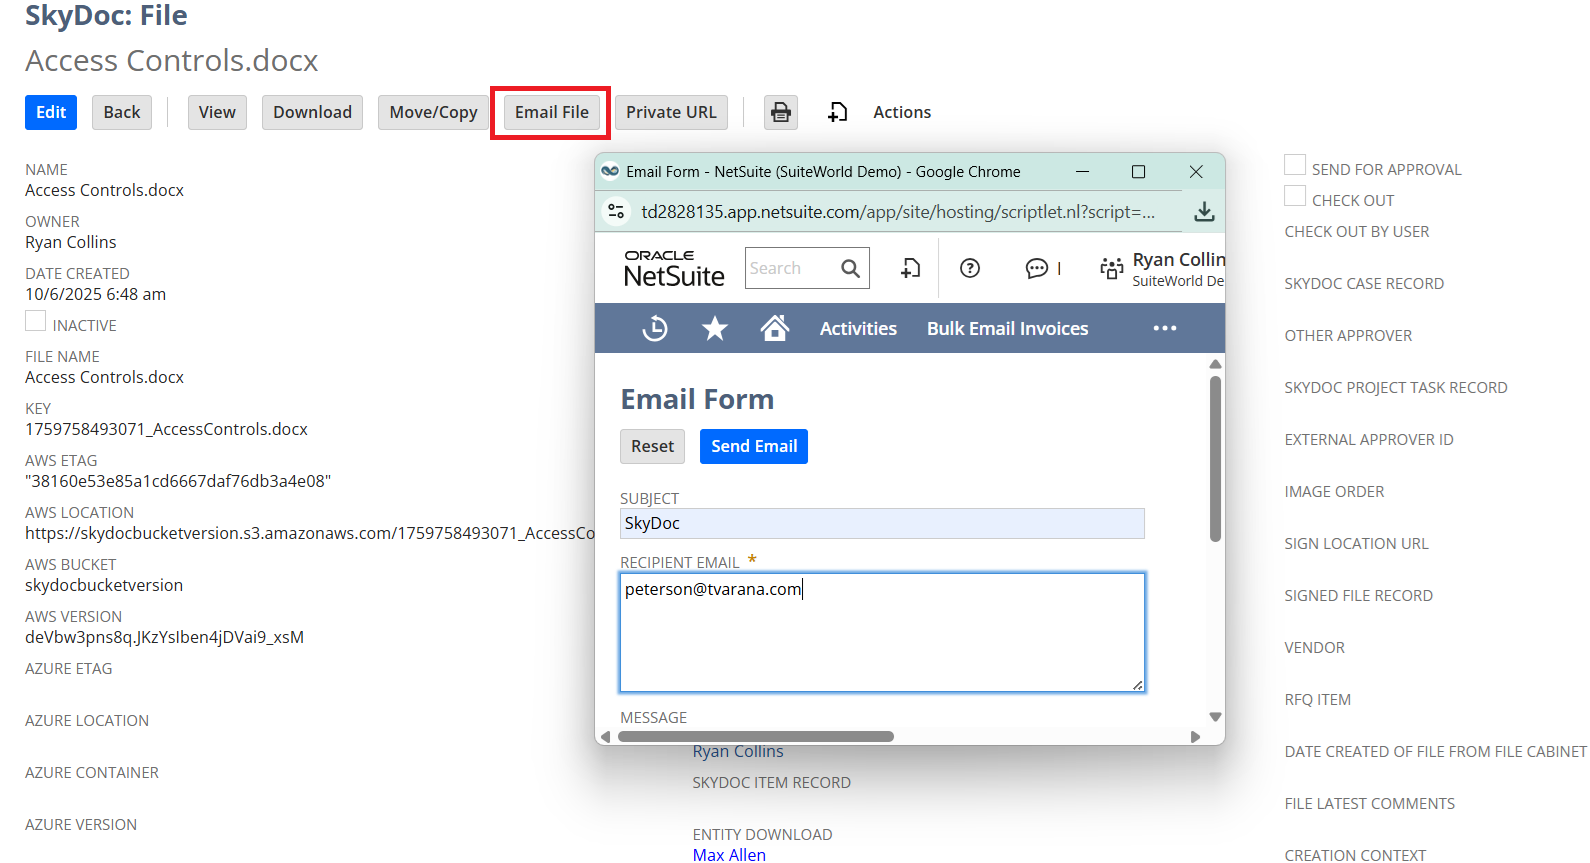
○ To use an email template, check the “Enable Email Template” box.
○ Select the desired scripted template from the dropdown menu.
The Display List section allows users to view all files uploaded to a record. It includes:
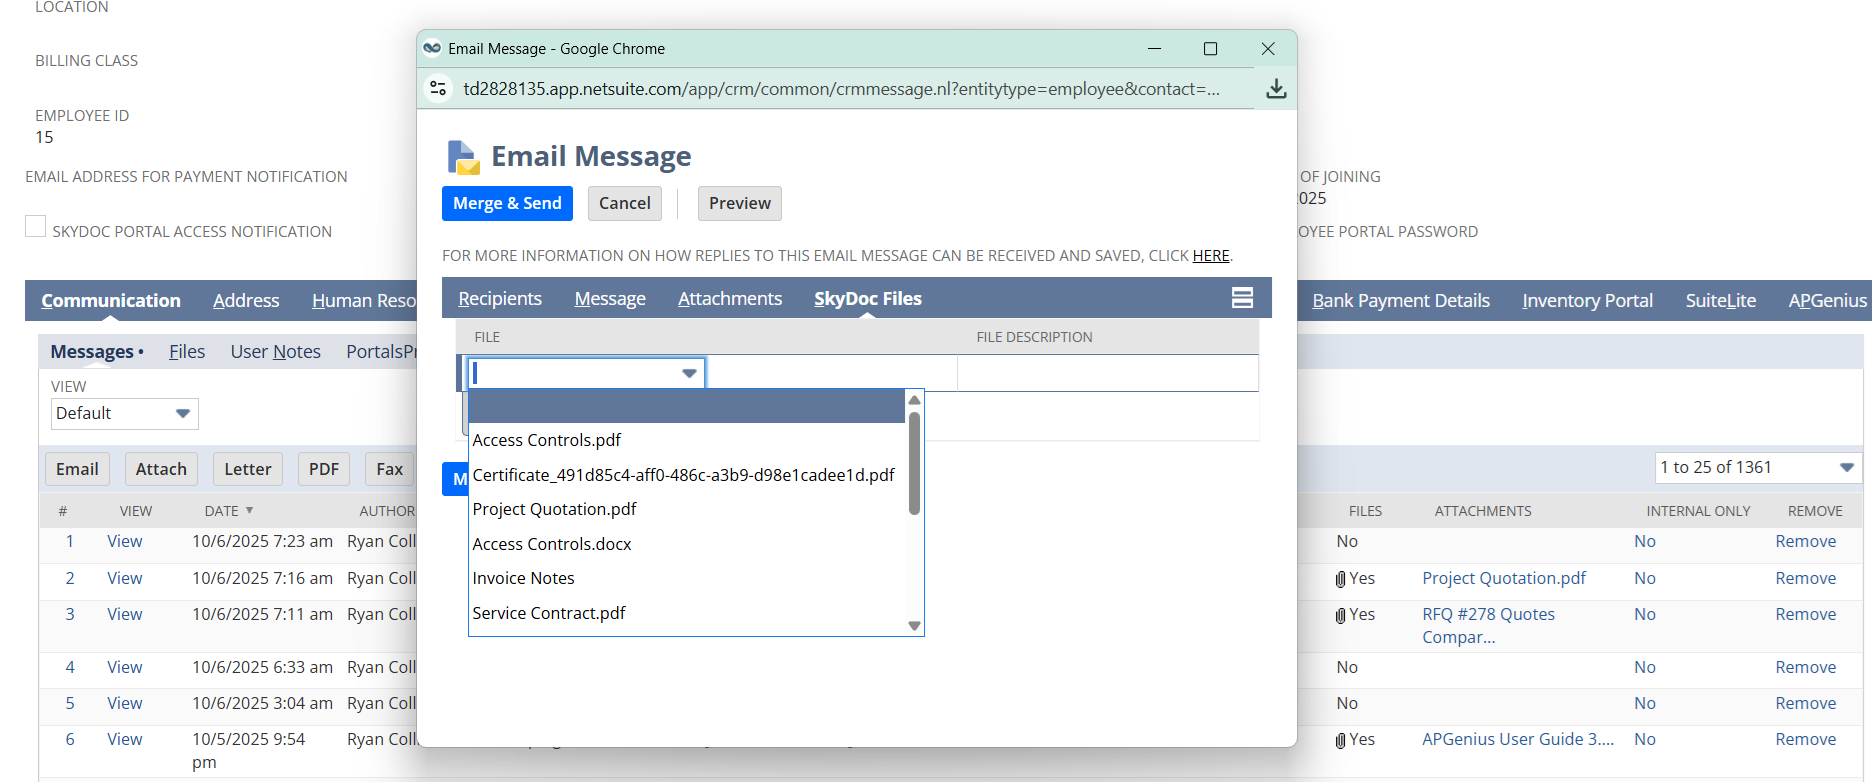
Sending Emails with SkyDoc Attachments
Follow these steps to send an email with SkyDoc file attachments from the Communication subtab:
Access the Communication Subtab
SkyDoc Setup
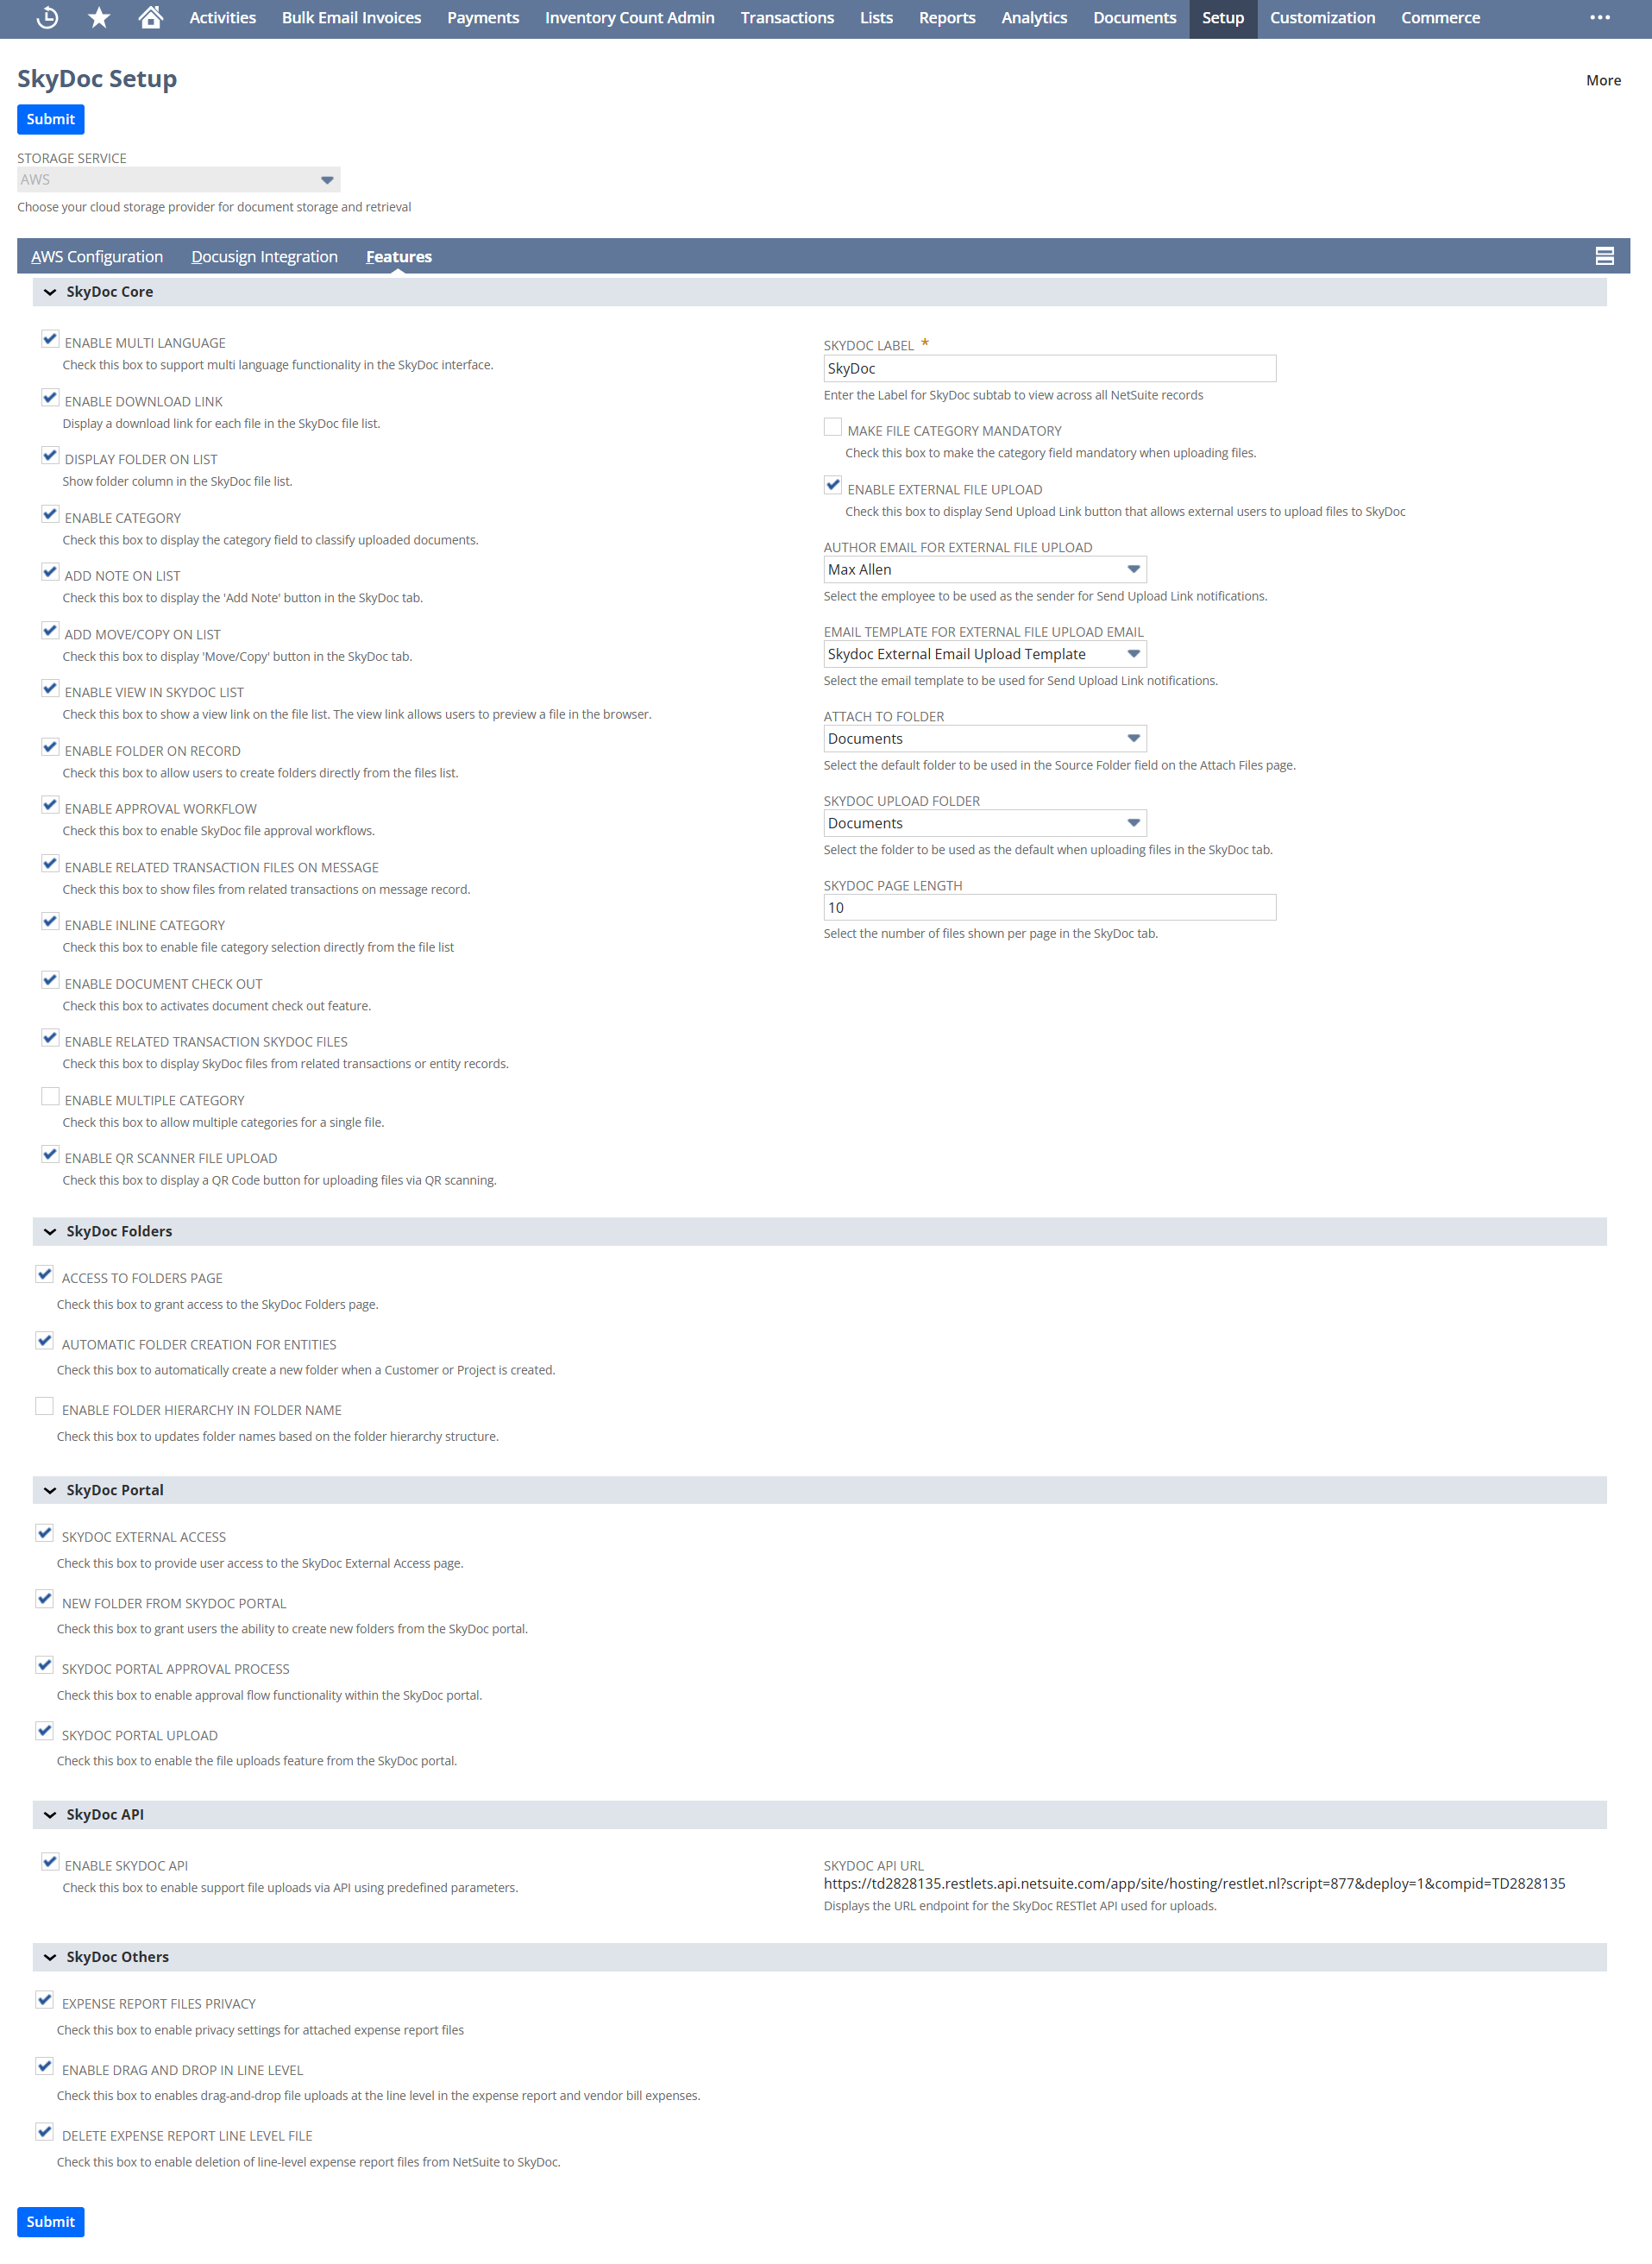
Navigate to Setup > SkyDoc > SkyDoc Setup
The SkyDoc Setup Page is a centralized configuration screen for managing the app's features.
Here's a detailed overview of what the setup page offers:
Storage Service Configuration
Storage Service: This dropdown shows the storage service used for SkyDoc (AWS or Azure)
SkyDoc Label: This field allows you to set a custom label for the SkyDoc service.
Enable Multi Language: Setting this field enables SkyDoc's Multi-language functionality.
Expense Report Files Privacy: Setting this field enables the Expense report files privacy functionality.
Enable Download Link: Setting this field enables the download link to be seen in the SkyDoc display list.
Display Folder on List: Setting this field enables the folder column to be displayed in the list of files under SkyDoc display list.
Enable Category: Setting this field enables the category dropdown to be seen in the SkyDoc Upload & display list.
Add Note on List: Setting this field enables the "add note" button to be seen in the SkyDoc display list.
Add Move/Copy on List: Setting this field enables the "move/copy" button to be seen in the SkyDoc display list.
SkyDoc External Access: Setting this field enables files to be uploaded externally via SkyDoc Portal.
Enable Drag and Drop in Line Level: Setting this field enables users to upload files directly at the line-item level via drag-and-drop (applies to expense reports and bill by default)
Access to Folders Page: Setting this field enables access for SkyDoc Folders page.
Enable View in SkyDoc List: Setting this field enables the View Column in the SkyDoc tab to view SkyDoc files in View mode.
Enable Folder on Record: Setting this field enables you to create a folder from the record itself.
Enable Approval Workflow: Setting this field enables the approval flow.
Automatic Folder Creation for Entities: Setting this field enables the creation of folders automatically when a new Customer or Project is created.
Enable Related Transaction Files on Message: Setting this field enables to display related transaction files on message.
Enable Inline Category: Setting this field enables setting the category for an SkyDoc File record in the SkyDoc tab.
Enable Folder Hierarchy in Folder Name: Setting this field enables to upload the folder name as per the Hierarchy.
New Folder from SkyDoc Portal: Setting this field enables users to create folders directly from the SkyDoc portal. This feature simplifies folder management by giving users the flexibility to organize their files seamlessly within the portal interface.
Enable Document Check Out: Setting this field enables the Document Check Out feature for SkyDoc.
Enable Related Transaction SkyDoc Files: Setting this field enables to display Transaction Related Record files on the Transaction and Entity Record.
Enable Multiple Category: Setting this field enables users to select multiple categories during file uploads under SkyDoc, as specified in the REQUIRED NUMBER OF CATEGORIES field.
Note: The "REQUIRED NUMBER OF CATEGORIES" field will only appear after enabling the "MAKE FILE CATEGORY MANDATORY" checkbox.
Delete Expense Report Line Level File: Setting this field enables delete expense reports line level files.
SkyDoc Portal Approval Process: Setting this field enables the approval process in SkyDoc portal.
SkyDoc Portal Upload: Setting this field enables the upload option in the SkyDoc portal.
Make File Category Mandatory: Setting this field enables making categories mandatory while uploading the files in the SkyDoc drag and drop box.
When this checkbox is checked you can view "REQUIRED NUMBER OF CATEGORIES" here you can enter the number of categories you want to make mandatory.
When this check box is enabled you need to select the category while uploading the file in drag and drop box or else it will throw an error message "Please select at least 1 category".
Enable QR Scanner File Upload: Setting this field enables users to upload files using a QR code.
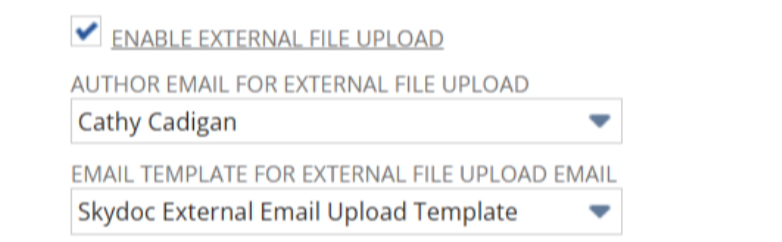
Enable External File Upload: Setting this field enables users to upload files to NetSuite externally.
Enable SkyDoc API: Setting this field enables SkyDoc API functionality.
SkyDoc API URL: This field displays the API URL for SkyDoc integration.
DocuSign Integration
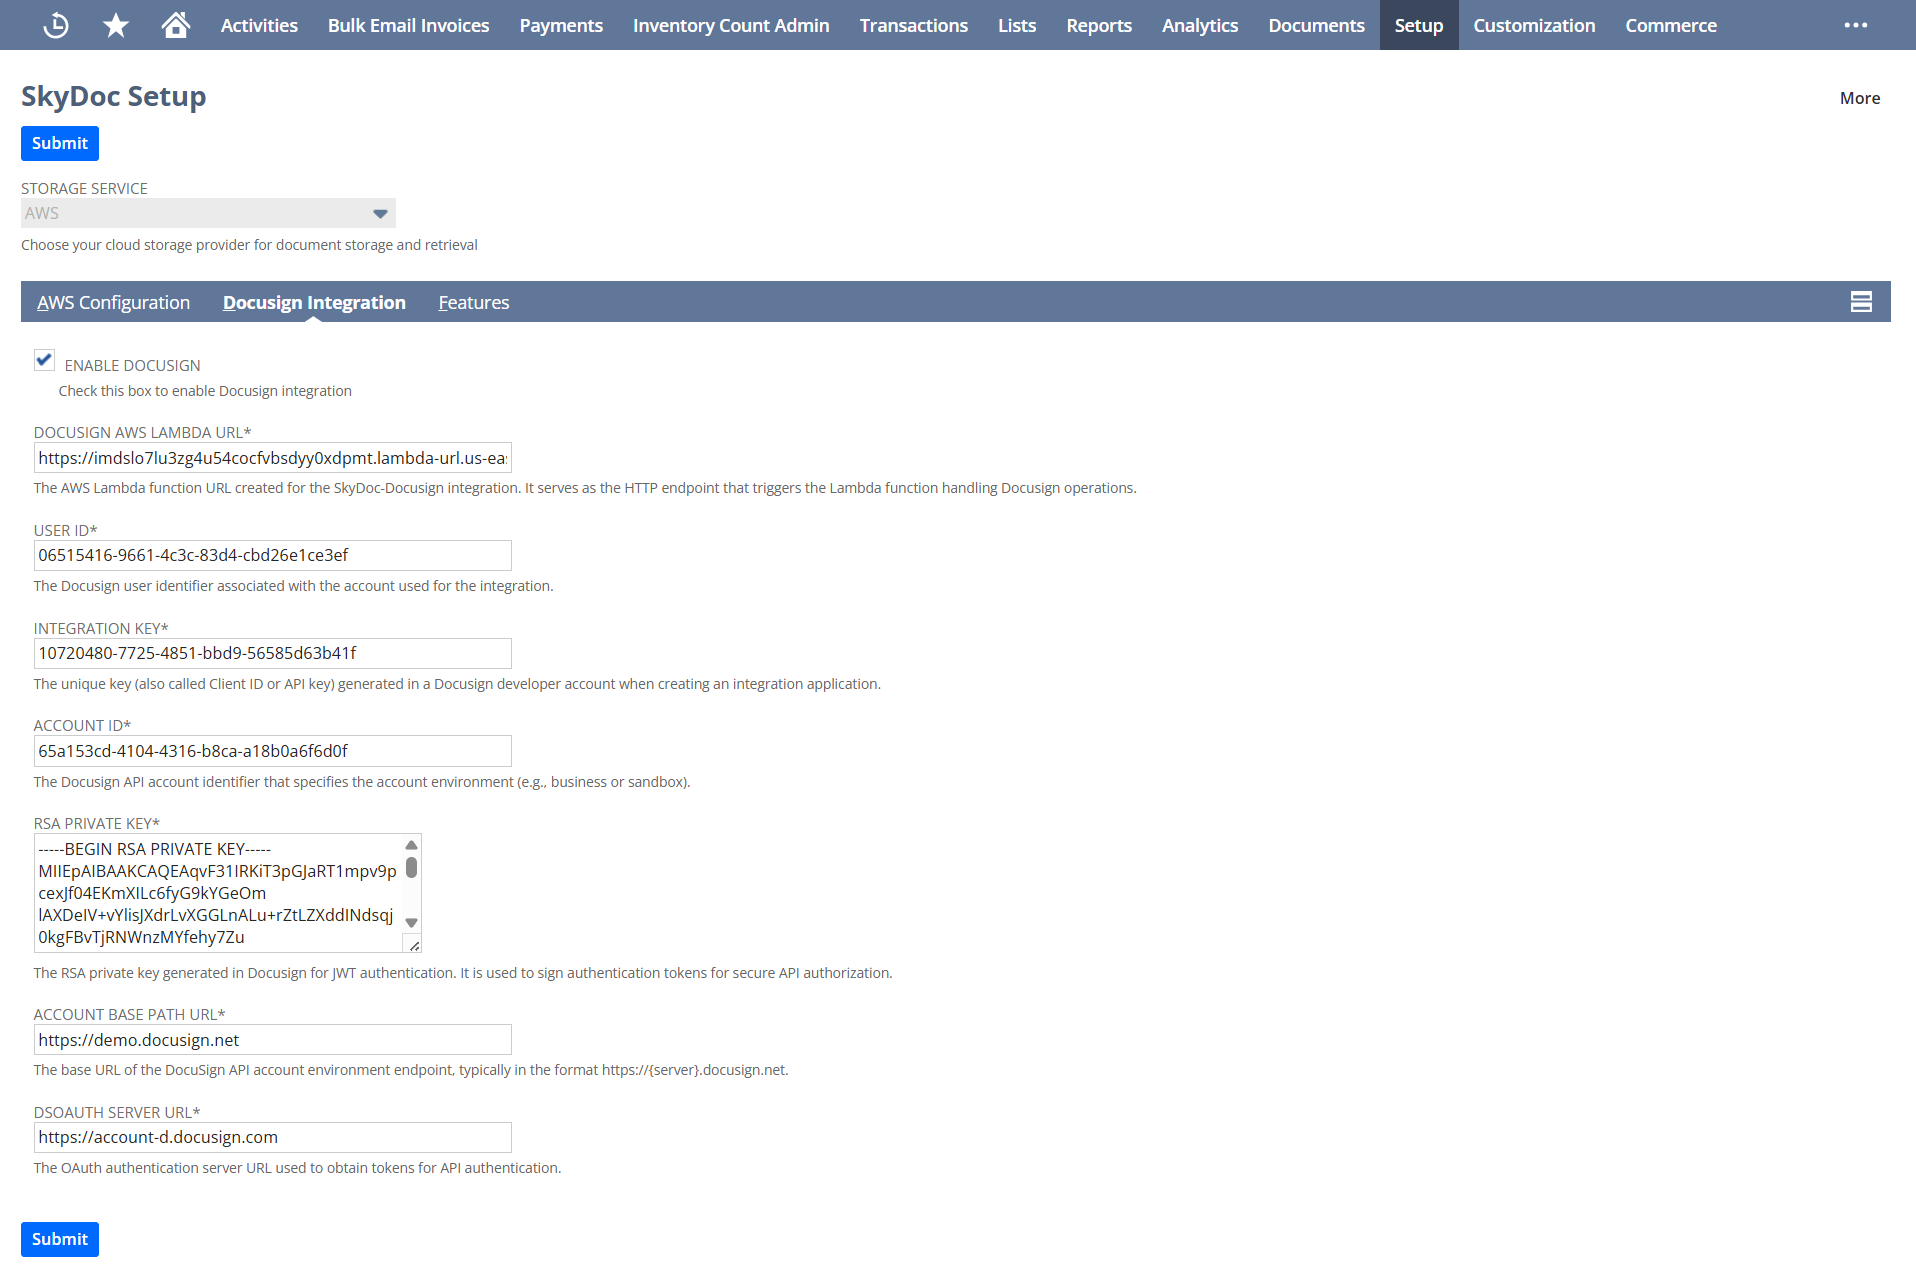
Enable DocuSign: Setting this field enables users to send documents for electronic signature directly through SkyDoc.
DocuSign AWS Lambda URL: Provide the API Gateway endpoint URL linked to the AWS Lambda function. This enables integration with backend services for processing uploaded files.
User ID: This field displays the unique user identifier for SkyDoc integration.
Integration Key: This field contains the integration key required for SkyDoc API authentication.
Account ID: This field displays the account identifier for SkyDoc services.
RSA Private Key: This field contains the RSA private key used for secure authentication with SkyDoc services.
Account Base Path URL: This field displays the base URL path of the DocuSign account.
DocuSign Server URL: This field contains the DocuSign server URL for electronic signature integration.
Email Configuration
Author Email for External File Upload: This dropdown allows selection of the default author for files uploaded externally through SkyDoc.
Email Template for External File Upload Email: This dropdown allows selection of the email template used when notifying about external file uploads.
Folder ConfigurationUpload Tool: This dropdown allows selection of the folders to which the files will be uploaded.
Attach To Folder: The folder selected here is displayed in Source Folder Field in the Attach Files page. Displays the unattached files of the selected folder in the Attach Files Page.
SkyDoc Upload Folder: The folder selected here is considered as the default folder while uploading files in the SkyDoc tab.
Display Configuration
SkyDoc Page Length: This field displays the number of files to be displayed in the SkyDoc display list.
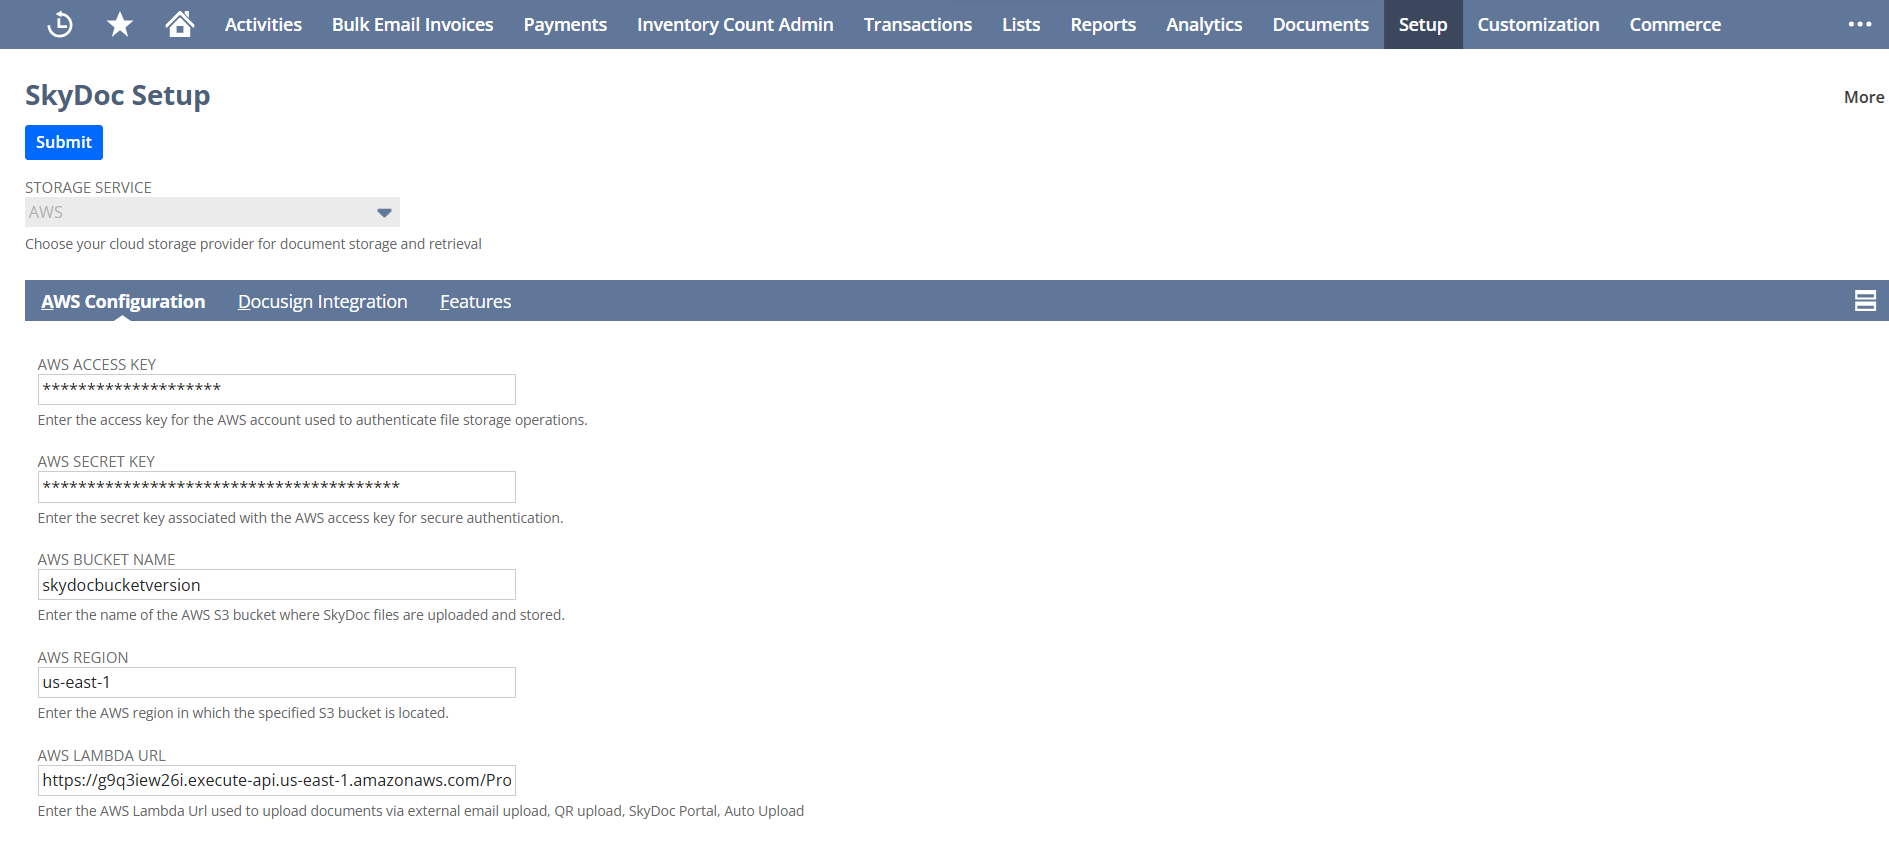
AWS Configuration
The AWS Configuration section allows you to connect the application with your AWS account for secure file storage and processing. Enter the following details to complete the setup:
SkyDoc Roles Page
To configure permissions for different roles within SkyDoc, navigate to Setup > SkyDoc > SkyDoc Roles. This page allows you to define and manage role-based access for various functionalities, including administrative tasks, file uploads, viewing, deletion, attachment handling, file movement/copying, and access to the SkyDoc folders page.
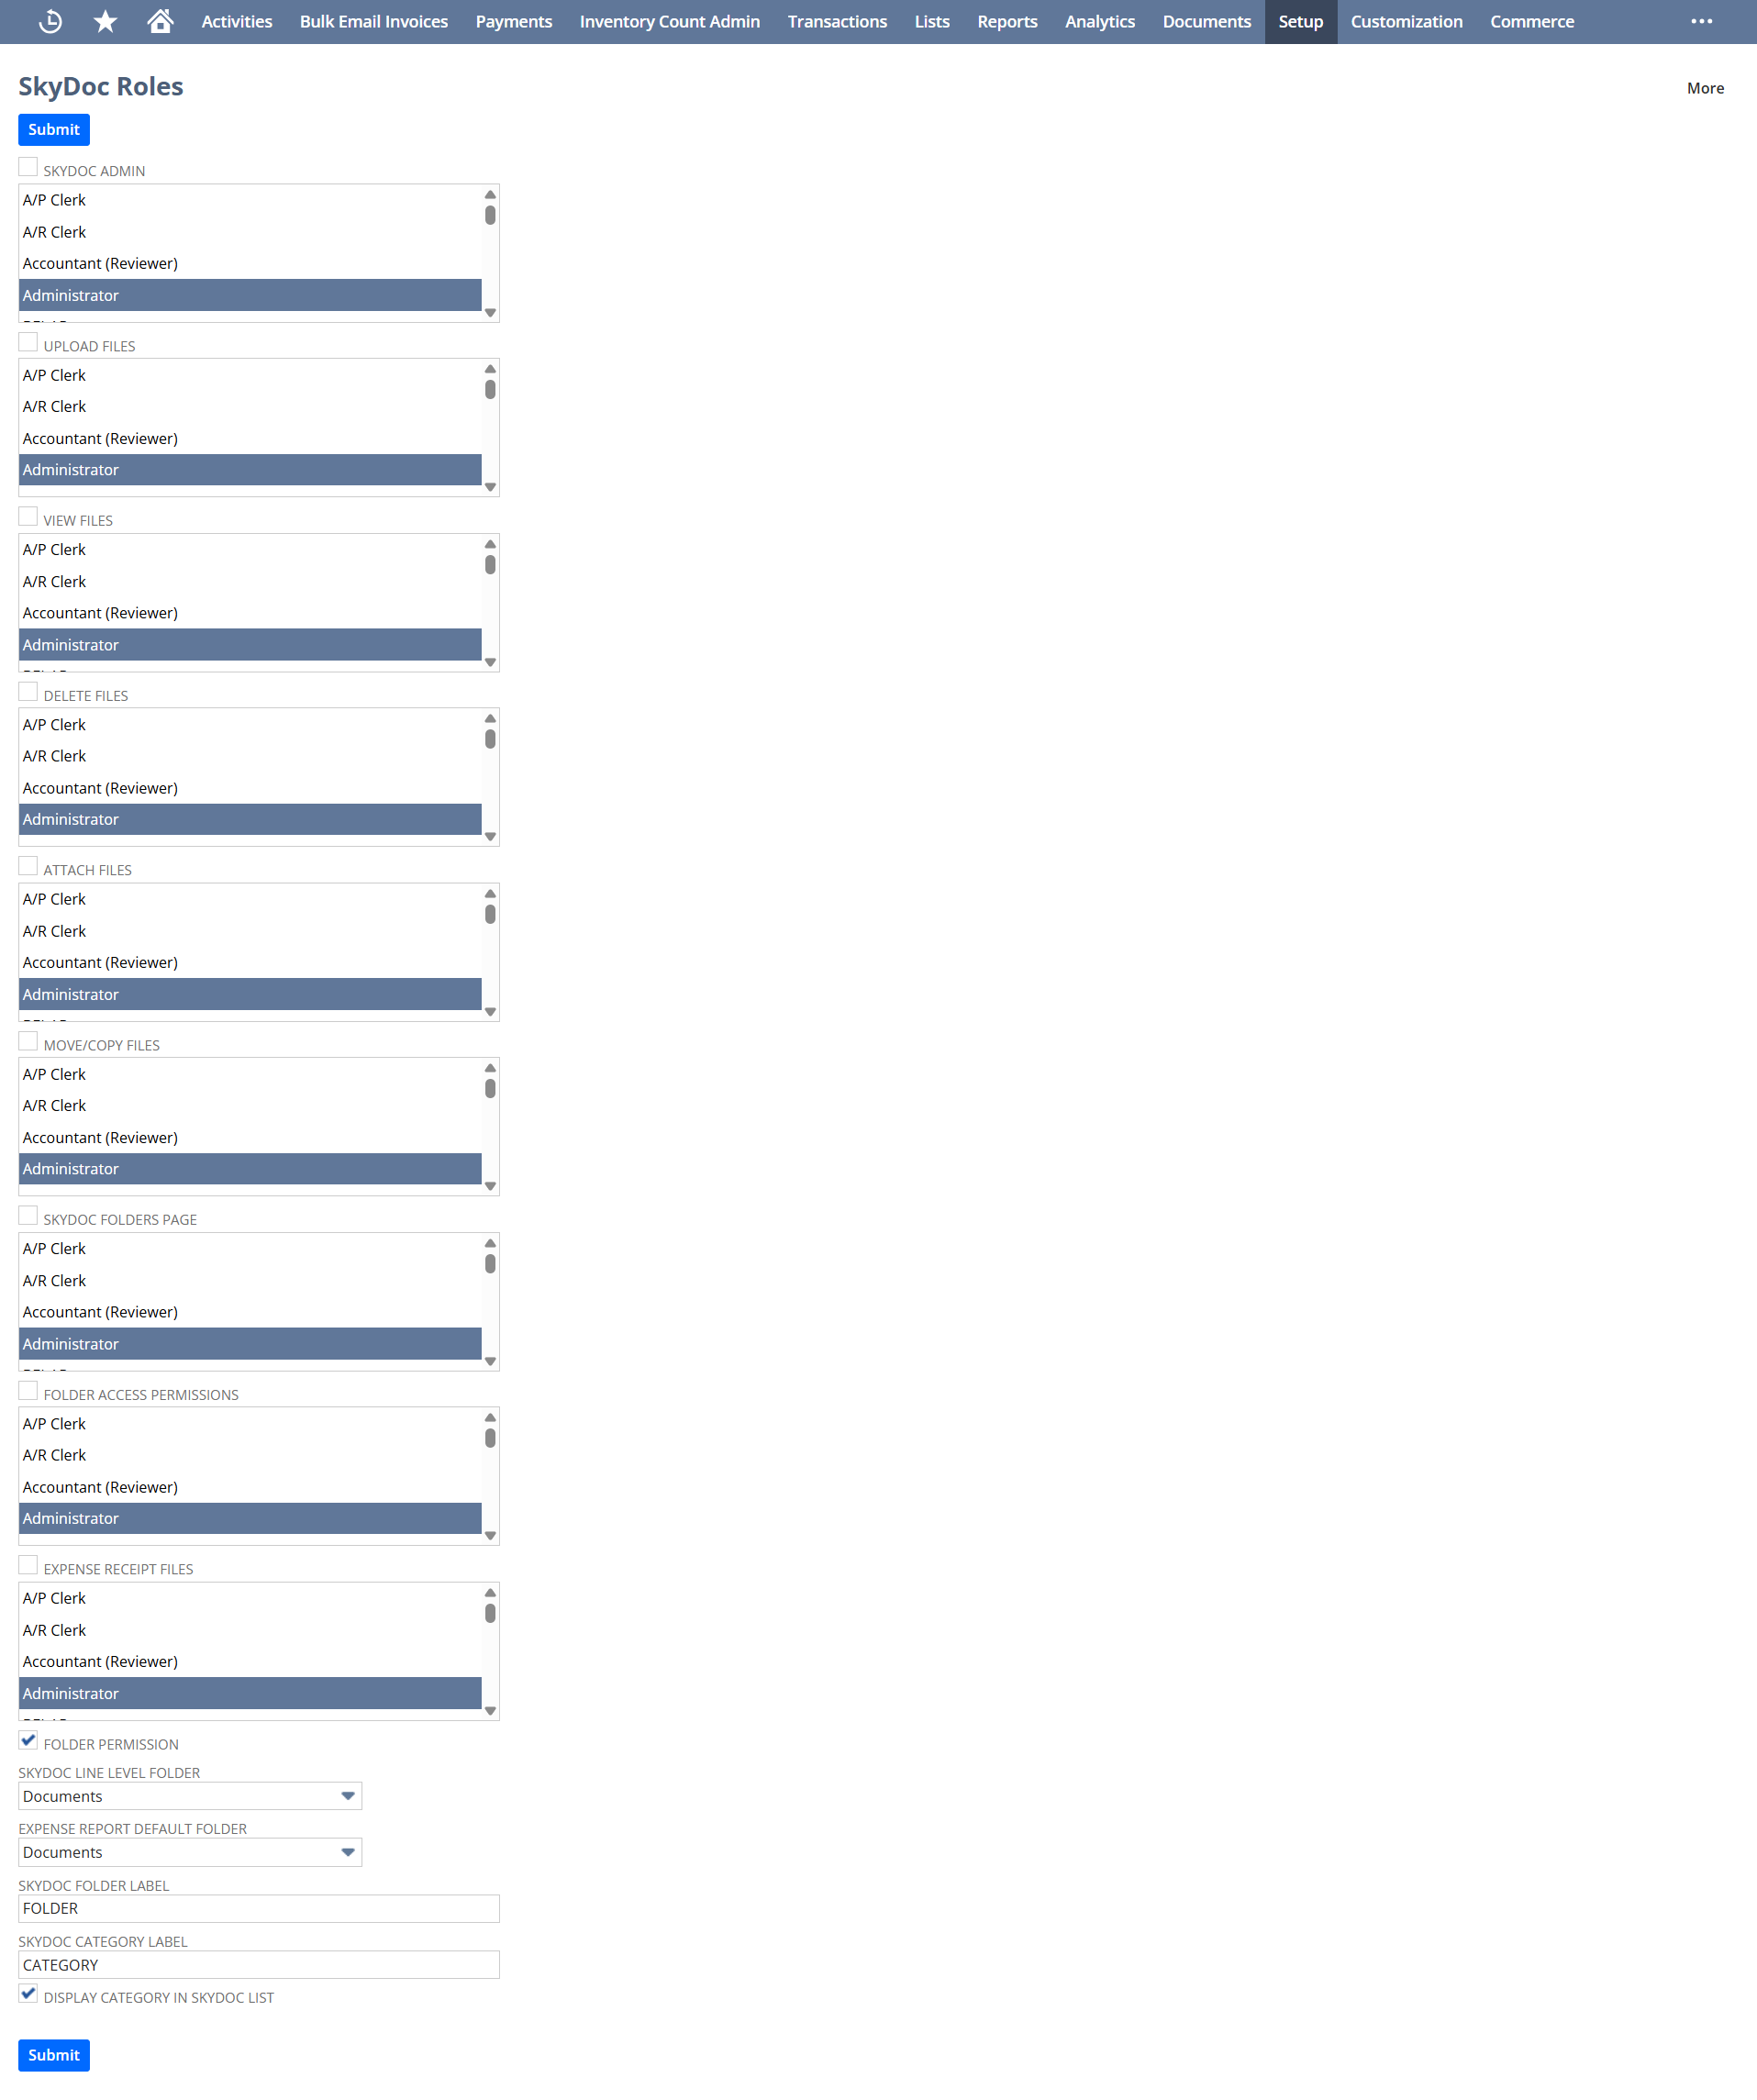
SkyDoc Admin: Select the roles for giving access to all the SkyDoc forms like SkyDoc setup, SkyDoc Roles, External access pages.
Upload Roles: Select the roles to give permission for uploading files in SkyDoc.
View Roles: Select the roles to give permission for viewing files in SkyDoc.
Delete Files: Select the roles to give permission for deleting files in SkyDoc.
Attach Files Roles: Select the roles to give permission for attaching files in SkyDoc.
Move/Copy Roles: Select the roles to give permission for moving or copying files in SkyDoc.
Folder Roles: Select the roles to give permission for viewing SkyDoc Folders Page in SkyDoc.
Folder Access Permissions Role: Select the roles to give folder permission for selected roles, and to restrict the permission for other roles.
Expense Receipt Roles: Select the roles to give permission for accessing all Expense report receipts.
Checkboxes
● Folder Permission: Check this box to restrict the SkyDoc folders to the logged in user based on permissions assigned in SkyDoc Folder Record.
● Display Category In SkyDoc List: Check this box to display category column in list of files in SkyDoc Tab.Text fields
● SkyDoc Folder Label: Enter the label for Folder field and also for Folder column in SkyDoc Tab.
● SkyDoc Category Label: Enter the label for Category field and also for Category column in SkyDoc Tab.
Dropdown lists:
● External Access Folder: The folder selected here is displayed in the Folder field in the External Access page. By default, files uploaded in the external access page are stored in this selected folder.
● SkyDoc Line Level Folder: Select the folder to store line level item Files to this default folder.
● SkyDoc Form Level Folder: Select the folder to store Form Level Drag and Drop Files to this Default Folder.
● Expense Report Default Folder: Select the folder to be default on expense report and restriction of files to other users.
SkyDoc External Access
To give access to the portal, navigate to any Entity record.
● SkyDoc Portal Access: To grant access to SkyDoc Portal, enable the SkyDoc Portal Access check box.
● SkyDoc Portal Access Notification: Enable SkyDoc Portal Access Notification to send email notifications.
● SkyDoc Portal Password: The SkyDoc Portal Password is used to enter password
The individual to whom we have granted access will receive the email notification.
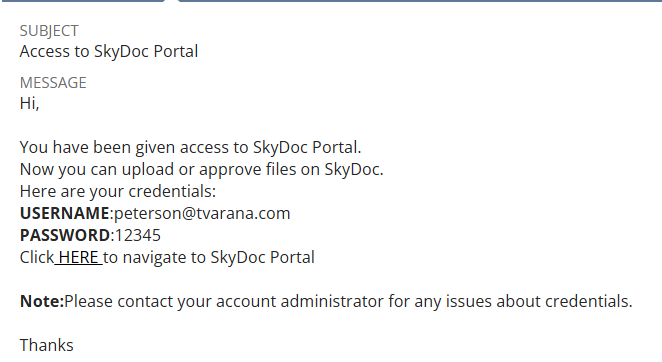
To access your account, use the link provided in the email along with your username and password, and hit the login button.
Upon successful login, you will have access to two options:
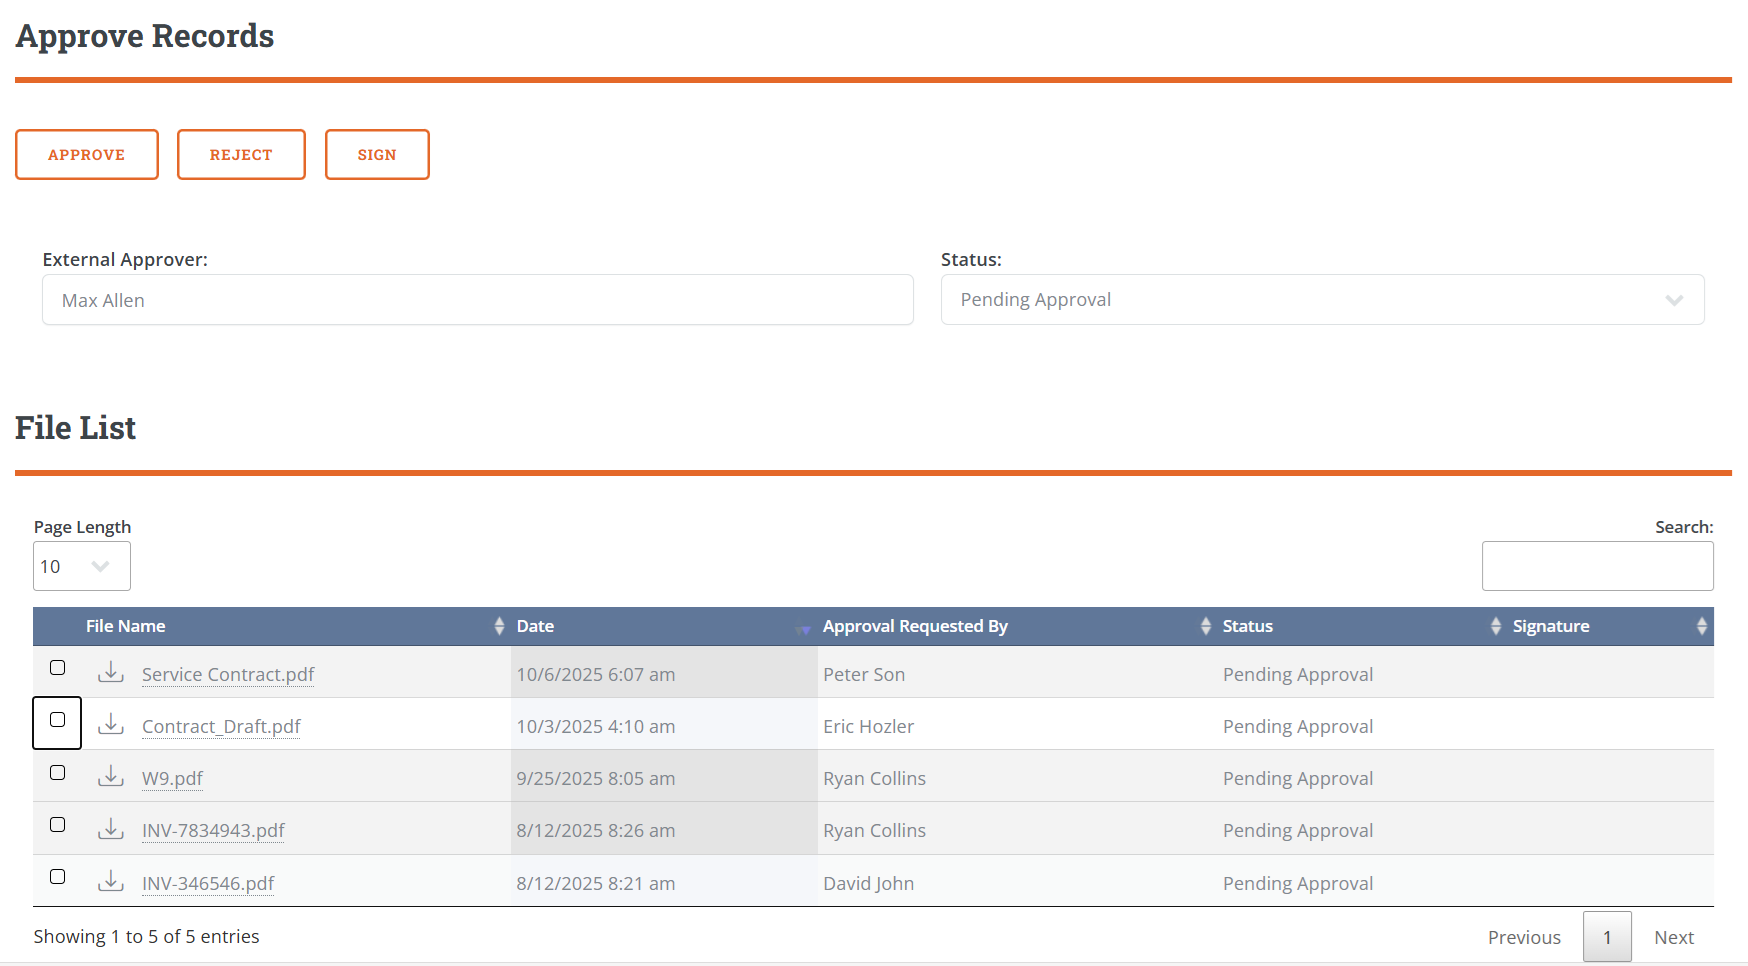
1. Approve Records
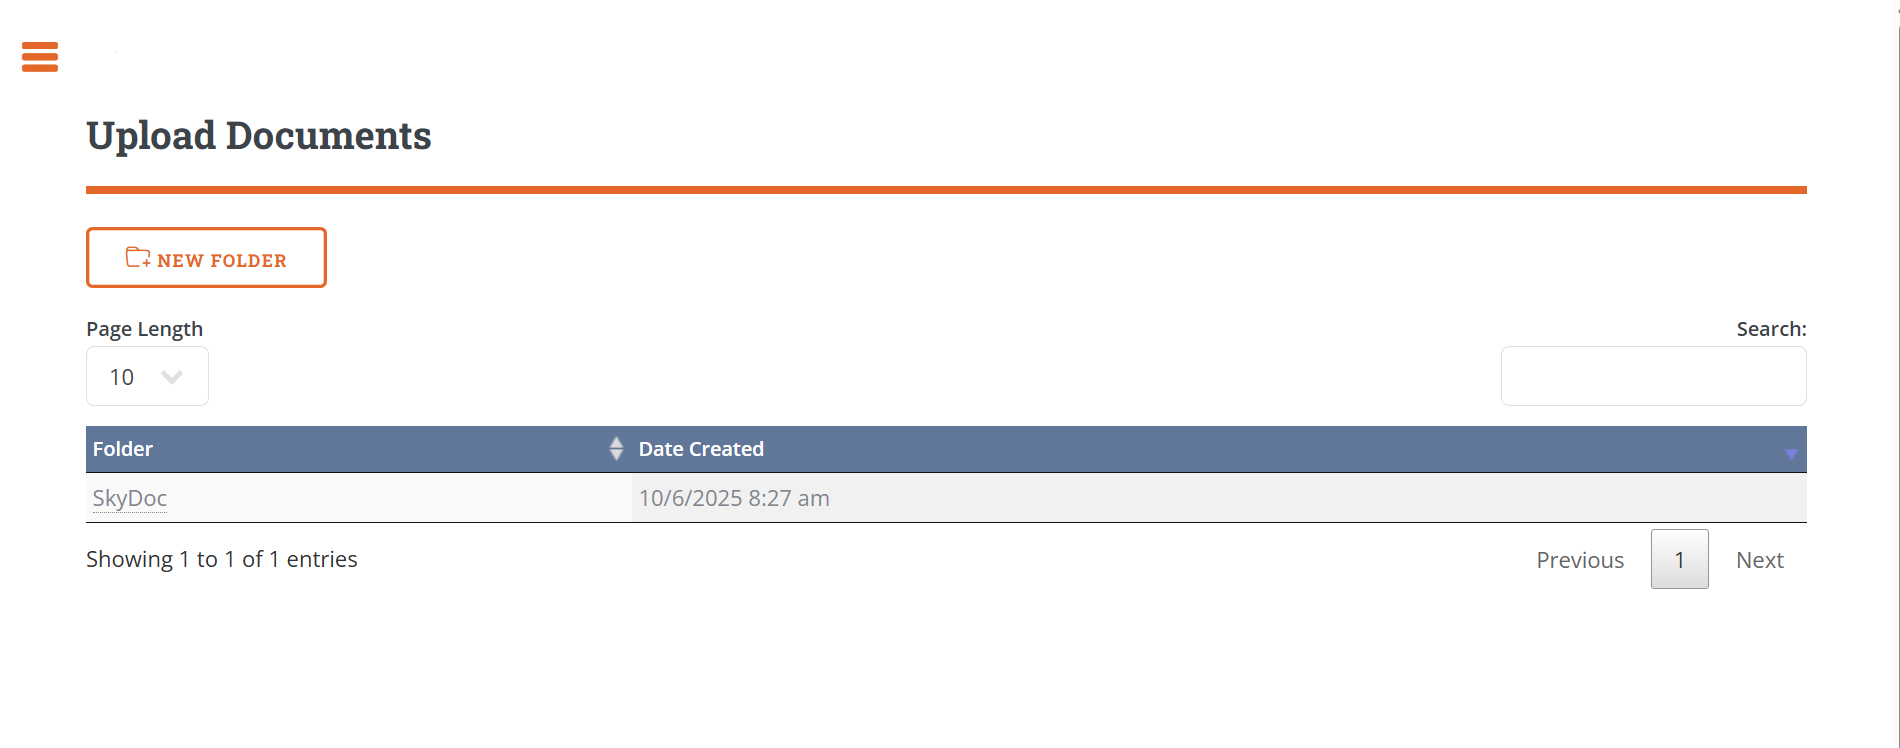
2. Upload Documents
Approve Records: The files submitted for approval can be either "Approved" or "Rejected" through the Approve SkyDoc Records feature.
Upload Documents: In upload documents we can upload files directly from SkyDoc portal
SkyDoc Folders List
SkyDoc Folders are used to organize and store files efficiently. Follow the steps below to create a new folder and configure its settings:
Go to Documents > SkyDoc Folders > SkyDoc Folder List and click New.
● Enter a name for the folder.
● If this is a subfolder, select the parent folder from the dropdown list.
● Access to Folder: Use this field to restrict folder access to specific users.
● Access to All Employees: Check this box to grant access to all employees.
● Saved Search Employee Access: Specify a saved search to grant access to users based on its results
.● Public: Enable this checkbox to make the folder public, ensuring that all files uploaded to it are public by default.
SkyDoc Portal Access
On the SkyDoc Portal Access subtab:
● External Entity: Select employees who should have access to the folder via the SkyDoc Portal.
● Saved Search External Entity Access: Use a saved search to grant access to external entities.
● Subsidiary: This field allows a single folder to serve as the default for multiple subsidiaries. This streamlines document management and simplifies the upload process.
SkyDoc Folders
To view all folders and their contents in one location, navigate to Documents > SkyDoc Folders > SkyDoc Folders. This will provide a comprehensive view of the folder structure and associated files.
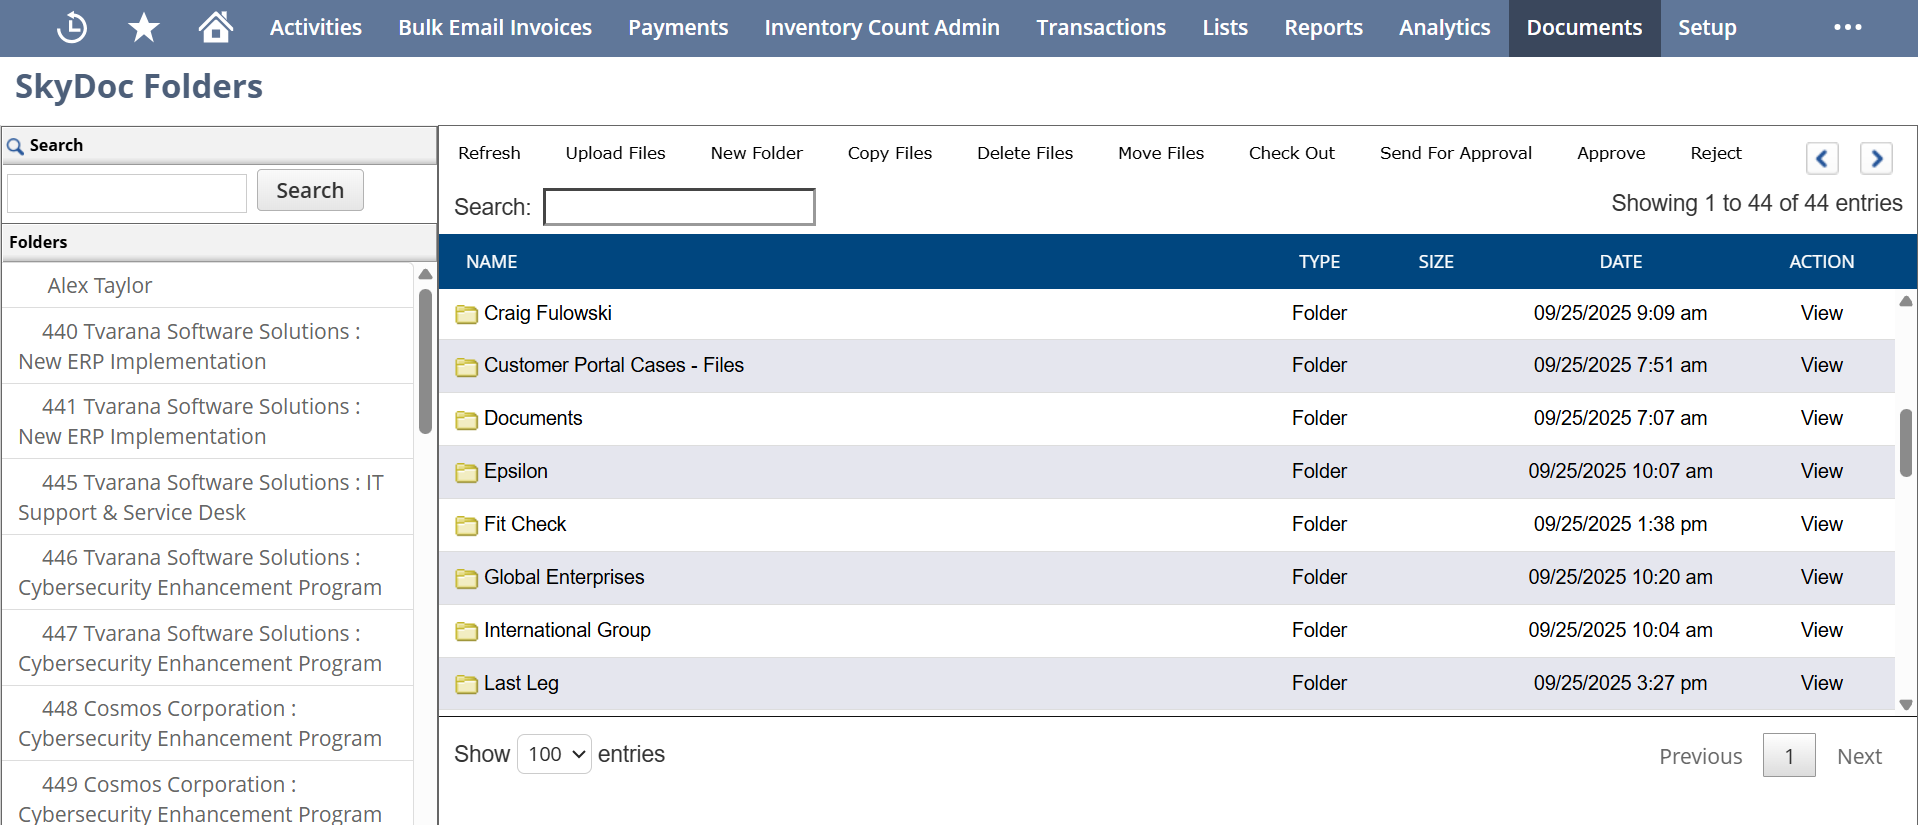
This page serves as a comprehensive file cabinet, allowing users to view all folder contents in a single location. It facilitates various file management operations, including uploading files,creating new folders, deleting files, copying and moving files between folders, checking out files, sending files for approval, and downloading files.
SkyDoc File Category
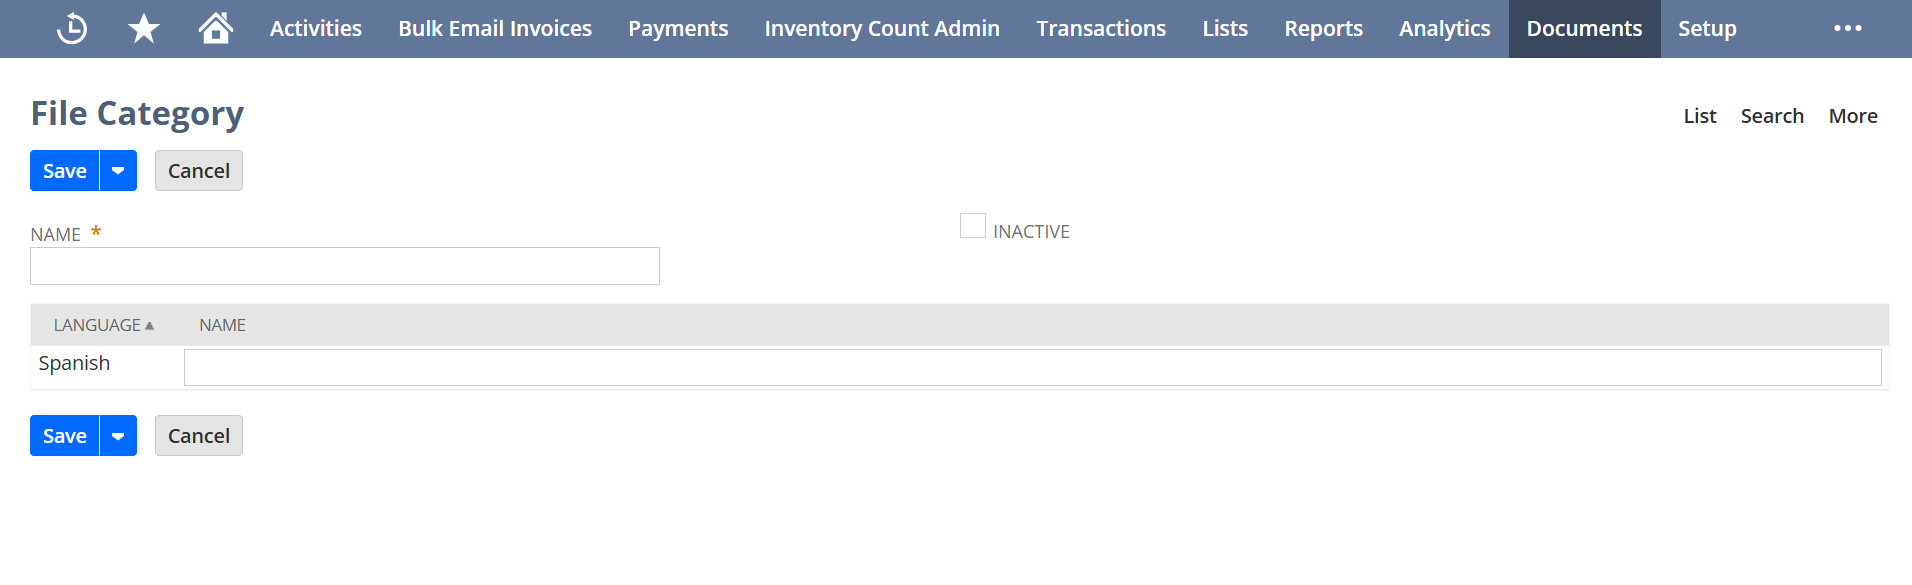
SkyDoc file categories are used to organize and differentiate files within a folder
To create a new category, navigate to Documents > SkyDoc Folders > SkyDoc Files Category > new.
The Display List section allows users to view all files uploaded to a record. It includes:
Reach out to us below.

